Quantcast
Channel: Idle Fancy
Viewing all 143 articles
Browse latest View live

Miss Isla Makes a Toast: Simplicity 2648

$
0
0

There are a few universal truths about a woman's late twenties. Friday nights will increasingly be spent watching Netflix and drinking champagne, family members will start to gossip about the impending doom of her eggs, and she will attend eight-hundred-and-two weddings a year. Roughly.
 
Or, at least, those are the truths of my late twenties. Yours may be defined by never-ending balloon rides and the sudden ability to play the mandolin. Me? I'm all weddings, all Orphan Black marathons, all the time. This fall, specifically, is jam packed with wedded bliss. Sam and I have five invitations decorating our fridge right this second.
 
Kicking off the Season of Personalized Cocktail Napkins, one of my dearest friends from high school was married earlier this month. There is no trickier event to dress for than a September night wedding, in Texas. Anything is possible, from freak cold fronts to hurricanes. My solution: a cocktail dress, a cardigan, and a large purse filled with emergency ponchos/granola bars.
 
 
Unfortunately, I don't own many summer-appropriate cocktail dresses. Most of them are silk or velvet--lovely fabrics, but not coming near my skin before October. Luckily, Hancock Fabrics had one of their mega pattern sales in August, with Simplicity, Butterick, and McCall's all priced for 99 cents! Much of my pattern buying has been indie-focused in the last few years, so I came away with quite a haul. Among the trove was Simplicity 2648, an "Amazing Fit" princess-seamed cocktail dress.
 
Y'all, I know we talked about this with McCall's 6696, but cup-sized pattern sizing is genius. This particular pattern goes up to a size 24 and D cup size. Considering how annoying princess seam bust adjustments are, I am just going to pause for a happy dance.
 

Right. So, there's just one question. How well do these Amazing Fit patterns actually fit? I set out with two yards of stretch floral cotton sateen to find out. To fit my 46-34-46 frame, I traced a size 22-D for the bodice, graded to a 20 waist, then graded out to a 22 curvy for the hips and skirt. The result, as you can see, is a pretty amazing fit, indeed.
 
 
The way Amazing Fit patterns work is at once brilliant and infuriating. Not only are the bodice pieces based on your cup size, but almost every seam has a one inch seam allowance, rather than the standard 5/8th inch. In order to find your personal fit, Simplicity has you baste the entire dress together, take it in or out where you need, then stitch everything together permanently. For those with hard-to-fit figures, this is a welcome, if time-consuming process.
 
For me, the standard sizing ended up being an almost perfect match. The armscye was taken in about an inch, but everywhere else is as-is. All of my skirt and side seams were one inch, which is much larger than I prefer, when sewing up princess seams. It can be really difficult to ease that much fabric together. I ended up trimming them all down to 1/2 inch, after the basting fit check.


The rest of construction, as Simplicity would have us do it, is super easy. One invisible zipper, a machine-stitched hem, bodice facings, then you're done. You know, of course, that I didn't let any of that stand. Three cheers for making things more difficult!
 
Okay, I did keep the neck facing, which I under-stitched and tacked to the shoulders. I then finished the armscyes with self-fabric bias tape, catch-stitched to the inside of the dress. The invisible zipper was subbed out for a hand picked lapped zipper--metal, because that's what I had in stash--and the hem was hand-stitched up. Apparently, I'm a glutton for hand stitching. I don't know when that happened, but I suspect the aforementioned Netflix marathons are to blame. It's such a mindless, soothing thing to do while watching TV murders. I love it.
 
Dress back! Note: Lapped zipper, lack of pattern matching.

Dress guts! All seams were serged to finish. I used a mix of black and white thread, because the dominant color outside is black, but the inside is white. I opted for black anywhere it could show on the outer fabric.
  
The only quibble I have with this dress is the fabric. This large scale watercolor floral was bought a zillion years ago from Gorgeous Fabrics, and really is the perfect end-of-summer cocktail print. Unfortunately, the stretch of the fabric and the huge scale of the print made this simple project a bit more intense. With the amount of fabric I had, print matching along seams was not an option. The repeat distance was well over two feet! Instead, I settled for matching by color group, when possible. It actually turned out pretty well, thanks to the amorphous quality of the flowers, but I was terrified it would end up a mess.
 
Stretch came into play in two areas--easing the princess seams and choosing foundational garments. Stretch is totally awesome for close fitting dresses, but it can encourage a fabric to pucker. There is some small bubbling over the bust seams, thanks to this very thing. After the second attempt at easing, I invoked the privileges of a wearable muslin and called it good enough. As for that other issue... let's just say that Spanx are a total necessity, with this dress. This cotton wants to cling to everything it touches, both girl and garter. It's either suck it in all night or girdle up. Wearing this for a night out definitely made me appreciate all those full-skirted day dresses!


In the end, I adore this bodice. There is a high, rounded neckline than I'm dying to try with a fuller skirt. I'm actually wondering, if cutting a size larger in 2648's own skirt wouldn't make this pattern much more wearable for day-to-day dressing. I love the way Alana's version skims out a little bit, instead of hugging every curve. It's less a wiggle dress, that way. Oh, the possibilities...

No matter what future style changes I make, this dress is a perfect cocktail piece. I actually didn't quite finish it in time for the wedding, but I've worn it since and loved it! The wedding itself went off without a hitch. The outdoor ceremony ended up between two thunderstorm cells, which is much better than it sounds. It was cloudy, sixty-eight degrees, and perfectly breezy. Such lucky weather for a Texas September! It was a lovely night for the loveliest of couples. Bring on more wedding marches!


Selfish Sewing Week: Kate & Rose Zsalya Top

$
0
0
 

It's that time of year again, my dear goslings. Not autumn, which has yet to reach us here in Texas, but something just as exciting. Happy Selfish Sewing Week! Twice a year, the lovely Rachael hosts a week long celebration of that most joyful kind of sewing: that which we do for ourselves. 

If you've read my blog for long, you know that this is the only sort of sewing I do. For me, sewing is pure relaxation. It's an opportunity for me to revel in luxurious fabrics, interesting patterns, and indulge my love of pretty clothes. I'm proprietary about my sewing time, because it's exactly that. My time. So, it should come as no surprise that I'm a big, big fan of Selfish Sewing Week. We should all get to revel in that indulgence, from time to time...to time. 


This week, I chose to make a pattern I've long had my eye on. The Zsalya is a beautiful yoked blouse and dress duo, from Kate & Rose patterns. There are two sleeve variations, one short and one long, each with embellishments that echo the blouse's subtle crossover v-neck.  It reminds me of the classic artist's smock, a look that lends itself well to such modern updates.

Y'all, this pattern is precisely what I love in a blouse. Each detail, from the crossover yoke to the shaped sleeve band, is thoughtful. This isn't a blouse you could easily recreate with a Big 4 pattern, but a work of true design insight. It's loose, without being shapeless. It's interesting, while flattering one's figure. It works beautifully in all those flowing fabrics we love so much: silks, lawns, and challis.


For this first Zsalya, I chose the green polka dotted cotton voile that was leftover from my long ago Anna Dress. With a bit under 2 yards, I had just enough to make the short sleeved version of this blouse. No, the sleeves did not actually make the final product. We'll get to that...

To begin, let's talk about construction. This blouse was an absolute blast to make! Honestly, I can't remember the last time I had this much fun sewing up a pattern. The Zsalya construction is a bit like a Choose Your Own Sewing Adventure. In the instructions, there are two ways to do all the hardest steps, depending on your skill level and current motivation. Instead of the Quick and Dirty, which I appreciated from afar, I chose to do everything the Clean and Fancy route. 

Of course. My love of fancy is so well-documented, it's in this blog title. 

This particular fancy method involved a series of pattern flips that ensured a lovely inner finish. The crossover yoke's seams are faced and top-stitched, just as pretty inside as out. For a relatively quick project, the techniques involved in getting a perfectly finished yoke made for a mentally stimulating bout of sewing. Each step was well explained, well diagrammed, and easy to accomplish. The instructions hold your hand every step of the way, if you're worried about the geometry involved. This is more than your average pattern, for sure. 


The back: I love the curved yoke, but the fit here is a bit odd. Next time, I will be making some adjustments there, as well.

Naturally, I made a few adjustments to this pattern. Going in, I imagined this blouse paired with skinny jeans, for those nights when I just can't be bothered to put on a dress. That doesn't happen often, admittedly, but pretty casual blouses are a hole in my wardrobe. To make it more suited for that purpose, I lengthened the blouse by three inches and omitted the sleeves. 

Well, I eventually omitted the sleeves. After attaching one short sleeve, I tried the blouse on and was unhappy. In any other fabric, they would have been so, so cute. Combined with the longer length and mass of polka dots, however, they just didn't work. I was overrun by dots! With the trusty seam ripper, I took them off again and finished the sleeves with self-fabric bias tape. 

My other alterations were fairly minor. When you have a generous rear end, as I do, longer tops can end up blousing in unfortunate manners. With the added length, that was something to worry about, so I added a four-inch slit at each side seam. Not only do they give a greater range of movement, but the slits preserve the draped quality of the original pattern lines. Additionally, I made a small (1/2 inch) full bust adjustment, then rotated the dart back into the pattern's original gathers. So easy! 


In the end, Iadorethis blouse. In fact, I already a have long-sleeved Liberty version halfway sewn up! I took a rounded shoulder adjustment on that one and left the original length, in my new quest to perfect the Zsalya. This top is exactly the sort of garment I love for chillier months. It dresses up beautifully with skirts and boots, but can be smartly casual with jeans and a cardigan. Plus, you know, it's super fun to sew. The Zsalya has tried-and-true Mary pattern written all over it. 

If you're interested in winning a copy of Zsalya, or any of the other patterns featured in Selfish Sewing Week, hop on over to Imagine Gnats. Rachael has a fantastic giveaway ending tonight, which will have forty-one lucky winners. How fantastic is that? In the meantime, check out the other featured stitchers and indie designers participating in Selfish Sewing Week. Happy sewing!

Featured Stitchers


Featured Indie Pattern Designers


Note: The Zsalya top was provided to me, as part of participation in Selfish Sewing Week. The opinions herein are my own and completely unbiased. Though, let's be honest, I chose to sew this top because its style is right up my alley!


Miss Maureen Loots and Plunders: Butterick 5997

$
0
0


Contain your shock, friends. For the second post in a row, I am wearing jeans. Don't blame me, blame the swingy blouses! A shirtdress (and a fun related announcement) will be up later this week, but in the meantime I'm still reveling in roomy, artsy tops.

This one, a silk cotton version of Butterick 5997, was my Mood Sewing Network project for September and actually predates my Zsalya blouse. I made it a couple weeks back, tried it on, and had a dreadful realization. It was so bad that, until late last week, the shirt lay unfinished on the bed in my sewing room, taunting me. I finally mustered up the wherewithal to fix it, if only to stop the pangs of guilt. Unfinished objects drive me crazy.


Let's begin the melodramatic tale of 5997, shall we? The blouse came about, because there really aren't enough blouses in my wardrobe. I have dresses aplenty, tons of skirts, piles of sweaters, but very few non-knit tops. In the wintertime, that's fine, because when I'm wearing jeans I'm also usually wearing a cashmere sweater. (Aside: Cashmere is my one great ready-to-wear indulgence. Last year, in the what I will forever call The Best Christmas Ever, all my parents gave me were cashmere sweaters and you have never seen a happier Mary. Soft things forever.) In the warmer months, though, I'm at a loss for what to wear with jeans. Sure, I mostly reach for dresses anyway, but sometimes I just want something easy! Knit tops are great with skirts, but I hate pairing clinging knits with tight denim. Damn it, I want to wear skinny jeans and I don't want to be self-conscious while doing so!

Enter the swingy blouse. Loose, interesting blouses in fancy fabrics are the key to this wardrobe conundrum. My love of these garments is directly caused by watching too many classic movies and TV shows, while growing up. There was a period in the late fifties to early sixties, when women would casually throw on smocks with their cigarette pants, for chic home attire. Admittedly, this was often in order to disguise a pregnancy, but whatever. This style has always stuck in my head as the epitome of casual chic. 

So, swingy blouses were going to be made. Initially, I bought McCall's 6991, the wrap blouse currently making the rounds through the Sewing Blog Community, with an eye on making View C. After Manju's gorgeous pink version, I had to have it! Just as I was about to cut into my Mood fabric, however, I spied Butterick 5997 on the internet and fell head-over-heels with View D. 6991 was thrown over, in favor of a shoulder pintucks and a stand collar. Plus, it had those dishy gathered sleeves. How could I resist a shirt with so many gorgeous details? 


Well, I couldn't! After making a couple of flat pattern adjustments--a very small FBA and narrowing the shoulder seam--I cut into this gorgeous silk cotton poplin from Mood. The color, a steely Wedgwood blue, is one of my all time favorites. So much so that, last summer, I insisted we paint half of our rooms the exact same hue. In my defense, Sam also likes the color and I was the one doing all the painting, because it's his least favorite home maintenance task ever. My lovely younger sister came up and we painted and painted and painted blue for days. That I still like this color after that is a testament to its beauty, don't you think? So, yeah, this fabric was awesome and the shirt was going to be even more awesome, because pintucks are the most awesome. The end.

Or so I thought. After finishing most of the shirt, including doing a hand-rolled hem, I set in the sleeves. Joyful at the prospect of my almost-finished shirt, I trotted out to our hall mirror. 

And shrieked. 

This is what I saw:


Well, approximately. I swear I took a picture of the horrid sleeves in questions, but my phone seems to have (rightly) rejected the evidence. Trust me, I looked like a bloody pirate. I was one jaunty hat away from tearing through our neighborhood, looting and plundering the houses for rum and vintage fabric. Yoho

What looked like a perfectly reasonable, if billowy, sleeve on the pattern model, translated to a great, gathered monstrosity on my own blouse. I can only assume this is one of those things where they kept logically grading the sleeves up, along with the rest of the pattern, but PEOPLE REALLY SHOULDN'T WEAR TWO FOOT CIRCUMFERENCE SLEEVES, NO MATTER THEIR BODY SIZE

So, I stewed about it for a few weeks. Finally, I worked up the gumption to take both sleeves off, completely take apart their seams, and reduce their width by over six inches each. I then, just for good measure, chopped off three inches from the hemline and didn't gather there at all. The result is the blouse you see now, moderate bell sleeves and all. 


Reasonably sized sleeves!
Apologies for the wrinkles--we drove around for half an hour, trying to find a good photo location. We, as happens, ended up at the schoolyard down the block that I always go to anyway and I ended up with sleeve and back wrinkles. My mother was always adamant that seatbelts are a must, even if they ruin one's outfit!


I like it! The sleeves need some shape tweaking still, but the actual base of the blouse is pretty fantastic. I love the pintucks (so easy with an edge-stitching foot) paired with that mandarin collar. Even better, the blouse is saved from being a tent by clever side darting and that dishy deep V. Some people may not be a fan of cleavage baring shirts, but this is a totally tasteful hint of cleavage shadow. I like my bosoms and don't mind giving them some air, so it works. 

If you're thinking of trying this pattern yourself, I do have some suggestions. First off, check the sleeves before you cut them out. Maybe you like feeling a bit piratey on your day off, but if you don't, those suckers may be way too big. Also, staystitch and understitch every part of the neckline you possibly can. I make a policy of always doing these things anyway, but they're pretty glossed over in the instructions here. You don't want that V to distort! Staystitch as soon as you can! Additionally, if you're going to use a silk or rayon, I highly recommend using French seam where possible and hand-rolling the hem and sleeves, to prevent unraveling over time. It took some extra effort, but I'm so happy to have finished it properly.

Otherwise...this is a super easy, super straight-forward blouse pattern. I love its swingy hemline and all those fabulous details. I also, wonder of wonders, love wearing it with jeans. That's a win! Even better, this fabric is so, so soft and has a faint silvery sheen in sunlight. How wonderfully fancy. 

Now, I'm off to plunder some booty. Ahem, I mean I'm off to sew a shirtdress. Yoho!  

Incidentally, the title of this post was inspired by one of my dear writing friends, New York Times Bestselling Author* Maureen O. Betita, who writes a rollicking series of pirate romances. If ever there was a woman who could pull off a pirate hat and sleeves, it's the lovely Maureen.

*When one of your friends hits the NYT List, you're contractually obligated by The Rules of Writer Friendships to always mention it with her name. It's a very well deserved, very big deal.


Note: This fabric was provided to me, free of charge, as part of the Mood Sewing Network. 

BurdaStyle Plus Size Essentials Blog Tour: Faux Wrap Dress

$
0
0

Good afternoon, crickets! Last month, BurdaStyle approached the Curvy Sewing Collective with a blog tour proposal. They had recently released two plus size pattern bundles, the Plus Size Essentials Collection and the Best of BurdaStyle: Plus Size Collection, and were curious if we'd like to review some of the patterns in a blog tour. As the girl who recently eviscerated a Burda plus size collection, I was excited to sample some of their more popular patterns. If I'm going to snark on a company, it only seems fair that I give their patterns I do like a try. 

And, boy, do I like the patterns in these two bundles. My personal favorite is the Essentials collection, which has some patterns I've been coveting for months, including the Short Sleeve Bow Blouse,Contrast V Neck Dress, and the Faux Wrap Dress. All three of these patterns have a mature, sexy vibe to them, like pieces right out of a Sophia Loren movie. 


When it came time to decide, I chose the riskiest pattern of the three, the Faux Wrap Dress. While relatively simple in silhouette, it's actually a fairly complicated design, with side pleats in lieu of front darts, criss-crossing bodice pieces, and no waist seam. One of the strengths of Burda is their interesting, fashion-forward design aesthetic. They either hit big or miss big, but they rarely release anything I could easily recreate with a sloper. 

They also--Oh, my sweet crepes!--don't come with seam allowances. 

Thus, in a nutshell, why I have never made a Burda pattern. As a perfectionist, adding my own seam allowances is a nerve-wracking exercise in geometry and chalk dust. There's so much tracing and measuring and cursing. How I longed for those 5/8th inches! I would never take them for granted again! Honestly, I don't understand Burda's lack of seam allowances. I'm sure this is how it's done professionally or how it's always been done or some such nonsense, but give the home seamstress a break. Most of us would pay extra money for included seam allowances, I promise you. 

This wasn't even a complicated pattern--five pieces total--but by the end of the tracing process, I had about lost my mind. When it came time to mark the resulting pieces, it was completely gone. Transferring markings from pattern pieces that are smaller than your fashion fabric is infuriating. There is so much room for error! Afterwards, champagne and a full Brandi Carlile album were the only things that could calm my frazzled nerves. 


The actual sewing process, however, was charmed. Thanks to its lack of separate bodice and skirt patterns, this was a really quick dress to sew up. There are three pleats on the main front, a darted wrap piece, then double pointed darts on each back panel. A zipper, some side seams, and you're done!

Going a little rogue, I also subbed in a lapped zipper for the prescribed invisible zipper, and finished the dress with bias tape instead of a lining. The gorgeous model's dress is lined stretch cotton crepe, but I couldn't get my hands on a suitably stretchy thin cotton. Considering this dress has almost zero ease built in,  a stretch cotton is absolutely necessary. I ended up choosing this autumnal floral cotton from JoAnn's that's been in my stash for a few months. It had a slight horizontal stretch that felt perfect for a body-conscious dress like this one. It was also horribly, horribly off grain which necessitated some creative lopping off, but that's another story entirely. (One that, incidentally, involves me trying to explain fabric grain to a mystified teenager at the Returns Desk who just wanted to go on his lunch break and get away from crazy, wide-eyed seamstresses. Needless to say, already washed fabric is not returnable, even if it's a foot off grain. Grumble.)


The fit was a bit more challenging than the sewing process. This pattern only goes up to a Burda 52, measurements of 48-41-50.5 inches, which is actually pretty darn small in the realm of plus sizes. That's about a 24 in terms of the American Big 4's usual sizing. I started with a 50 at the bust, then graded down to a 46 at the waist, then back up to a 50 at the hips. The result is a mixed bag. I actually love the bodice fit, with its interesting pleats and faux wrap style. It ended fitting me really well, apart from a bit of extra blousing at the non-pleated side seam.

The skirt, on the other hand, is odd. What look like drag lines around the hips in some of these pictures are actually extra horizontal folds of fabric, caused by the dress' middle being too long. Between the bottom of my rib cage and top of my thighs, there's an extra two inches of fabric desperately trying to find a home. It lands like ruching throughout the waist and hips of the dress. What's even weirder about this is that I'm pretty tall for a woman--5'8'' without hairspray--so the proportions have to be based on someone much, much taller than average.

Lesson of the Day: fitting is complicated, because patterns are not drafted for individuals. Hardly anything is going to fit you out of the envelope and that's okay. There are work-arounds for almost any problem! Were this post for any other reason, I would have hacked the dress in two, formed a waistband seam and front darts, then sewn it back together again. Since this is supposed to be an honest review of this pattern, however, I figured it was best to show you my end result without massive overhauling. Having extra room through the torso is probably going to be a common fitting issue with this one, unless you're incredibly long waisted.


Lapped zipper! Practically perfect pattern matching!

Even with the unintended ruching, I like this dress alright. Yes, the fabric is a giant, crazy sofa print, but I dig it. One of the perks of having Viking Warrior Princess bones is that I can pull off largescale florals like this one. Mine is not a figure that's easily overwhelmed. Thanks, hearty ancestors! Even better, the colors of this fabric are beautiful.  The oranges and golds of these flowers fairly glow against the dark background. So autumnal! If the leaves refuse to change color, maybe this dress can encourage them along. 

Also, let's be honest, this pattern is sexy as hell. With the right silhouette, apparently even a sofa floral can be sexy. It hugs my curves beautifully, giving a tasteful bit of cleavage and a retro wiggle vibe. The pictures for this blog post were ridiculous to go through, because I kept doing unintentionally hilarious sexy faces. Scarlett Johansson, I am not

Were I to make this again, I'd probably go for a stable knit. It could be such a wearable piece, with a true stretch knit, instead of just a stretch cotton. There's such a variation in stretch wovens that they're not all going to take to this pattern the same way. The stretch crepe of the modeled dress is light and airy, whereas mine is a clingier, slightly heavier fit. A nice ponte, however, would drape wonderfully into those pleats, not require a zipper, and make fitting this one much easier! That's my recommendation, if you give this one a go.


Be sure to check out the other stops on the BurdaStyle Plus Size Essentials Blog Tour! That's a mouthful to say, but there have already been some gorgeous pieces made by my CSC compatriots. Have you made a Burda pattern, friends? Tell me the secrets of adding seam allowances without losing your mind.

September 29th — Jenny at Cashmerette — the Jersey Dress
October 1st — Tanya at Mrs. Hughes – the Printed Tunic
October 2nd — Laurence at Quirky Pretty Cute — the Loose Jacket
October 6th — Mary at Idle Fancy — the Faux Wrap Dress
October 7th — Mary at Young, Broke, and Fabulous – the Draped Dress
October 8th — Sophie Lee at Two Random Words — the Cape
October 9th — T at U & Mii — Contrast V Neck Dress


Miss Clara and the Autumn of 1000 Shirtdresses: A Sewing Challenge

$
0
0

Good evening, dear ones! Tonight, I have two fun things to share: a new shirtdress and a long promised announcement. I know, you can hardly contain your excitement, right? My announcement is just so mysterious. 

Yeah, I'm rolling my eyes, too. Let's start with the shirtdress, then move on to the (still very fun!) non-surprise, shall we? 

This dress is yet another version of McCall's 6696, The Shirtdress Pattern of Wonder and Bliss. Last month, I bought a length of Robert Kaufman's Dotted Chambray in a lovely dusty green, meant to become a button down for Sam. My intentions were so pure and loving! Then, the fabric arrived. 

Y'all, this stuff is gorgeous. It's a perfect medium-to-light weight, drapes really well, and presses beautifully. It even has "pin dots," which we all know are just grown up, man-friendly polka dots. My baser instincts demanded that I steal it, claim total ignorance about its intended use, and turn it into a shirtdress.

Ahem. My conscience quickly recovered, of course. Instead of stealing his Baylor green chambray, I ordered some in my own dear Texas A&M maroon. That's not what Robert Kaufman & co. have named these colors, of course. They are calling them "olive" and "burgundy," but I know school spirit when I see it. This is Aggie Maroon and my favorite shirtdress yet! 


You have heard about this pattern ad nauseam from me, but let's quickly go over the details anyhow. 

This dress is made up with three yards of the aforementioned chambray, ten white classic shirt buttons, and top-stitching everywhere I could get away with it. The insides are finished with my new favorite technique ever, serging with gray thread. It's shockingly unobtrusive on colored fabrics! Why don't people shout this technique from the rooftops? As someone who's extra lazy about changing out serger thread, it's a godsend. 

As for alterations, I used my pattern pieces from the last few 6696s. This means the whole dress is a Size 20, with a one-inch full bust adjustment, narrow shoulder adjustment, and wide bicep adjustment. I do need to go back and resteam the collar, since one side is bunching a bit, but otherwise it fits like a dream. Perfected patterns are so lovely.


So, another 6696. Are you tired of them yet? I'm certainly hope not. This version may be more subdued than the others, but I absolutely adore it.  Believe all the good things you've heard about Robert Kaufman's chambrays, kittens. I'm far too tempted to order this in a few more colorways, for a parade of dotted shirtdresses! 

If you're hankering for a shirtdress of your own, I have very good news. That announcement I've been teasing for a week or two is finally ready to be shared. The Autumn of One Thousand Shirtdresses is now an official sewing challenge!


Multiple people asked if I would host a sew-along for McCall's 6696, as part of my own quest to make all the shirtdresses. Honestly, an official sew-along is something I've never wanted to host for a couple of reasons. Not only is it a ton of work, as the lovely Jenny can attest, but most of the information necessary is already out there. People far wiser than I have already done tutorial after tutorial, on everything from collar stands to sleeve plackets. What exactly would my own be adding?

Instead, The Autumn of 1000 Shirtdresses will be a sewing challenge. Over the next two months, I'll work through McCall's 6696 in a logical way, though it won't be a classic step-by-step guide. Instead, I'll post a ton of shirtdress specific information, including helpful tutorial round-ups, thoughts on fabric choices, guides to various patterns, and some of my own adjustments, hacks, and tricks. As we go along, I'll keep sharing my own shirtdresses and all the ones that you make, as well! 

Even better, there are prizes. Of course. Once the challenge wraps up on December 10th, I'll draw a name out of the Flickr pool and give away a bundle of lovely fabrics for future shirtdresses, as well as a vintage shirtdress pattern in the winner's size. Woohoo!

So, what are you waiting for? Grab a badge below, pick out some lovely buttons, and get sewing! You can use the #1000Shirtdresses hashtag throughout the challenge, on both Instagram and Twitter, and share all of your makes in our Flickr Group. You're also not limited to using 6696--feel free to pick any shirtdress pattern you own, whether it buttons all the way or even just half way. The more shirtdresses, the merrier!

A Note for those Down Under: Southern Hemisphere folks, don't fret. You'll notice there's a special The Spring of 1000 Shirtdresses button for you, as well. Bring on the pretty eyelets!


Idle Fancy

Idle Fancy

Miss Vivienne Joins the Circle + A Blog Hop

$
0
0


Good evening, kittens! As you read this, I'm dashing away to the far reaches of the world. 

Or, rather, Sam and I are en route to Georgia. He's attending an academic conference at his graduate alma mater and I'm going to eat chicken and waffles, fabric shop, and visit the zoo. Like you do. 

Before embarking on this great southern adventure, however, I thought I'd share two of my newest projects. Last week, the professor and I made a deal. We would watch one terribly scary, seasonally appropriate horror movie, then follow it up with some atmospheric period romance of my choosing. Our movie night choices? The pithy and terrifying,Slither, followed by Chocolat. While Slither did have the added bonus of Nathan Fillion, Chocolat is what inspired the garments in this post. Throughout the movie, Juliette Binoche's character wears the most glorious outfits. In scene after scene, she appears in tastefully plunging v-neck sweaters, swirling circle skirts, and bright, vibrant colors. Though I was tempted to knock off her iconic red cape, my eye instead fell on the circle skirts. 

Over the last year, I've felt in an odd place, style wise. Though I retain my affinity for florals and feminine silhouettes, I've longed for more glamour. At 29, my wardrobe needs are evolving, a fact which shows in my recent garments. There are now more solids, richer colors, and daring shapes filling my wardrobe. The combination of cleavage-enhancing sweaters with swirling, classic skirts fit that niche nicely. 

And, so, I made a few. These are just two of the four circle skirts I've cut out recently, with many more to follow. It seemed fitting to pair these together in a post, as they are both directly inspired by sewing friends. The first is made of a lightweight denim that the lovely Jenny brought me back from her biking adventures in Asia. It has a gorgeous pastel floral swirling across it, in a vintage pattern that is right up my alley! She is one fantastic sewing buddy, right?
 
The second skirt, in a darker blue, was actually my first completed version of this pattern. Made up in a bright floral pique, from Fabric Mart, this is a rip off of the gorgeous Tanya's Betsy skirt. Not five minutes after reading that post, I snatched some of this fabric for my own. Originally, I'd also planned to do a pencil skirt, but that seemed a bit too copycatty for my taste. The circle skirt impulse was a stroke of fortune!
Twirls!

The eagle-eyed among you will notice that these aren't full circle skirts. Though it goes against the acknowledged wisdom that circle skirts are universally flattering, I hate them on me. They're fine attached to a dress bodice, but set on their own with waistbands? Ugh. They don't emphasize my waist so much as make my hips looks gigantic.* 

Yet, a half-circle skirt doesn't have those glamorous, dramatic folds. The solution is, of course, the mystical three-quarter circle skirt. It's still twirly and full of body at the hem, but it doesn't drape so emphatically over my hips. 

To make the pattern for this, I relied on Patty's excellent tutorial and creative fabric placement. Once everything is cut out, these are absurdly simple. Sew up the sides, add a straight waistband, pop in an invisible zipper, and you're done! On the first one, I also did the laborious task of hand-stitching the hem, which is the worst. So much stitching! For the second skirt, I made a "design decision" and top-stitched the hem. So quick, so easy. The end!

*Big, big hips! Yes...I did just make a Pixies joke. It's been a long day.


Almost the end, anyhow. Though, I don't have many project details to share, I do have something else to chat about! Last week, I was tagged by two of my favorite bloggers, one near and one far, in the creative blog hop that's been going around. While I'm not normally a hop type of person, I've adored the posts in this series. Learning about the writing styles and processes of others is fascinating.
 
To begin, let's talk about the lovely women who tagged me. The first was Nicole, of the blog Pudge and Nico, whom I finally met in person just last week! She lives in Austin, as do so many amazing bloggers, and we've been chatting on Instagram about meeting up for eons. It turns out, she's even more wonderful in person. Nicole has fantastic taste in food, is great fun to chat with, and has such a way with novelty prints! You will never look at deviled eggs the same way, after reading her blog. 

The other lovely lady who tagged me is one whose blog I've long stalked, Amanda of Bimble and Pimble. Not only does Amanda make gorgeous clothes, but she's absolutely hilarious. You cannot read the garment battles that happen at Bimble and Pimble without smiling, I promise you. Plus, she does roller derby, which is the most badass thing ever, we can agree.
 
Thanks again for tagging me, y'all!

 
Now, onto the blog hopping! I’m going to state the obvious with this one. These questions, while they’ve been sweeping the Sewing Blog-o-sphere for a few weeks, were obviously not intended for our kind. These are questions about writing and process, not fabrics and fripperies. That being said, I am a writer, so I’m going with it.
 
Why do you write? 
 
I write, because I can’t help myself. As a creative millennial, not only have I grown up with the internet, I’ve grown up spewing my innermost thoughts onto said internet. My blogging adventures actually began over a decade ago, when my high school self chattered about crushes and my intense thoughts regarding Spring Awakening on a Xanga account. Originally, I wrote solely as an emotional outlet, but somewhere in my early twenties I decided writing meant more to me. It meant a potential career. It meant writing whole books about girl detectives and feisty aviatrixes.
 
As you may have noticed, I have no aspirations toward becoming a professional blogger. This is a conscious decision. My true writing, the work I'm actively building a career on, is fiction. I don’t want to muddy the waters with professionalizing a blog. However, deciding to write novels bled over into the rest of my life. All those feminist conversations over tea with my friends? Share them with the internet! All those dresses I decided to sew? Review them on a blog!
 
I started Idle Fancy a mere six months after beginning to sew seriously, a product of my own sewing blog obsession. I was making things and desperately wanted to chat about them with other sewers. My real life friends kept getting antsy, when I'd wax rhapsodic about top-stitching.  At the end of the day, if I feel passionately about something—whether it’s the latest shirtdress pattern or gender wage gaps—it’s natural to put those feelings into words. Not only is every blog post a chance to hone my craft and keep my voice fresh, but an opportunity to connect with likeminded souls from across the globe. The internet age is a wonder.
 
How do you write?
 
Before writing any Idle Fancy post, I take garment photos. I can’t write a blog post, then take pictures, and drop them in wherever. For me, the whole thing is a cohesive story waiting to be told.  That’s actually pretty hilarious, if you consider how unprofessional my photos are. I’ve gotten to the point where they’re respectable, but they’re never going to be the thoughtful, styled shoots of fashion bloggers. Let’s be honest, we’re lucky that I’ve moved on from having my younger sister stand on a couch and take “flattering” shots from above with a point-and-shoot. Now, I have a real camera, a tripod, and favor the golden hour before sunset. That’s as many hoots as I’m capable of giving about blog photography, y’all. You have all my hoots.
 
The actual writing part is the most fun, of course. Writing about sewing is such a blast! There are no characters to voice or plots to think about, just describing a hobby I adore, garments I gleefully wear, and making witty asides. I do take care with my posts, aiming to balance both entertainment and information. At the end of the day, people read sewing blogs for inspiration and helpful hints. I’m not an expert seamstress yet, but I try to include everything that might make sewing easier for my readers. That means my posts are pretty long, taking about an hour-and-a-half to write, on average, and covering everything from pattern technicalities to techniques that helped me along the way. They’re also usually chock full of pop culture references, blatant honesty, and snark, because that’s how I roll.
 
How does your blog differ from others of its genre?
 
I’m inclined to say that it doesn’t differ, but that’s ridiculous. If there’s anything that writing has taught me, it’s that every person brings a unique perspective and voice to their work. If all sewing bloggers made the same pattern one week, you’d get wildly different looks, because people are wildly different. Personally, I think Idle Fancy brings a couple of fun things to the table. It’s a combination of entertaining writing, pretty fabrics, and frank talk about body image. While that’s admittedly an odd mix, it works for me. I hope people come for the floral dresses, but stay for the honesty and laughs.
 
What’s are you working on next?
 
Shirtdresses. So many shirtdresses. I’m in the throes of planning The Autumn of 1000 Shirtdresses, which means making a few more versions of my own beloved McCall’s 6696. There will be plaids and sleeve plackets and velvets, oh my. There are also quite a few selfless sewing projects that have become backlogged. When we get back from Atlanta, those are first in the queue. Guilty pangs, I am having you!
 
 As for my non-sewing writing, I’m actually putting the finishing touches on a few projects that will release next year. If you’d like to read more from me than shirtdress tutorials, get excited! More news on that front, when the time comes. For now, cue the mysterious music…  
 
The lovely Lauren, of Rosie Wednesday, Jenny, and I in shirtdresses, of course!
Now, to tag the next stop on this blog hop! It will come has no surprise to you that I’m tagging my sewing lady crush and the giver of beautiful fabrics, Jenny of Cashmerette. Not only is Jenny ace at picking out fabrics, but she’s one of the most delightful women I know. There’s nothing she can’t do, from making gorgeous coats to kicking ass in graduate school. Check out her post next week on all things blogging!
 
In the meantime, happy sewing!


From Plaids to Flowers: Shirtdress Inspiration

$
0
0
Good evening, friends! To properly kick off The Autumn of 1000 Shirtdresses, I thought a pure inspiration post might be fun. Originally, I was just going to post a few particularly lovely shirtdresses. Then, I went down the rabbit hole of Pinterest, ending up with a whole shirtdress board and way too much inspiration. A girl needs twenty-two shirtdresses, right? That's the road I'm on.
 
Anyhow, I've broken up my favorite categories below, with links to original sources when possible and pins, when not. I'm not going to jibber jabber about the various boards, because images are what we're about today! Plus, I have a killer headache to fight and a new episode of The Mindy Project to watch. Priorities, chickens.
 
What I'd really like to know, anyhow, is what sort of shirtdress you're planning. After compiling the collages for this post, I've added a maxi version and a wax print version to my "must sew" list. If there's a certain variation you're after, but would like some help, let me know. I'd be happy to include extra tutorials for such specifics in our sewing challenge!
 
Plaids & Flannels


Maxi Dresses

Florals

Bold Prints

Bright Colors


Miss Cressida and the Slipping Scissors: A Halloween Tale

$
0
0

In honor of Halloween, today I'm sharing a terrifying story of my own: The Tale of the Slipping Scissors. Grab your teddy bears and grasp your mugs of spiked cocoa close, darlings, because this one gets truly frightful. If you're prone to fainting spells, do proceed with caution. There are (sewing) horrors ahead. 

It all began, of course, with a pattern. When Jennifer Lauren sent out a testing call for her latest offering, the Cressida skirt, I jumped at the opportunity. Between the flirty semi-circle shape and that tidy row of buttons, I was smitten. Dreams of buttoned up autumn skirts filled my mind. I no longer saw flannel bolts or tweed yardage, but potential Cressidas instead. In fact, I ordered this cozy wool tweed from Mood Fabrics, with just such a garment in mind. 


Despite living in the south, where we get mere suggestions of autumn and winter, wool is one of my favorite fabrics to sew with. Seams practically disappear into it and hand sewn hems become truly invisible. This tweed was no different, sewing up beautifully and easily. On closer inspection, this fabric itself is quite interesting, its small herringbone lines of maroon, green, and navy forming the classic, tweedy plaid. It's a solid medium weight, but very drapey, almost like a heavy challis. Absolutely gorgeous and perfect for a Cressida!

Due to the small amount of fabric I had, the waistband and button bands were cut on the crossgrain. Unfortunately, while this tweed is gorgeous, the plaid forms rectangles not squares, as it appears to the eye. The sides of each "square" are a smidge longer than the tops, so any pattern matching is futile. Both bands started out perfectly matched, but slowly and surely marched off into chaos. I'm calling the resulting pattern shift a design element. It's such a small plaid that the casual observer couldn't tell anyhow. 


I'm inclined to gloss over the construction of this pattern, because it is such a straightforward piece, but I know some people love in depth reviews of new patterns, before they buy them. If you're sticking around for the horrors, feel free to skim past these details! 

As with other Jennifer Lauren Patterns I own (Namely: all of them. Though, I've only sewn this one, the Bronte, Dalloway, and Afternoon Blouse have all been printed and assembled.), the Cressida Skirt was a cinch to piece together. Jennifer Lauren's .pdf patterns enable you to only print out the pieces you want, which is great for saving effort and paper. What's better, every pattern line and every match point align perfectly. That shouldn't be such a big deal, but you would be shocked by how many digital patterns I've put together that have completely mismatched lines and markers. I've gotten to the point where I mostly ignore those little triangles, in favor of lining up pattern lines correctly. So often going by the intended match points just skews everything! 

/rant

Right. You came for fun details, not my irrational ramblings about digital pattern quality. Based on changes Jennifer made to sizing during testing, I went down a size with this skirt, cutting out a straight Size 18. (Waist of 36", hips of 47" -- my own measurements are 46-35-46.) Cressida is a semi-circle skirt, with a straight waistband, button plackets, belt loops, and deep inseam pockets. This makes it extraordinarily easy to put together! There are no darts or pleats to worry about, though I do recommend stay-stitching your skirt's waist immediately after cutting. It's especially bad, when working with wools like my own, but circle skirt waistlines stretch like crazy. Even just dangling it off your ironing board can cause the waist to grow by an inch or two. Ask me how I know this. Staystitch, staystitch, staystitch!

This skirt is very beginner friendly. If you're new to buttonholes or plackets, this would be a great pattern to start with. Jennifer walks you though each step clearly, with helpful diagrams, and offers a range of finishing options, based on skill level. The button band is formed by sewing a placket to the skirt, then folding it back over the skirt itself. This method is a bit rarer than the standard technique of folding the placket in two on its own, but it provides a really sturdy base for buttons and sets the placket off a bit, visually. 

Other than the placket, construction is intuitive. I did make a few small changes, based on personal preferences. I subbed out the larger, pointed belt loops for small traditional rectangles, and omitted the pockets in favor of French seams. Theoretically, I know you can keep pockets and French seams, but it's not something I've done before and pockets didn't seem overly necessary in this piece. Rather than hie off researching a new technique, I nixed the pockets and kept it simple. Additionally, I only had six buttons, rather than the prescribed seven, so my button placement is stretched a bit. Since taking these pictures, I've added a snap just below the waistband, since my wide placement was causing the tiniest bit of gaping there. 


Now, of course, we come to the horrors. Notice that nice shot of my bum above? Ignore the way my hip's angle is making the hem appear crooked (I'm standing on a slope in these pictures) and, instead, focus on the right side of my hip, halfway down. Do you see it? That small slightly dark triangle? Let's zoom in.


Are you screaming yet? GOOD GOD, WHAT IS THAT THING? OH, THE INCONCEIVABLE HORRORS!

Picture the scene, kittens: There I was, satisfied in my sewing diligence and patting my back for side seams well-matched, when I decided to trim some loose threads. The skirt still needed to hang overnight, but I wanted to finish it as much as possible. So, I trimmed. Snip. Snip. Snip. SCREAM. My scissors slipped, as I was contorting to catch some stubborn dangling bits, and snipped right into the skirt back. 


I had snipped a two inch floppy triangle into my formerly perfect skirt. It had French seams, for fuck's sake, and I'd ruined it. Ruined it all! That's about the time I threw the skirt onto my studio's daybed, in a furious huff, cursed myself for a fool and gave up on sewing entirely. I would give away all of my fabric, sell my machines on Ebay, turn the studio into a romance novel library, and never again know such pain! My heart was not made of stone, it could be snipped and cut! 

Three days later, of course, the internal dramatics had calmed down a bit. I got out some interfacing, secured the triangle in place, covered it with a patch on the inside, and hand sewed the raw edges in place. It's not perfect, by any means, but it is barely noticeable. Or...so Sam tells me. I'm going to go with that optimistic view, because I love this skirt deeply. It's exactly the piece I want to pair with boots, tights, and sweaters. It makes me want to sip cocoa and trudge through fallen leaves. A small triangle will not keep me from enjoying it!

So, they all lived happily ever after. Though our heroine, it should be noted, promised to be less cavalier with her scissors in the future. There would be no more snip, snip, screams from this seamstress.  


Disclaimer: This pattern was received for free, in exchange for testing. The fabric, similarly, was courtesy of Mood Fabrics, as part of the Mood Sewing Network. 


Full Bust Adjustment on a Darted Bodice

$
0
0
Good afternoon, lovelies! As you may have noticed, it's been a bit quiet around here lately. Between traveling, writing on a deadline, and unexpected (though beloved) visitors, my free time has been greatly reduced. I'm hoping to catch back up on the Autumn of 1000 Shirtdresses over the next week, but I also am considering bumping the challenge due date back. Considering we're going to into the holiday season, I can't be the only one warring with a busy schedule! 

However, today and tomorrow, I'm focusing on bust adjustments. This is one of those areas where I'm pretty well versed in some techniques, but have zero experience with others. Since I usually just sew for myself, I have done innumerable full bust adjustments, but never even sniffed around a small bust adjustment. To that end, tomorrow, I'm going to round up links to well-vetted and helpful bust adjustments, including techniques I don't have personal familiarity with. Today, however, I thought I'd share my own FBA for
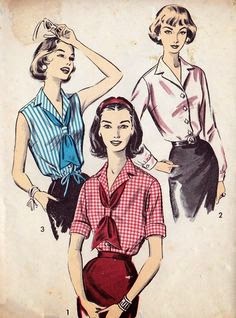
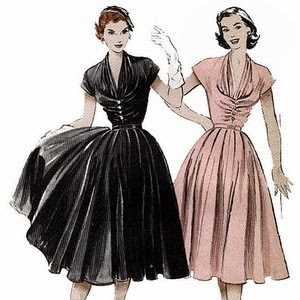
 McCall's 6696. 

This adjustment is the most basic of FBAs, for a two-dart bodice. If you are using any pattern with a bust and waist dart, this exact alteration will also work for you! There are more complicated FBA techniques, as almost no problem in sewing has just one answer, but this is the tried-and-true method I usually begin with. 


First off, who needs an FBA? It's going to depend on the pattern you're using, but most Big 4 patterns are drafted using a B-cup bodice and it's rare that Indies are drafted larger than C-cups. If your bra size falls outside this range, then an FBA is for you! Even if your measurements are exactly identical to those on the pattern envelope, chances are weird fitting issues will crop up with a large cup size. It's astounding the number of these issues a good FBA can fix, from floppy shoulders to gaping button bands. Today, we're going to walk through the most basic of FBAs, for a two-dart bodice, but virtually every pattern design can be adapted for large cup sizes.

Before we start the adjustments, however, let's pick a pattern size. McCall's 6696 is a classic two-dart shirtdress pattern with multiple cup sizes. All of the Big 4 pattern companies 
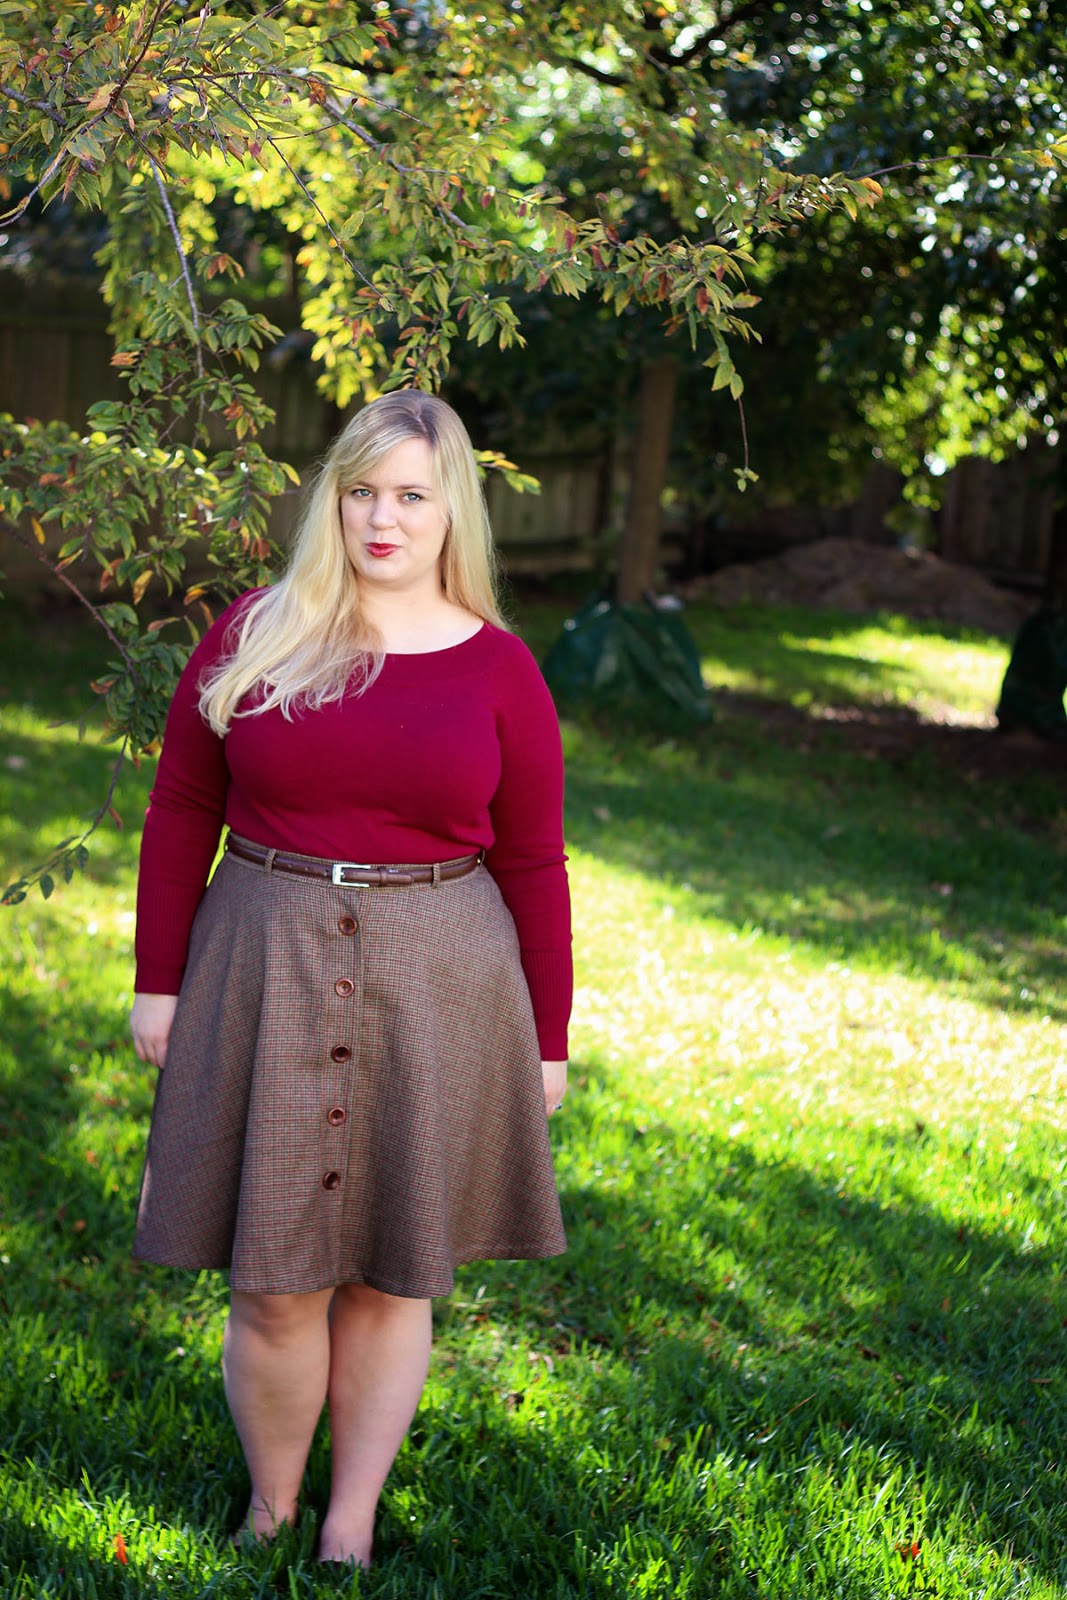
have introduced pattern lines with multiple cup sizes, which is great because it does a lot of the FBA work for us! This particular pattern goes up to a D cup, which means I still need some room to accommodate my ample 36E bosom.

This pattern goes up to a size 24, or bust measurement of 46 inches (47 for the D-cup piece). It's tempting to look at a pattern size chart and pick based on your usual bust measurement, but that way danger lies. If I made a size 24, it would be a gaping mess everywhere but my girls! Instead, the best method is to choose a bodice based on your high bust measurement.

High Bust vs Full Bust

Mary - High Bust Full Bust

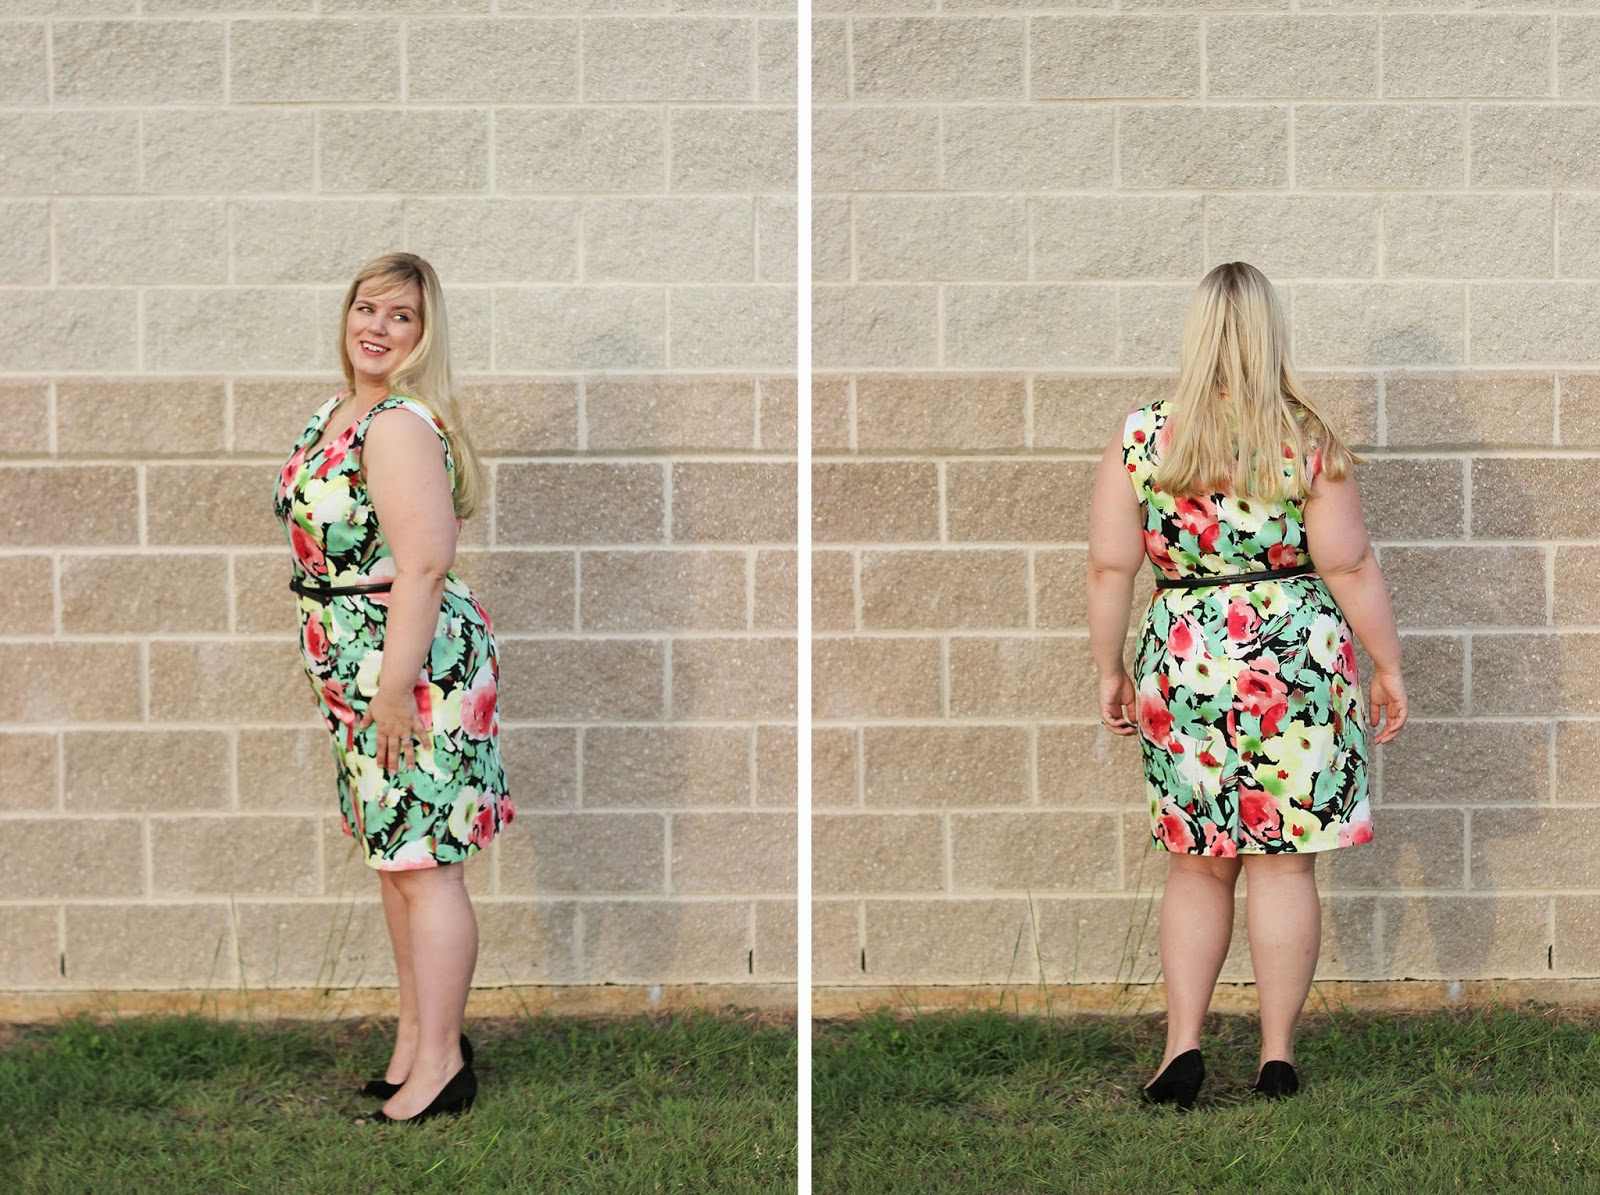
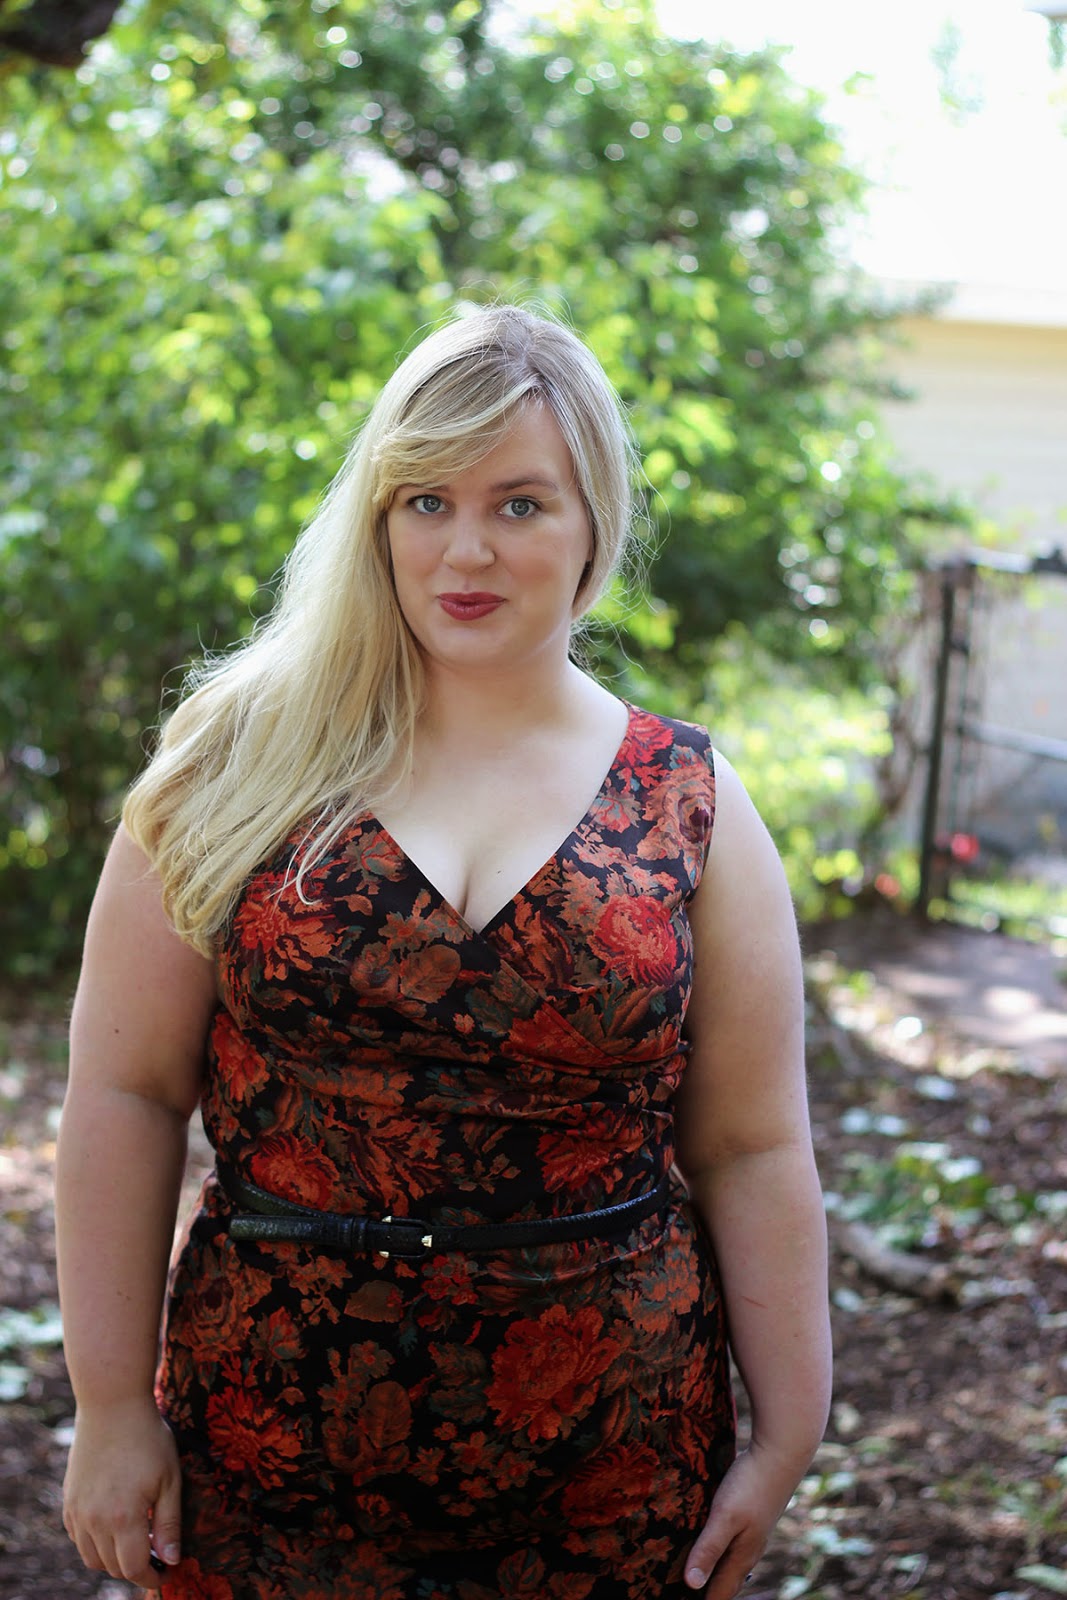
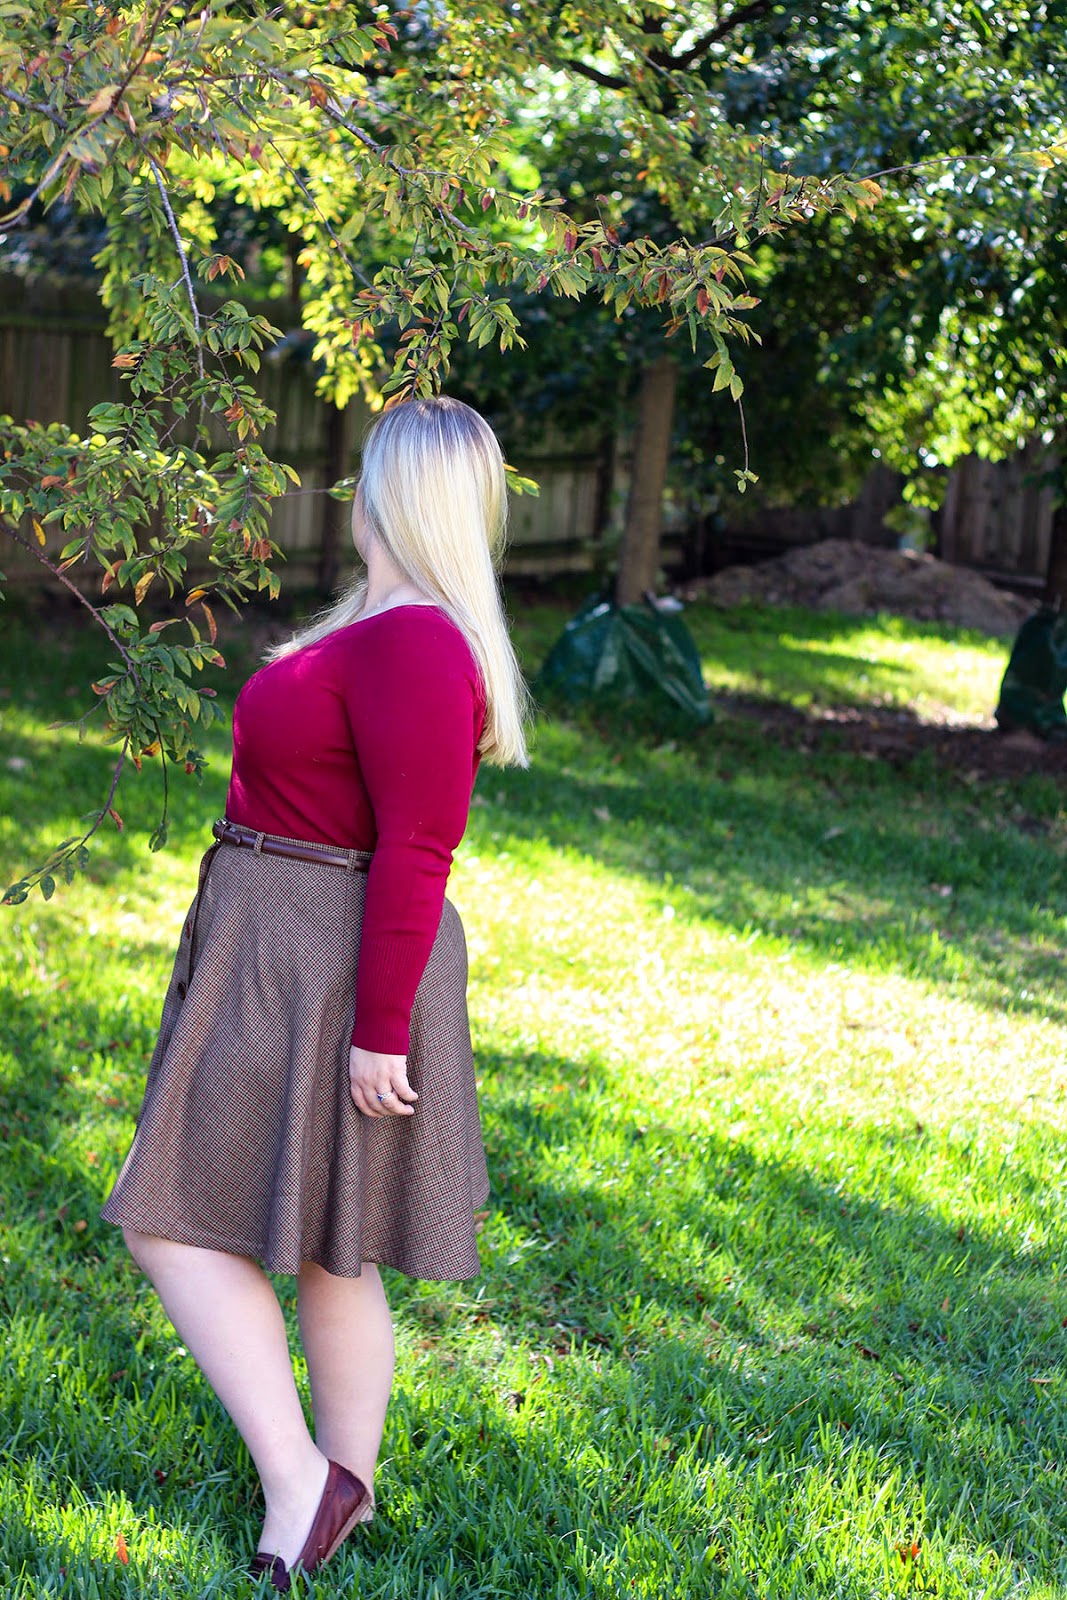
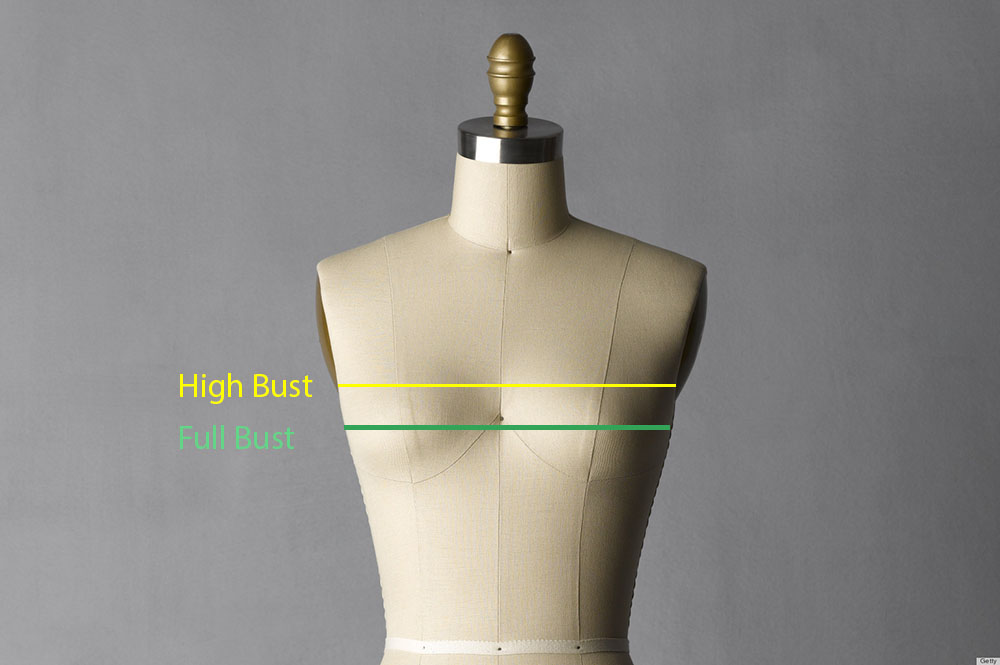
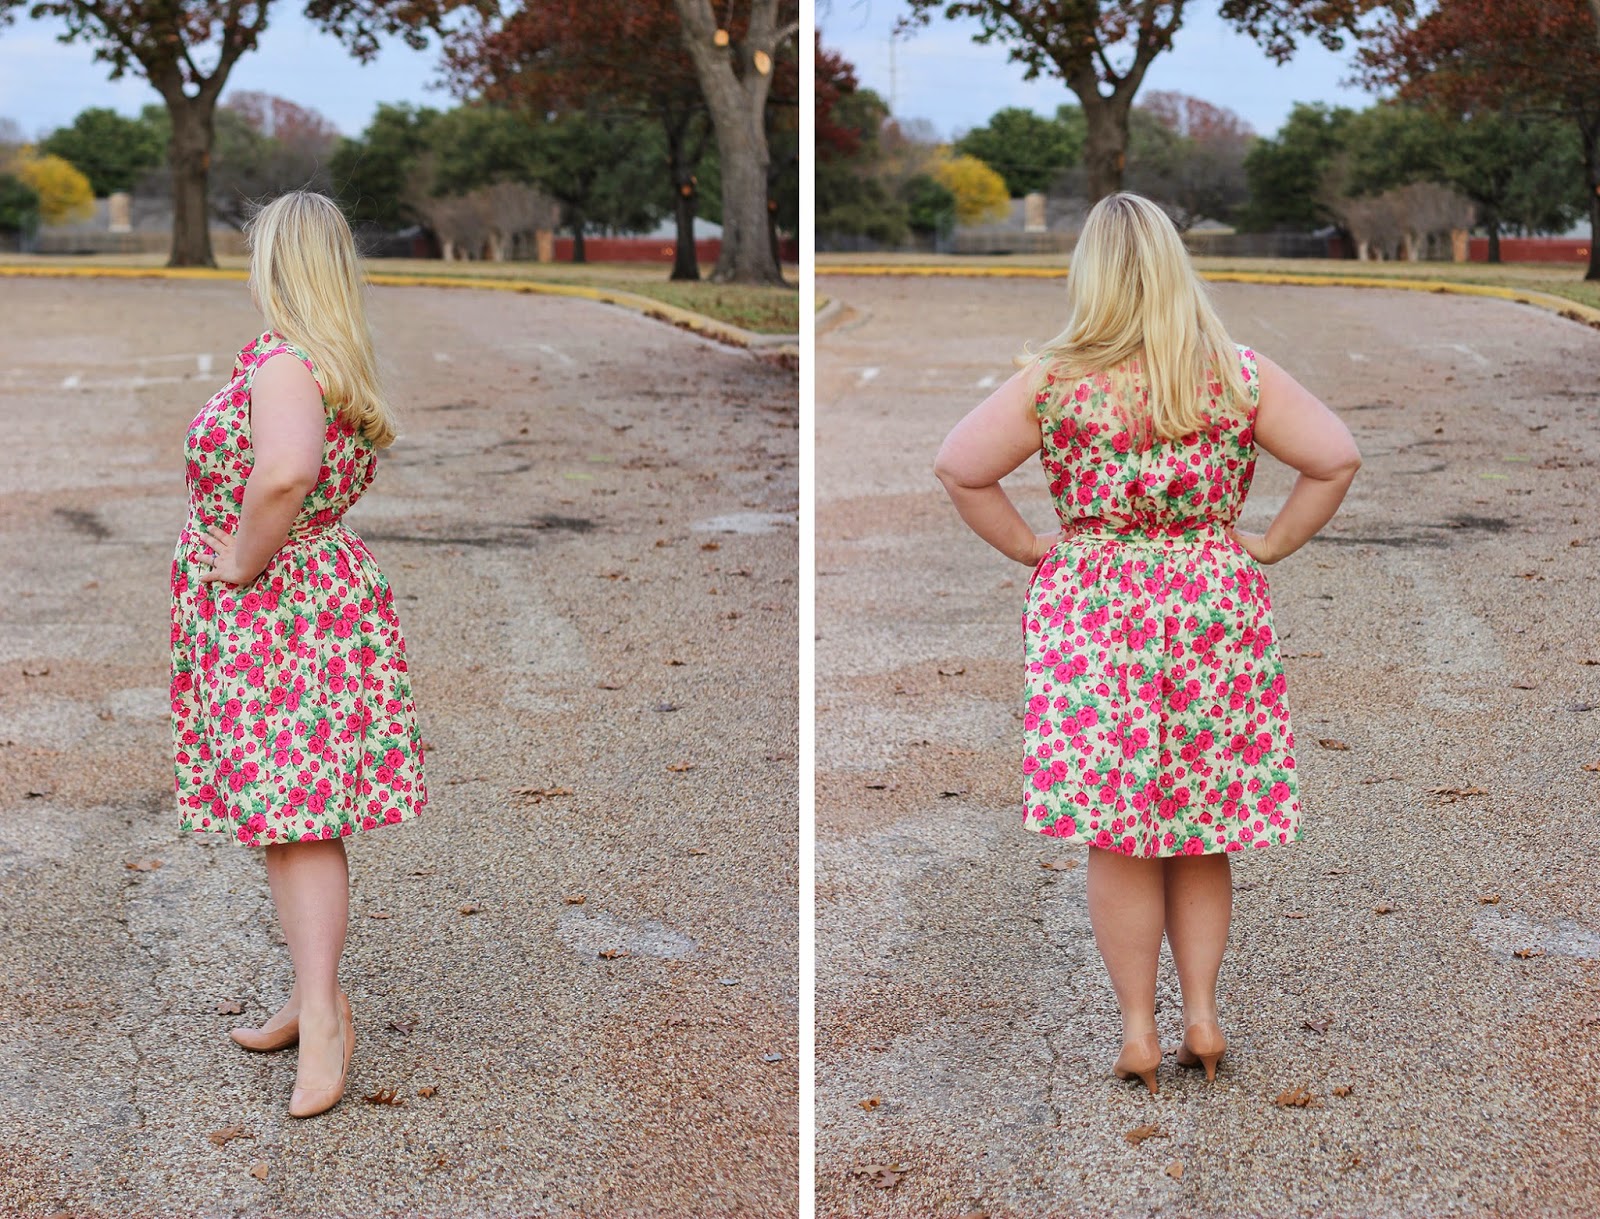
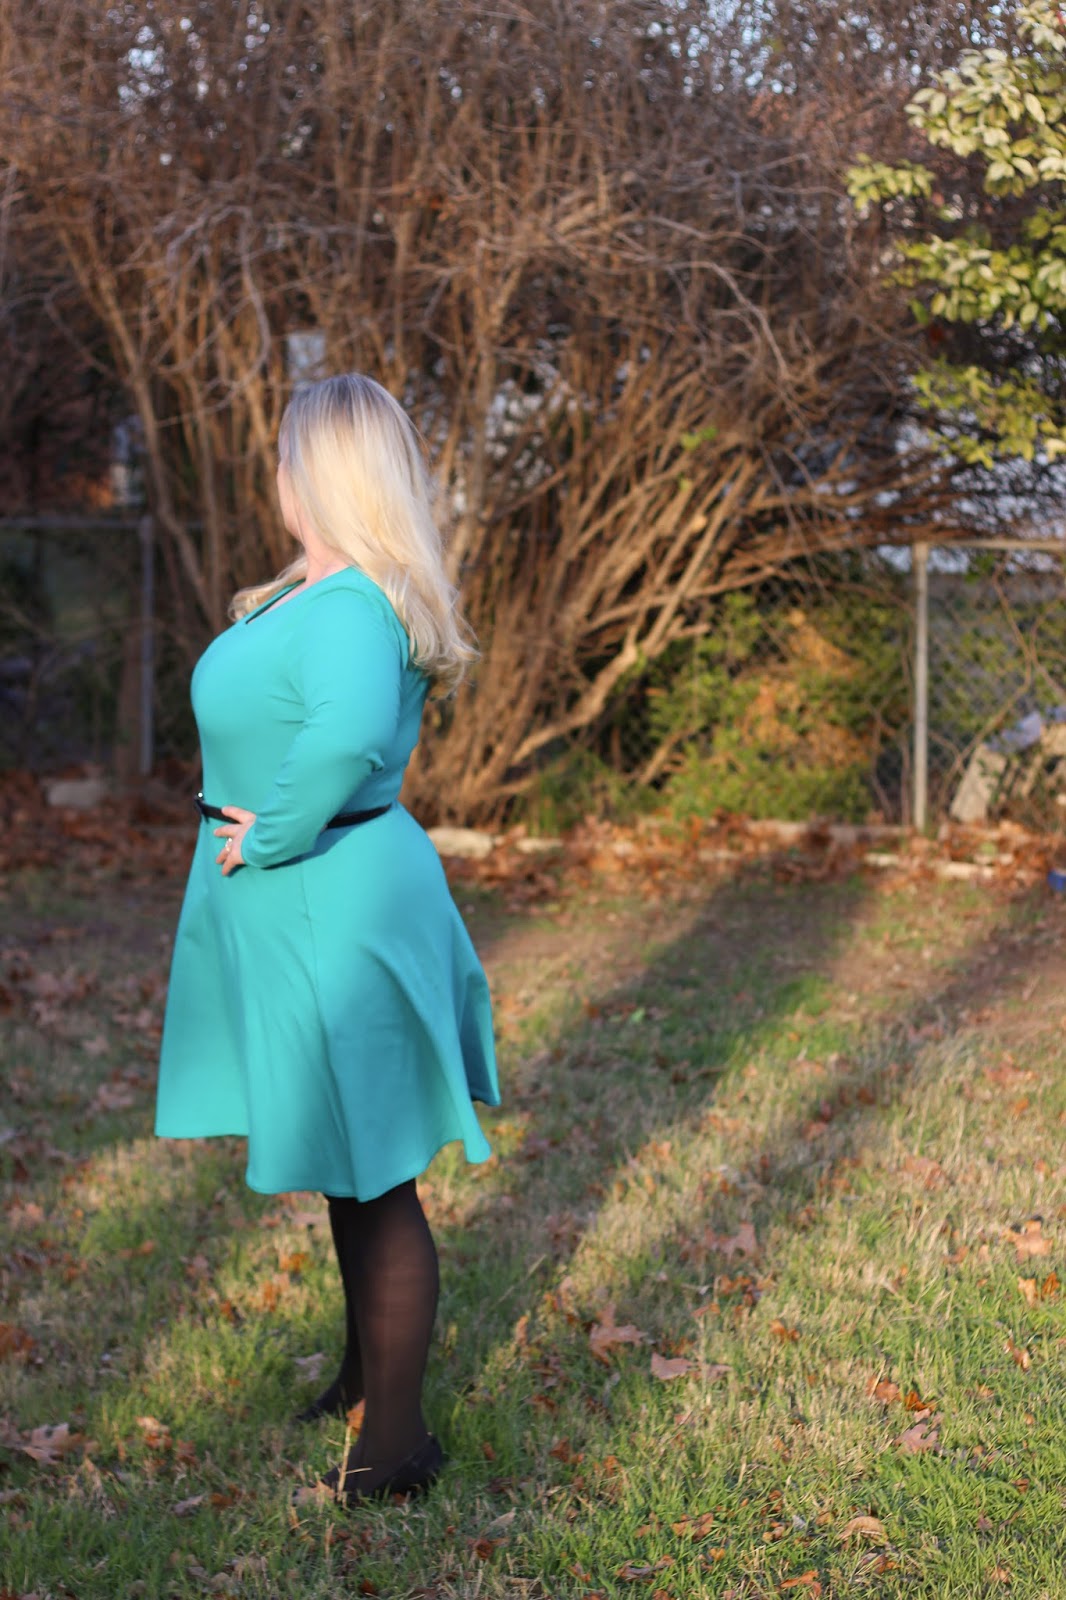
In a well-fitting bra, measure yourself all the way around the very top of your bust line, under your arms and over the beginning of your décolletage. That's your high bust! Now, measure around the fullest part of your bust line. Tada! That's--surprise, surprise--your full bust.

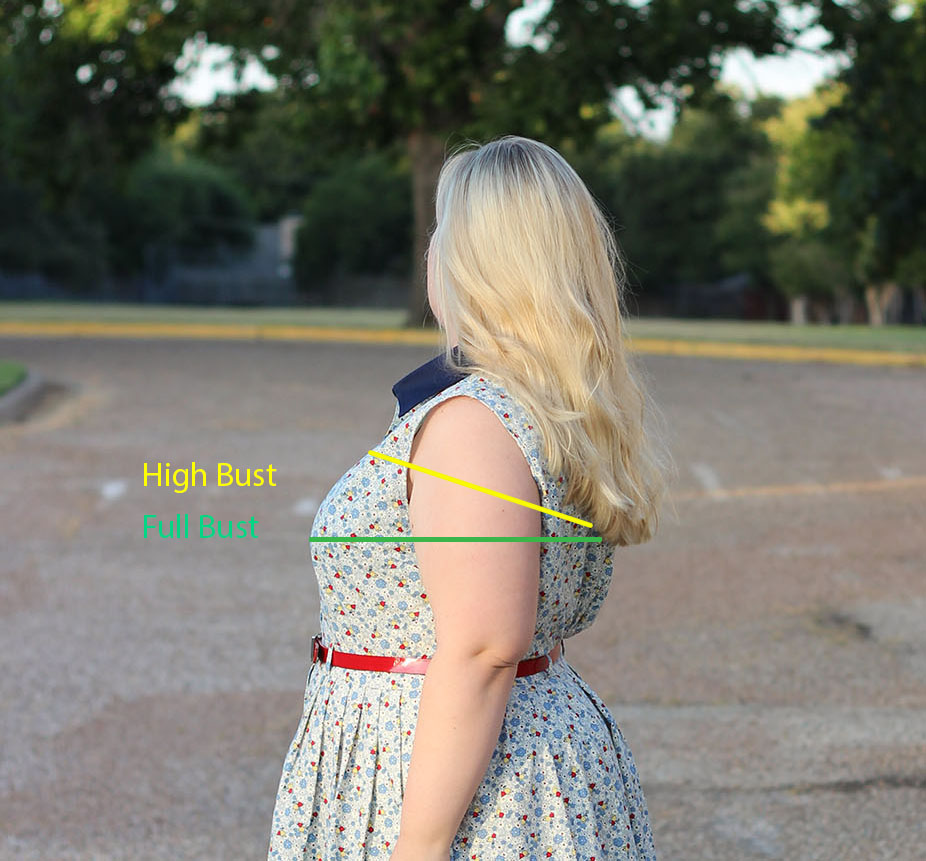
If you're a large cupped woman, these two numbers will be pretty different. My own measurements are a high bust of 41 inches and a full bust of 46 inches, which lines up with my 36E bra size. (Conventional wisdom states that every cup size is an extra half-inch measurement, though you may find this doesn't hold true for you, depending on fit preference.) Above, I've marked my own high bust and full bust, in a side profile picture. See how different those two parts of my bust are? If I pick a size with my high bust measurement, I'm between the size 18 and size 20 bodice, rather than our original size 24. Since my shoulders are wider than average and my waist is a solid size 20, that's the size I usually choose to perform an FBA on.

Note: You may have to grade between sizes at the waist and hip, depending on your proportions and measurements. It's not rare at all to need a size 20 bodice with an FBA, then a size 24 elsewhere. Women, no matter what fashion tells us, are not a standardized shape. That's why we sew, right? The important thing here is getting the right size upper bodice base for your shoulders and upper chest. You can easily grade out to other sizes, for your waist and hips.

Now, let's adjust!

Preparations:
Step One

To get started we're going to need a few materials.
  • Your pattern! Instead of using the original tissue pattern, I highly recommend tracing your pattern onto a more durable type of paper. We're going to be slashing and spreading this baby, after all. Tissue paper is just too flimsy to handle that workmanship! Besides, if you end up wanting to change the fit, it's nice to not have irrevocably messed up the original bodice. Personally, I use Swedish Tracing Paper, which is not only easy to trace on, but sewable for quick fitting checks.
  • A clear ruler!
  • Pattern weights! I use large metal washers, which are both weighty and have slim profiles that make cutting around them a breeze.
  • A sharpie or pen!
  • Scissors!
  • Tape!
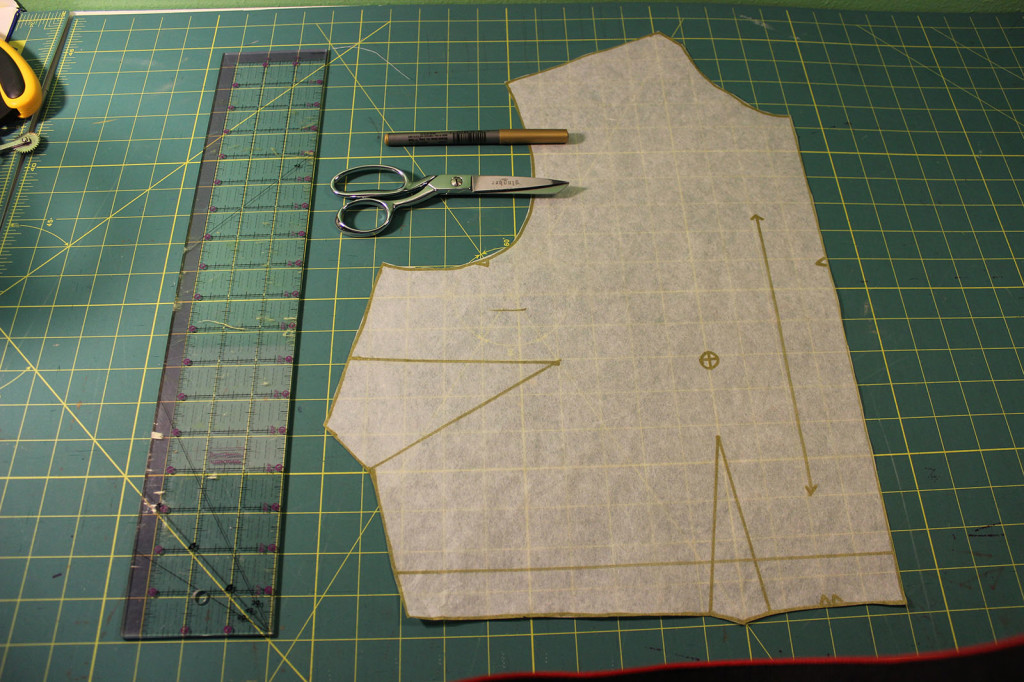
When you trace off your pattern, be sure to transfer all pattern markings, especially your horizontal lengthen/shorten line and the pattern's bust apex. We'll be using both of those markings to make our cuts in the pattern.

Step One: 

The goal of an FBA is to add fullness to your pattern piece, without sacrificing the fit at your shoulders and waist. To do that, we're going to draw a few lines on our pattern, then cut them to specific points, so that the piece only gets larger where we want! Are you ready? Grab that sharpie, my dear. (Note: Because my own markings were faint, for teaching purposes, I will be showing you this process with bright computerized lines, to make it easier for us all!)


Step Two

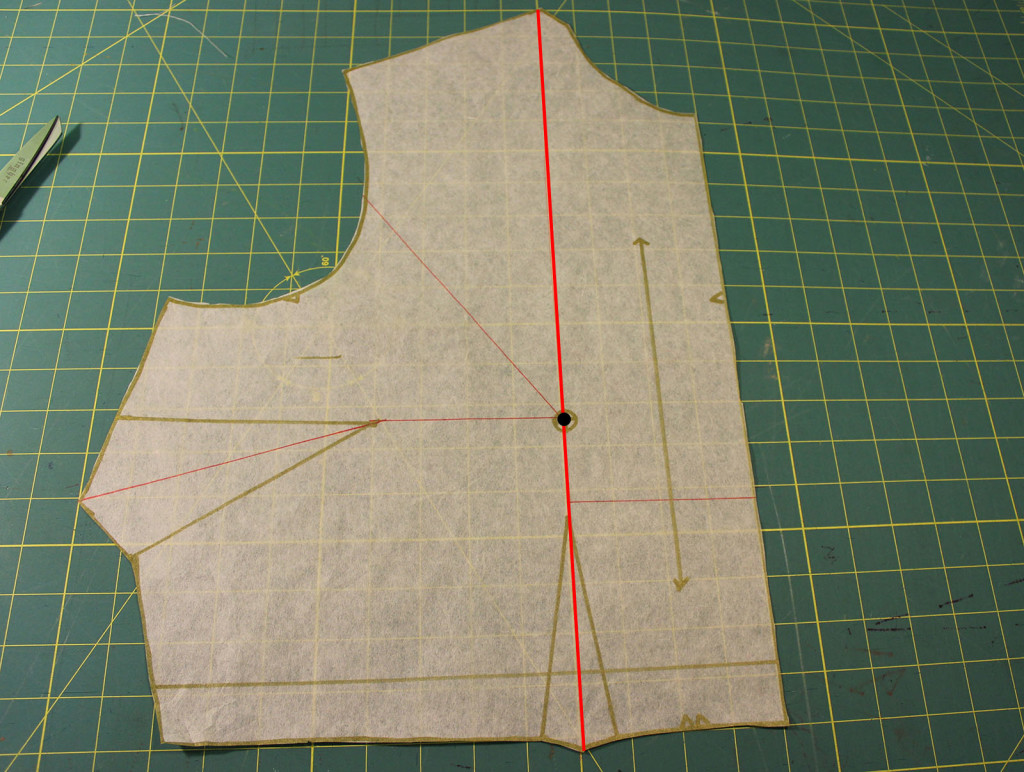
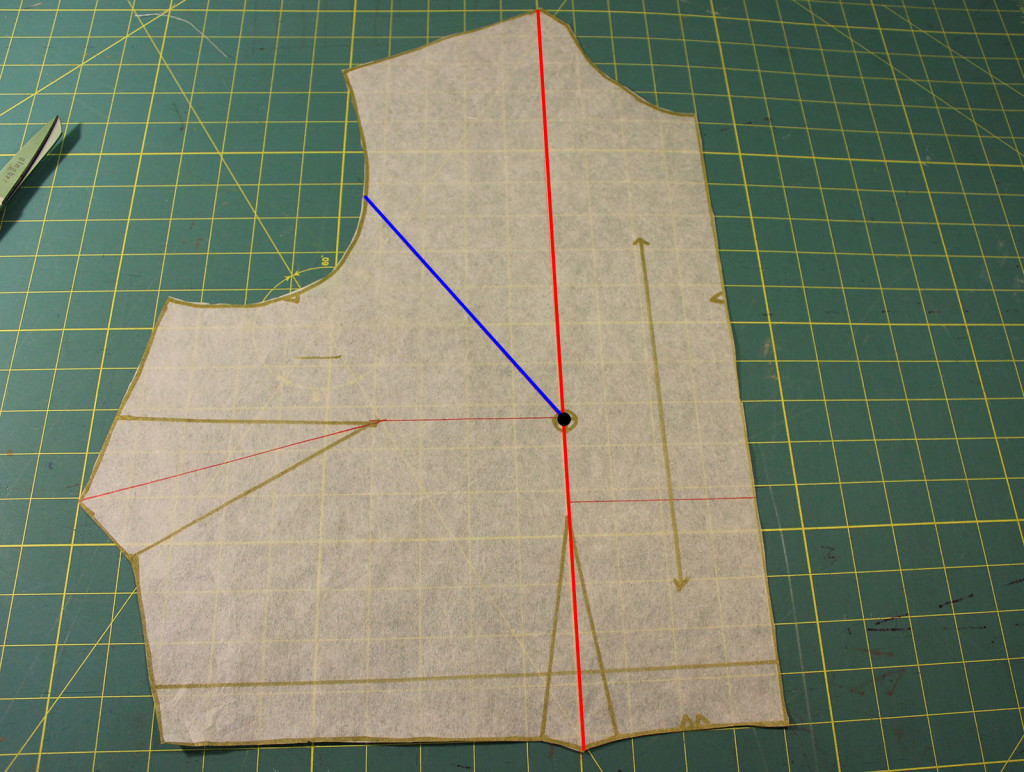
First off, draw a straight line through the middle of your waist dart (that one on the bottom) up to the pattern's shoulder, through the bust apex point. Above, you'll see my black bust apex and this first line in bold, bright red.

Step Two:


Step Three

Now, draw Line #2 from your bust point out to your armscye, about 1/3 of the way down from the shoulder. (Shown above in bright blue.) The reason we only go 1/3 of the way down the armscye is to prevent over-distortion of our armhole, which would give us too much blousing on the side.

Step Three: 

Step Four

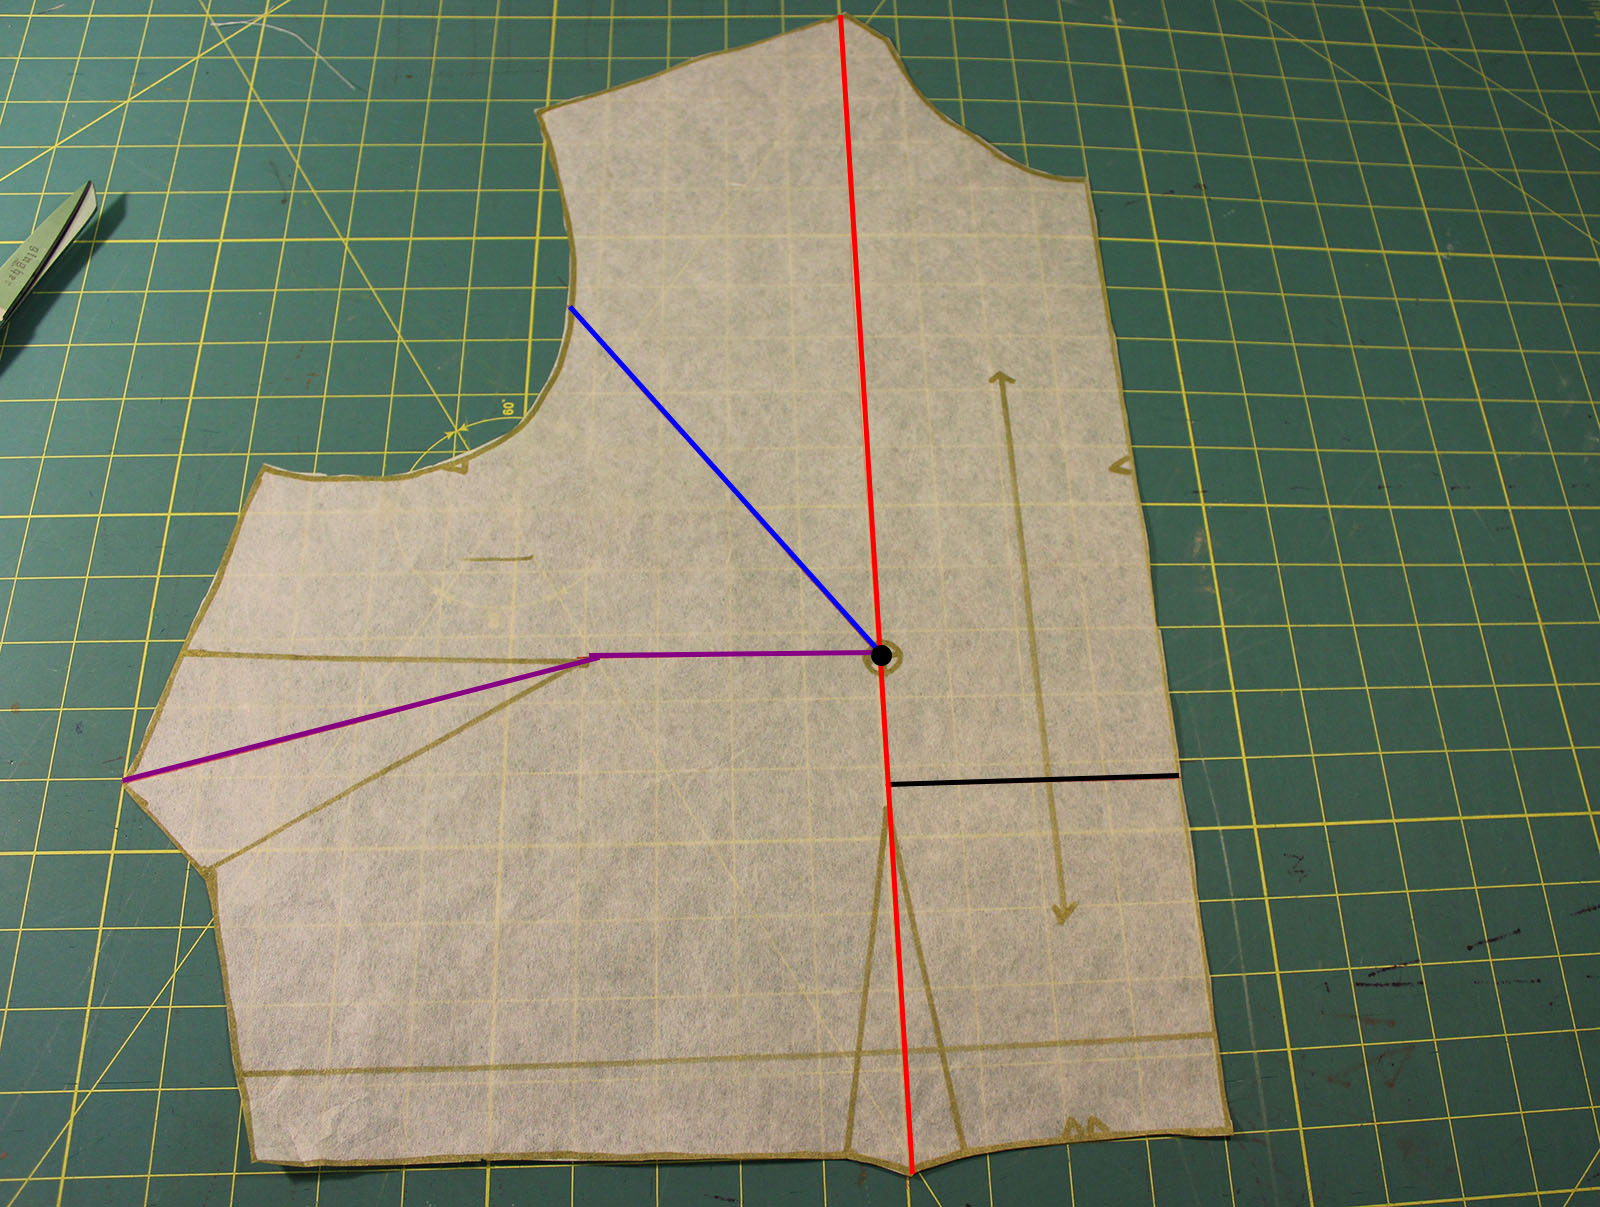
Next up, we're going to draw a line through our side bust dart to the bust apex. There are two main types of side bust darts you'll encounter: those positioned horizontally to an apex and those which angle up. For both types of dart, we draw Line #3 from the middle dart edge, through the dart tip, over to the bust point. If you're working with a horizontal dart, this will be a perfectly straight line. How easy! If you have an angled dart, as I do, there will be a hinge in your line like my purple one above.

Step Four:

Step Five

The final line we're going to draw is an easy one. From your center front, draw a straight horizontal line to Line #1, just above where your waist dart ends. I've done this in black above!

Woohoo! All your FBA lines are drawn! Not so hard, right? Now, onto the fun cutting parts...

Step Five: 

Step Six

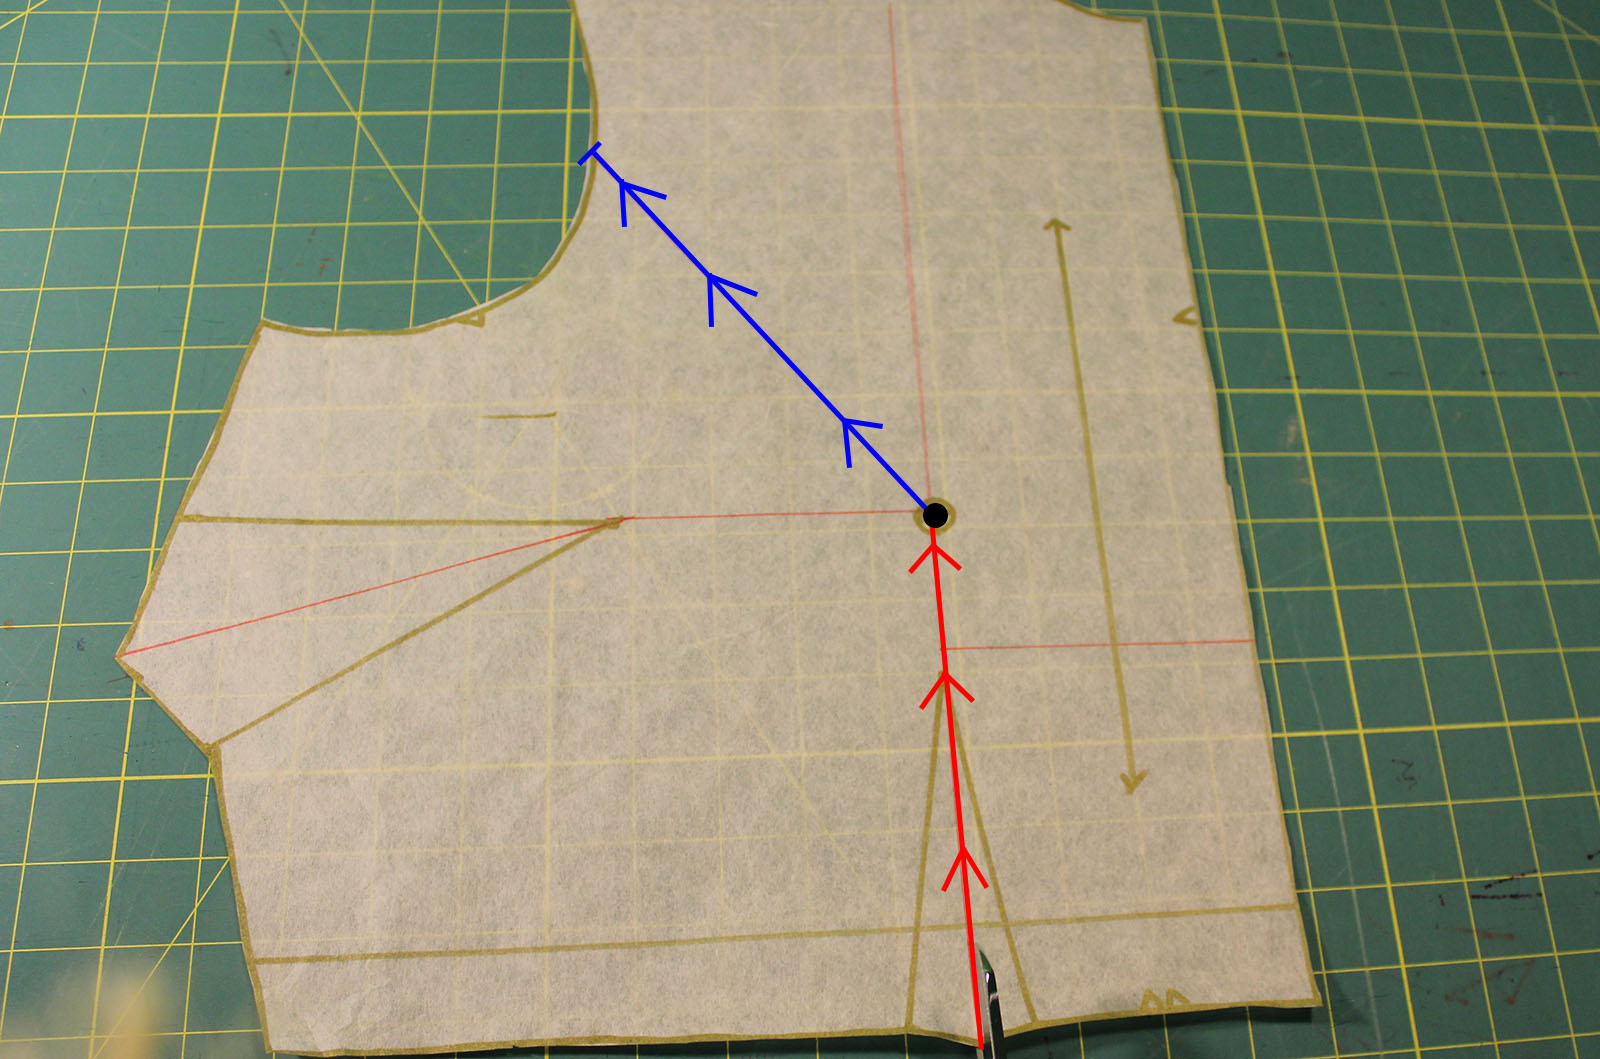
For our first cut, we're going to go up through Line #1 to the bust point, then pivot right there and continue along Line # 2 to your armscye. At the end of Line #2, stop cutting just before the line ends, leaving a small bit of line left intact (about 1/8 inch). We don't want to cut our pattern piece in two, just make it mobile enough that we can spread it out a bit. Leaving this little bit left gives us a "hinge," to move the bodice around.

Step Six:

Step Seven

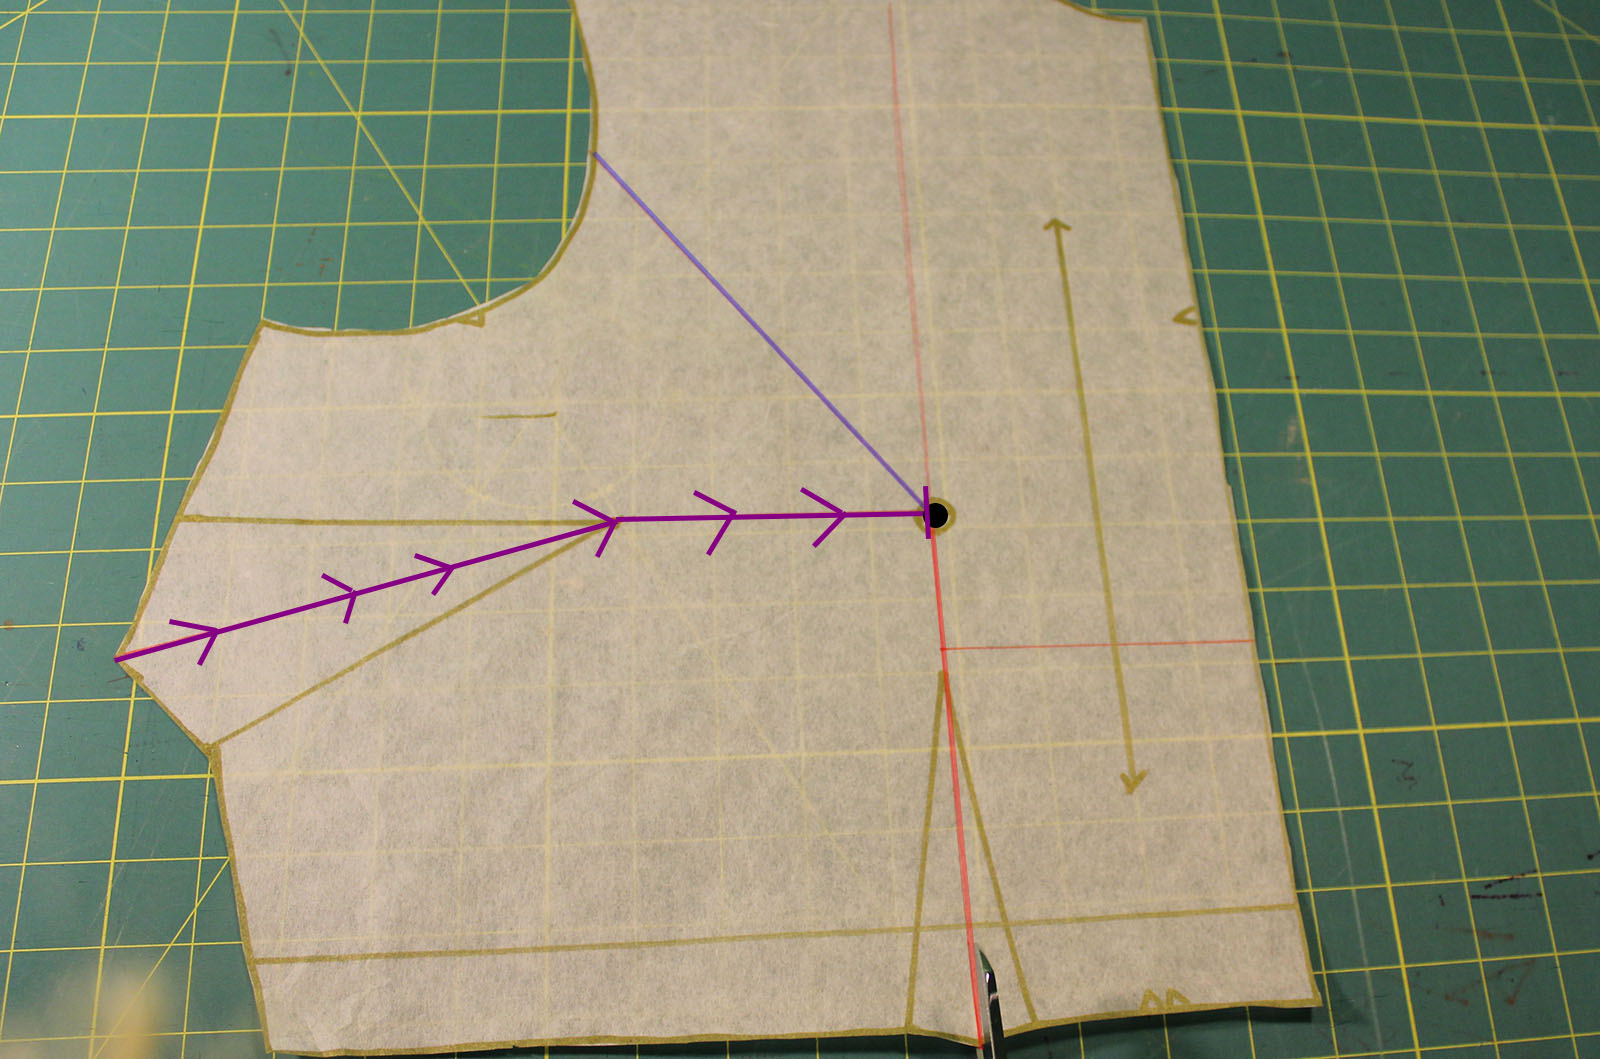
For our next cut, we're going to cut along Line #3, starting at the dart side and stopping again just before the bust apex, leaving another hinge. See how you can now spread your bodice pieces out quite a bit? The step below shows our new pattern piece, complete with hinges and cuts!

Brief Interlude of Math

Now that your pattern piece is all hinged, we can add in the fullness needed to compensate for our full bust measurement. How  much extra room do you need, however? There are a few ways to determine how much extra fullness you need, but I go with the simplest version. How much difference is between your Full Bust and the stated Bust measurement on the pattern size? Since I'm using a Size 20, D-cup pattern piece, there is a two inch difference between my measurements and those of the pattern size. (Pattern's body measurement: 44 inches; My full bust: 46 inches) That means I need to add an extra two inches to the bodice pattern! Easy, right?

Since a bodice pattern piece is only half of a full bodice, however, this means I'm making a 1-inch FBA.

2 extra inches needed ÷ 2 bodice halves = 1 inch FBA (Extra Room Needed ÷ 2 Bodice Halves = FBA width)

Note: For some multi-cup-size patterns, the stated body measurement for larger cup sizes may not be available. To combat that, subtract your desired ease from the pattern piece's final measurement, which is always found on the printed pattern. For me, on McCall's 6696, I wanted about two inches of ease in the front bodice.

Now, let's start spreading!

Step Seven:

Step Nine - a

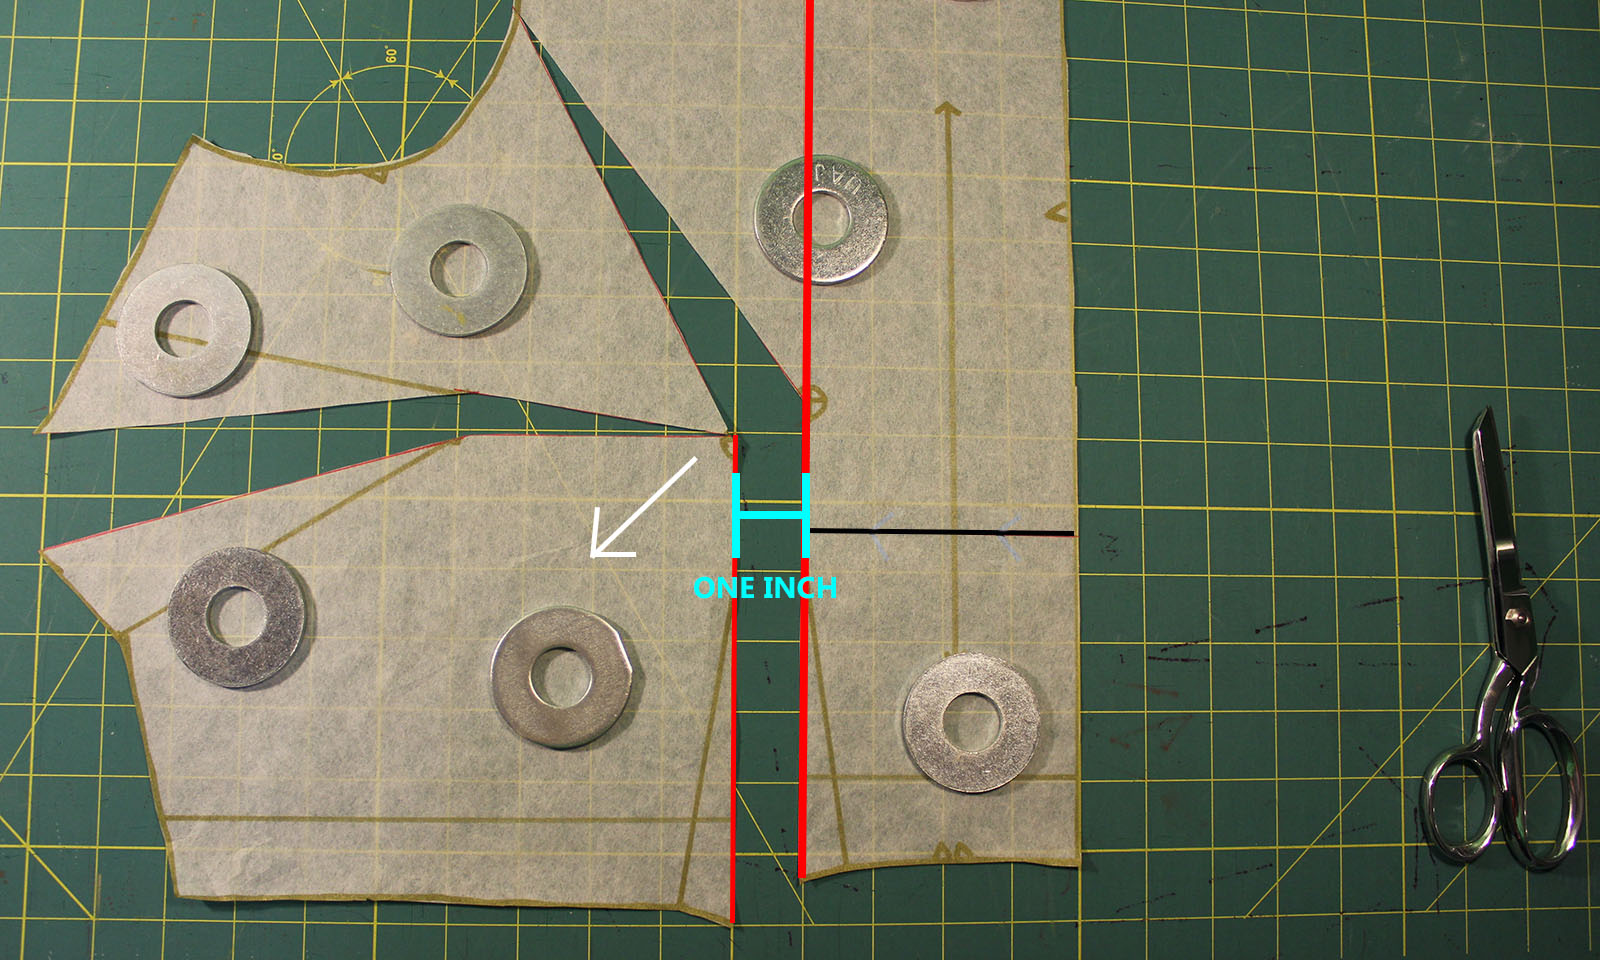
The extra fullness we're adding in gets directly added to Line #1, the bright red one that went up from our waist dart. To do this, secure the center front of your pattern piece, then spread your hinged lower bodice down and to the left. Being careful to keep the slash along Line #1 straight, spread your pattern piece out until there is one inch* separating the split Line #1.

See how your dart and armscye have also moved to accommodate your new Line #1? That's exactly what we want. Now, make sure every part is laying flat and your split Line #1 is still straight, with an inch separating it all the way down, then put pattern weights all over the place!

*Use the measurement you got from our Math Interlude. If you're doing a 2-inch FBA, spread it 2 inches, and so forth. 
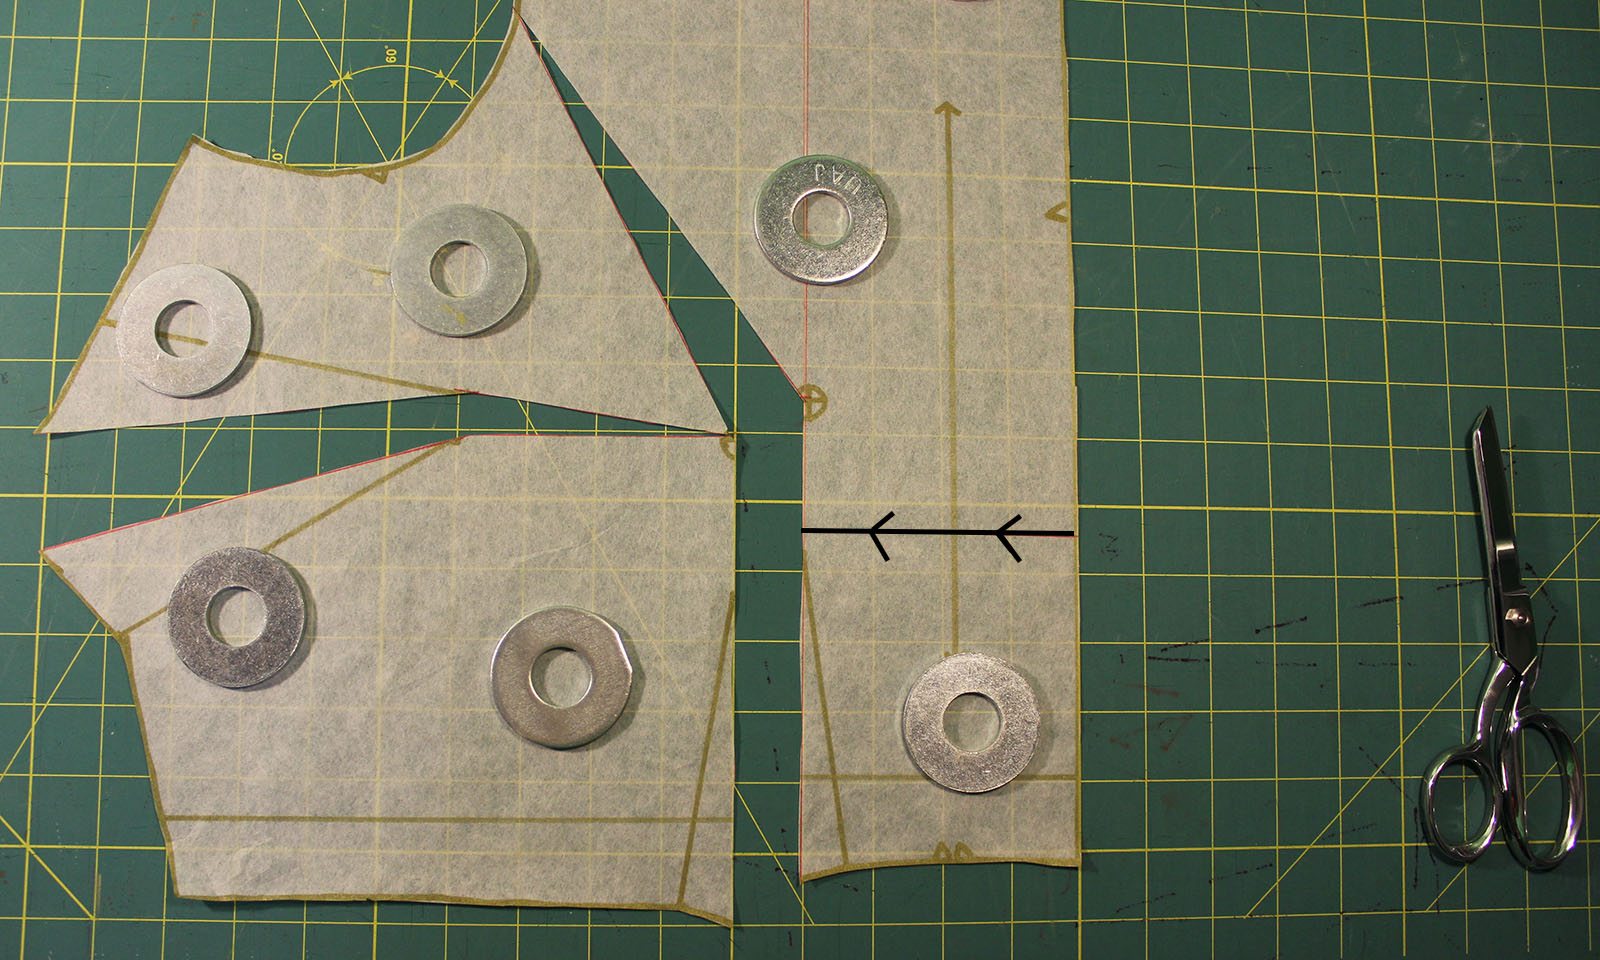
Step Eight:

Step Nine

Now that your pattern piece is slashed and spread, it's time to make our final cut. You know Line #4? Cut clean through it, from the Center Front all the way to the red line, as demonstrated in black above.
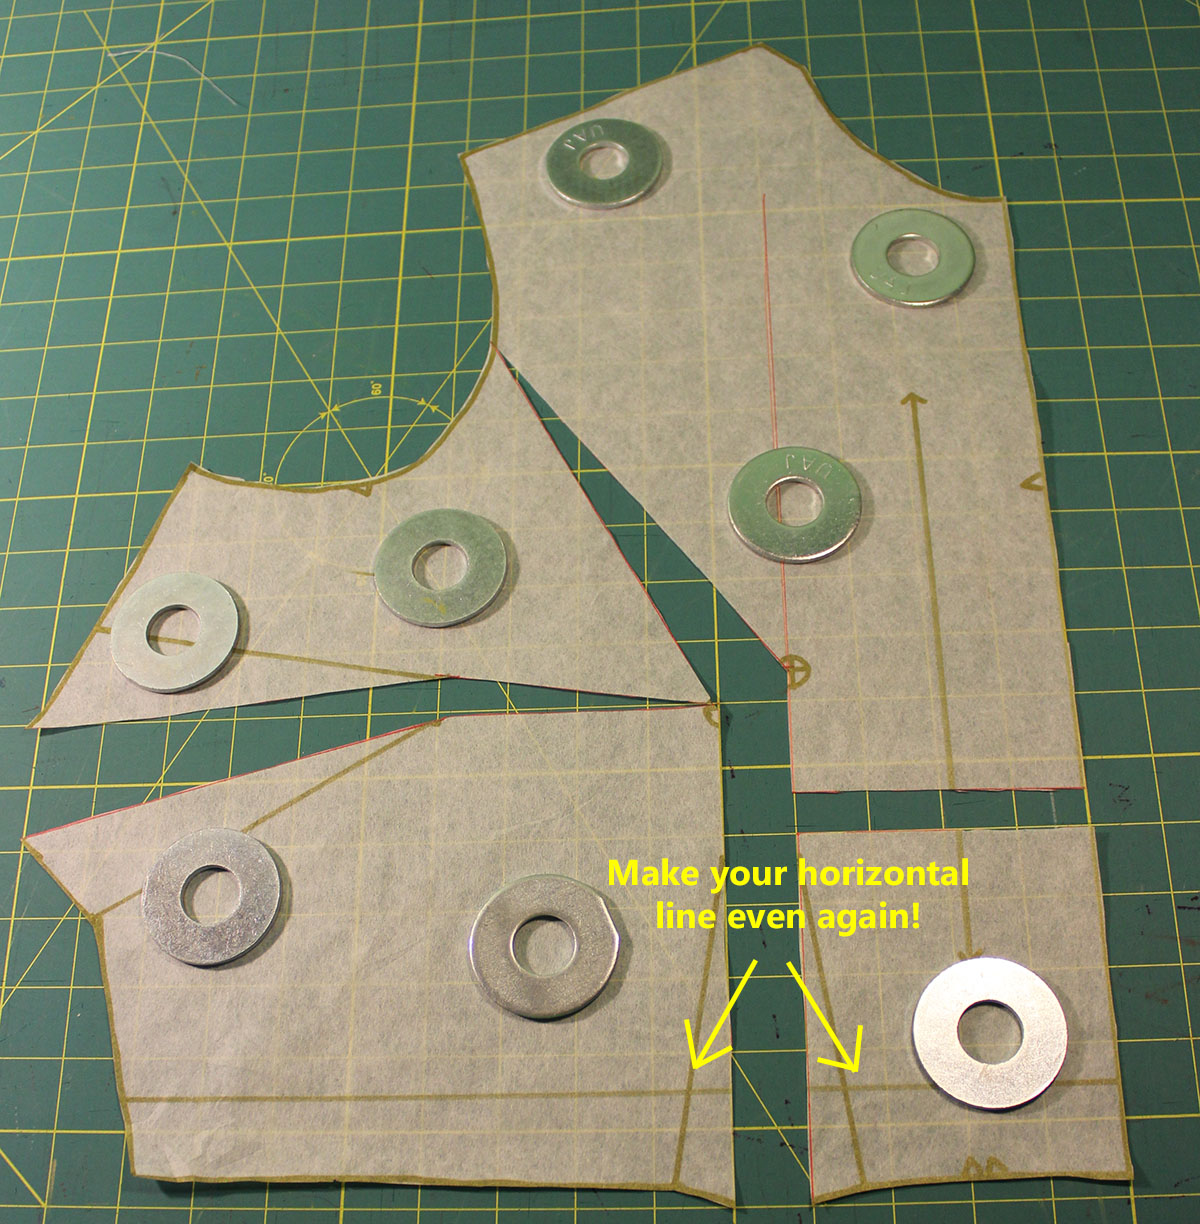
Step Eight: 

Step Ten 

Move that little bodice piece down, until your horizontal lengthen/shorten line is once again even. Secure with a pattern weight!
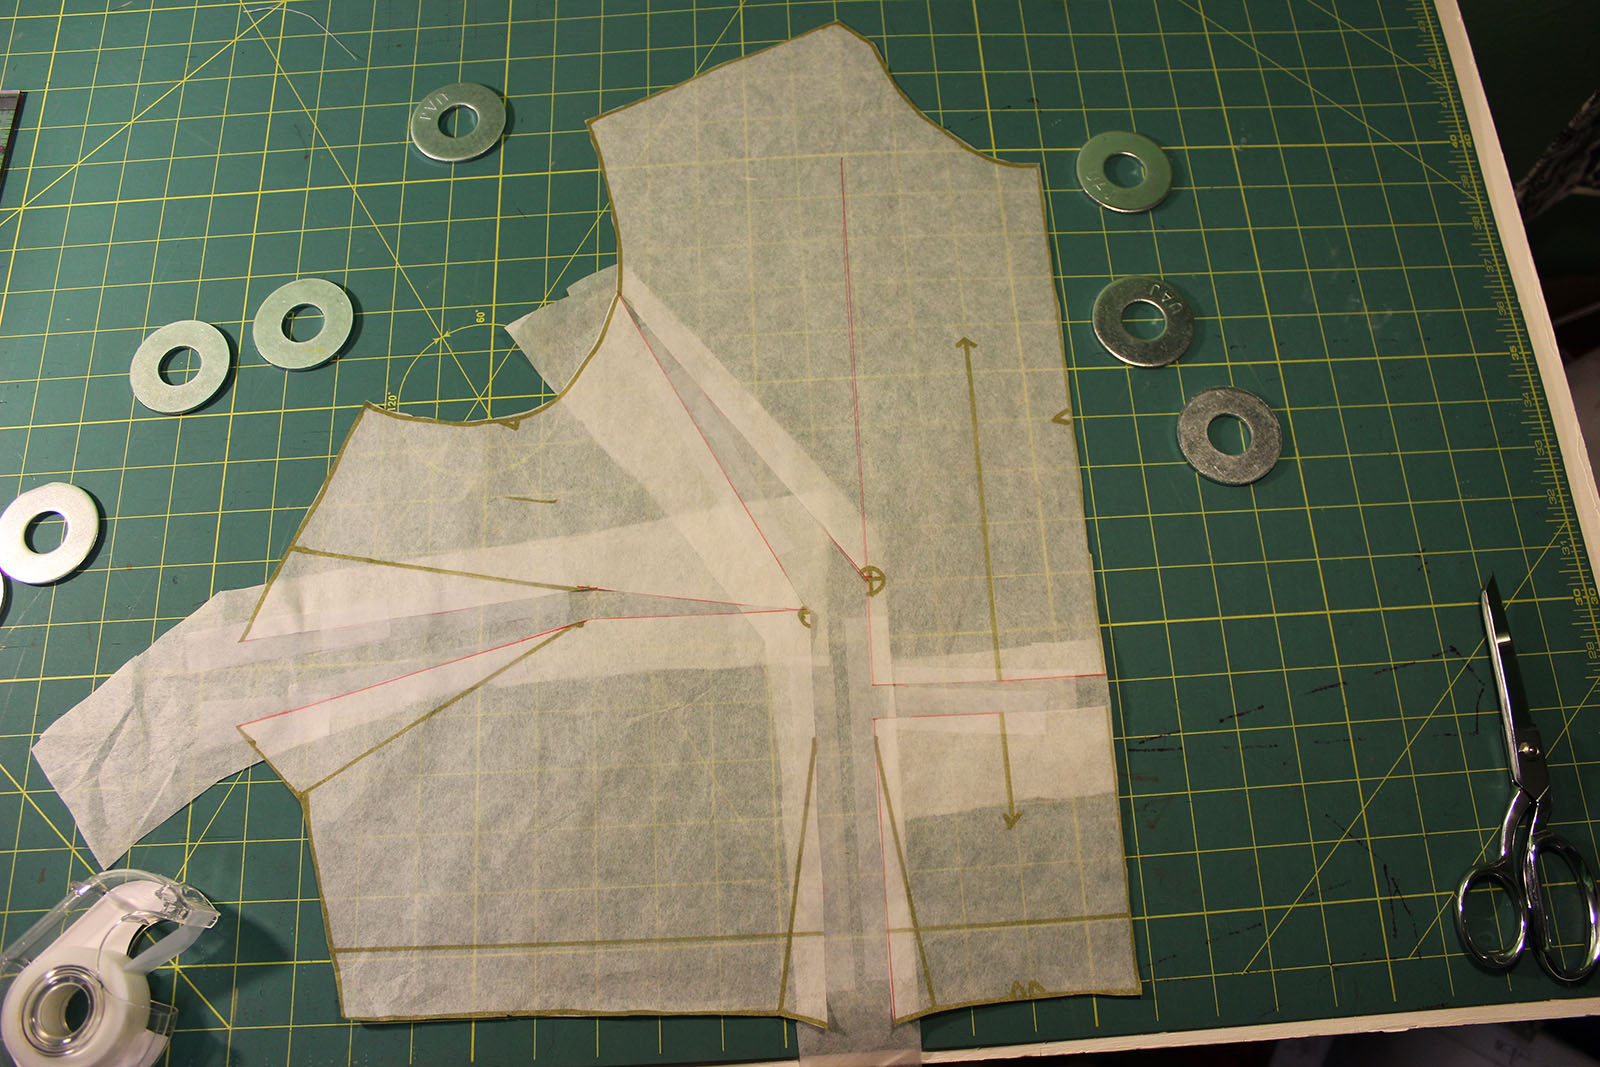
Step Nine: 

Step Eleven

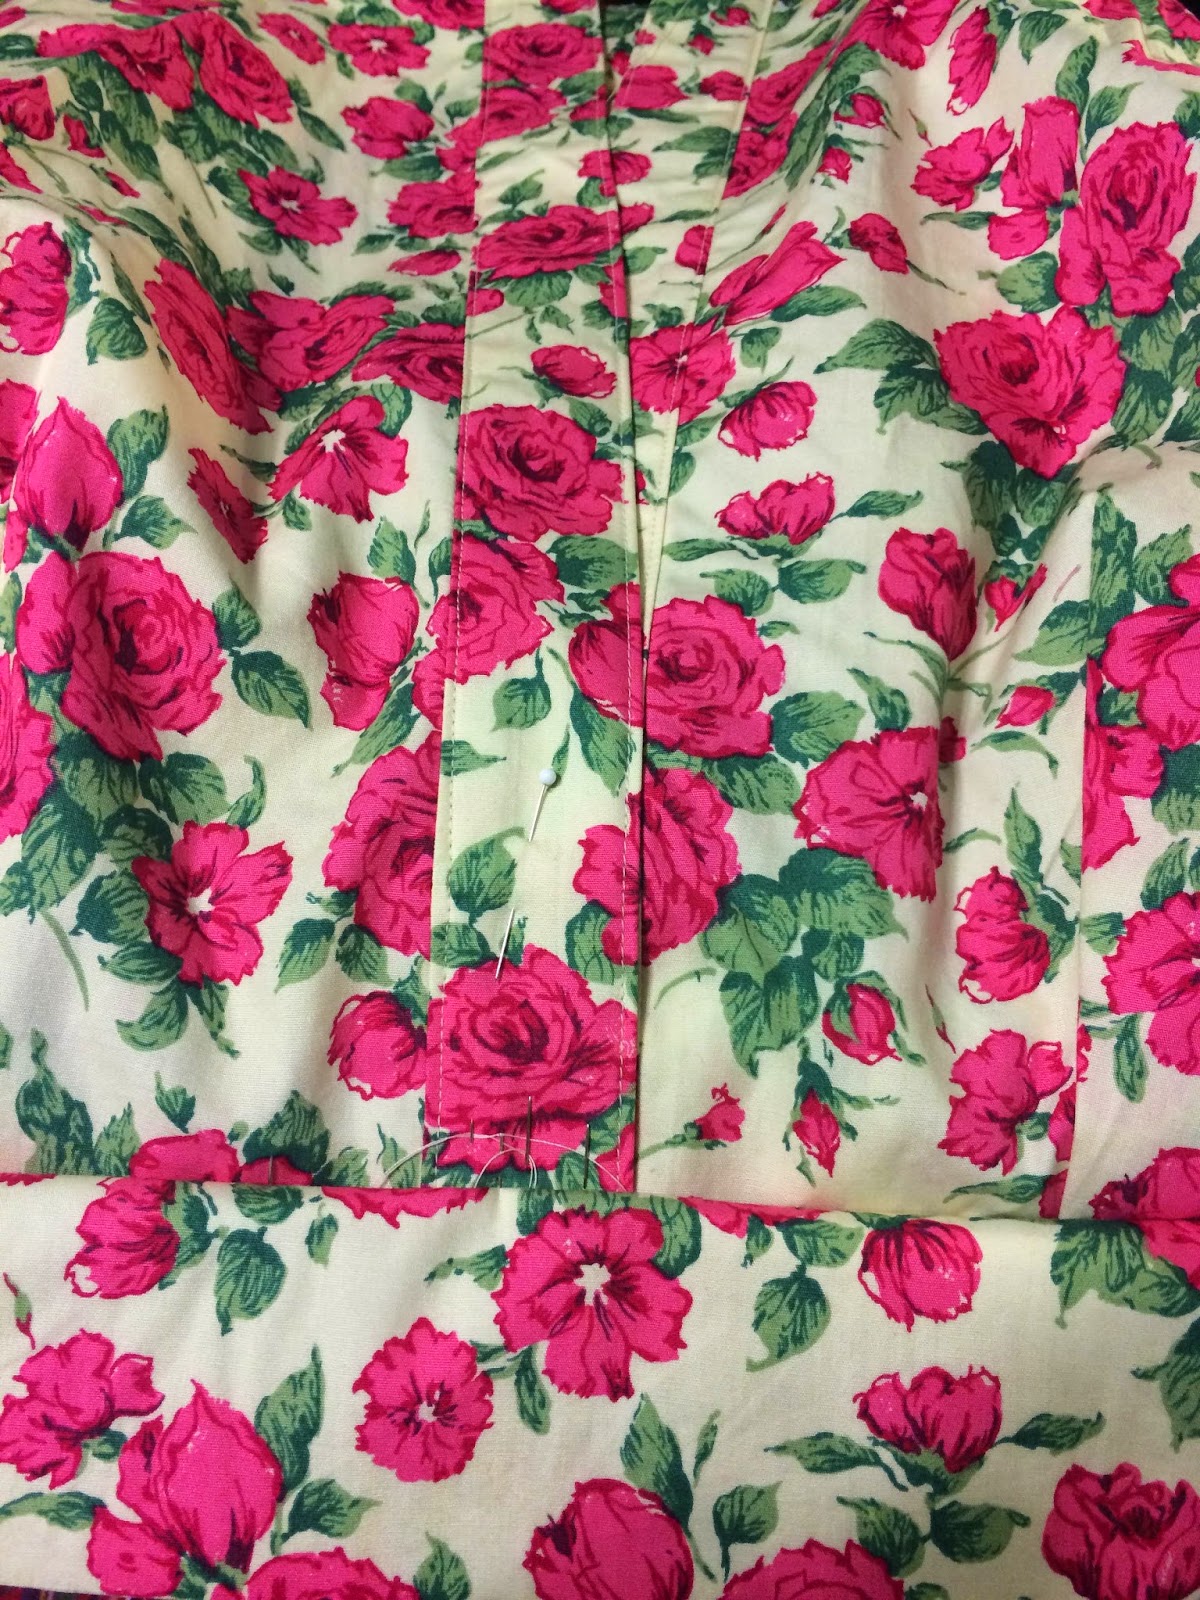
Very carefully put scrap paper underneath all the holes on your pattern, without shifting it around. (Hooray pattern weights!) Tape this scrap paper down. At each dart, leave extra paper past the pattern's end. We're going to redraw these darts next and will need the extra room!

Step Ten: 

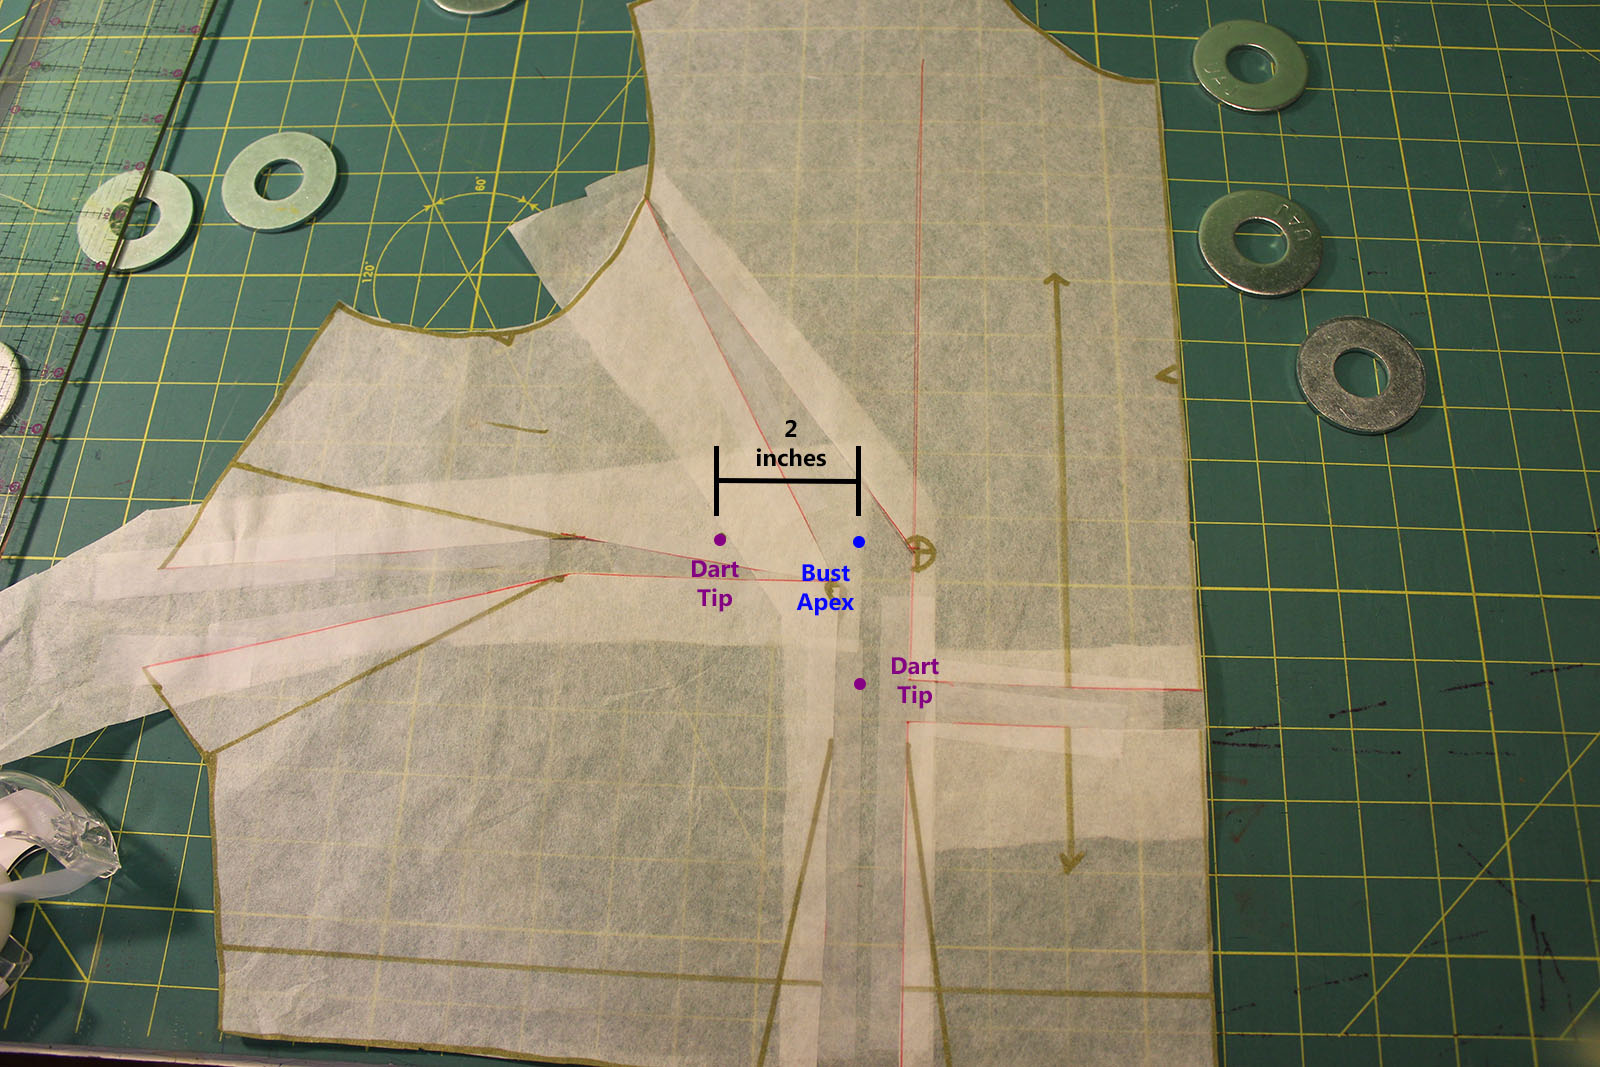
Are you excited about redrawing darts? We're so close to the end. First off, however, we need to mark your bust apex on the new pattern piece. To do this, hold the piece up to yourself and mark the fullest point of your bust on the pattern piece. I've marked my own in blue in the image below.

Step Twelve

Now, there are some standard rules with darts that nobody tells you. You definitely don't want these puppies going all the way to your bust apex. That's how dreadful, pointy hideousness happens! The standard rule of thumb is to position the dart tips one inch away from your bust apex. For larger cup sizes, however, this rule doesn't always hold true. If you have a large bosom, your actual bust apex takes up more room, after all. Over time, you will find what works best for you, but for large busts, I like the dart tips to be two inches from the apex instead.

To mark these, measure two inches to the left of your bust apex, then mark that dot for your side bust dart. Then, measure two inches below your bust apex, and mark that dart for your waist dart. I've marked these dots in purple in the above image.

You have new dart ends! Woohoo!

Note: Some people prefer to mark their apex, before doing an FBA spread, but this depends on personal preference. Whatever order you find the most helpful will come to the same end! I find that my apex is rarely in line with the pattern's apex, but instead on a horizontal plane, just to the outside. (I'm told that this is a common Very Large Bosom issue.) For this reason, I mark it after slashing and spreading, so that I can better see how the dart placement is. If your apex does not line up with the original pattern's or your new slashed bodice, it's really easy to move your darts. I like to do this, after finishing the FBA and find this method particularly helpful. 

Step Eleven:

Step Thirteen

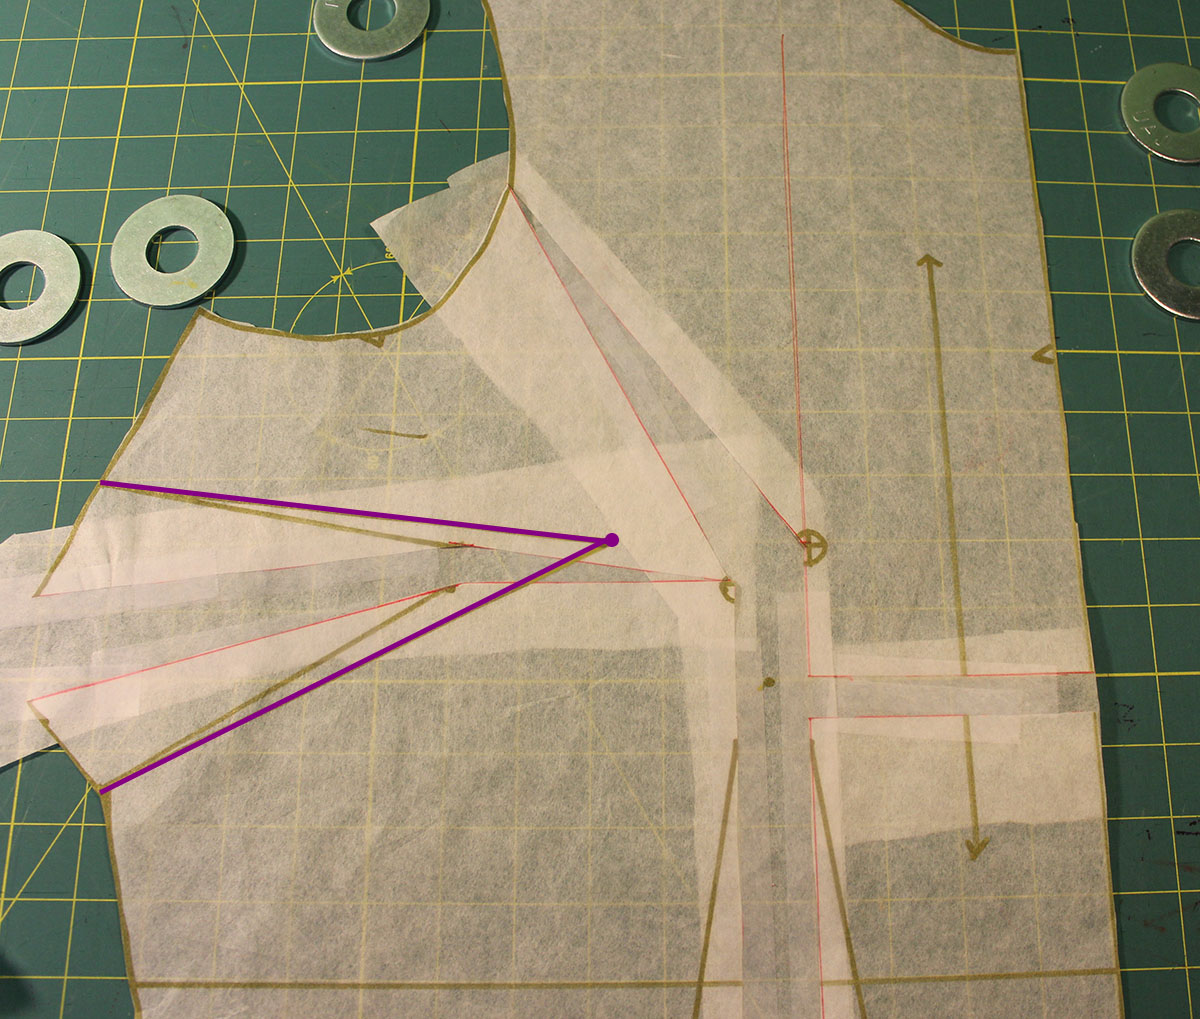
It's now time to redraw your side bust dart! To do this, use your ruler and draw two straight lines from the original dart ends, to your new dart tip. I've done this in purple above. Completely ignore the original dart legs. You're blazing your own path and don't need to follow those! Just go straight to your personal dart tip. 

Step Twelve: 

Step Fourteen

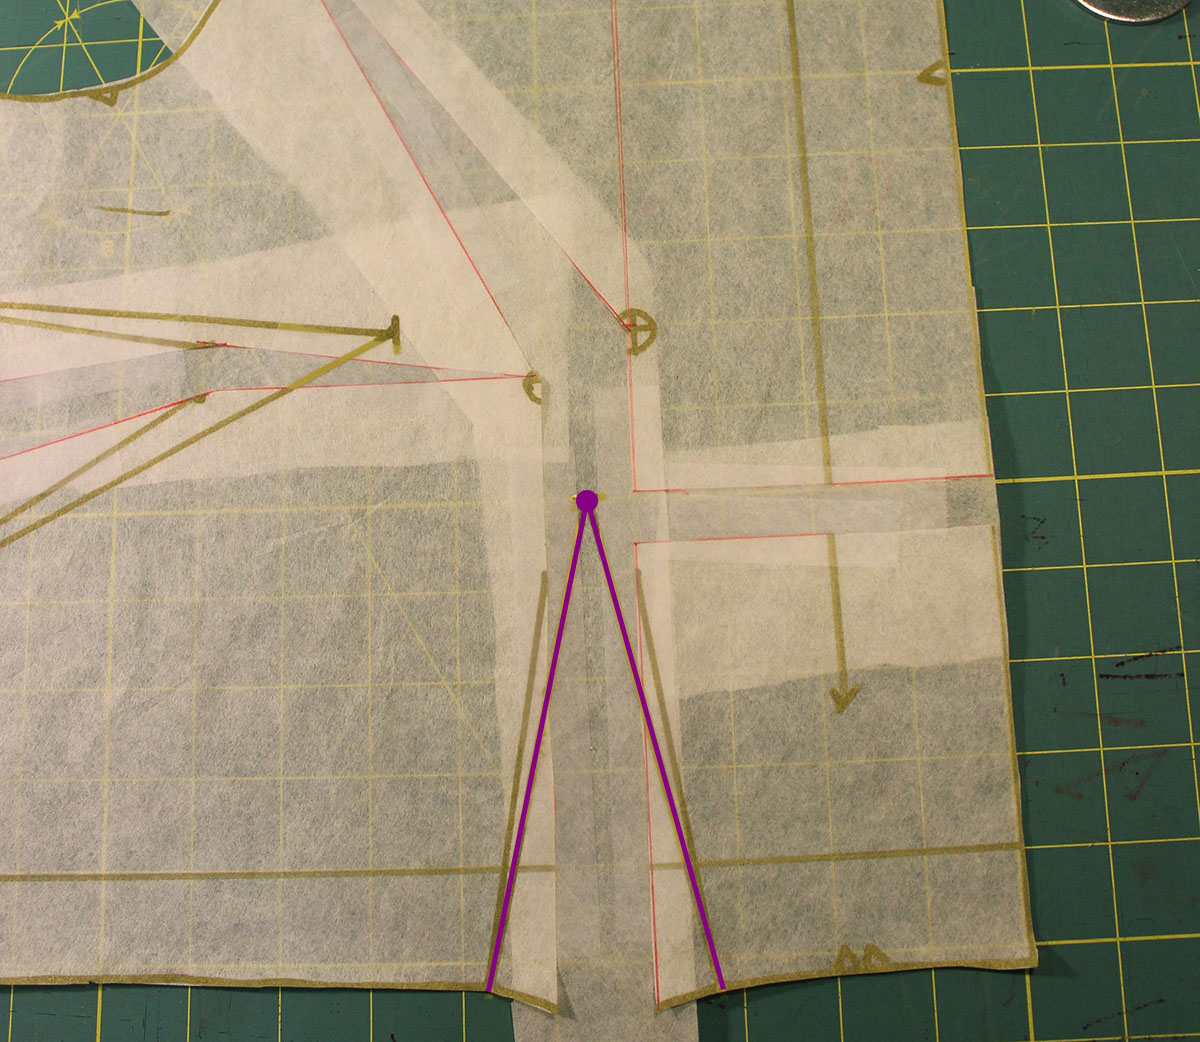
Repeat the same process for your waist dart. Beginning at your original dart ends, draw two straight lines up to your new dart tip. Once again, completely ignore that you're not following the original dart legs. Those don't matter for your needs.

Step Thirteen: 

We're so close to the end! We just need to get rid of all that extra paper.

Step Fifteen B

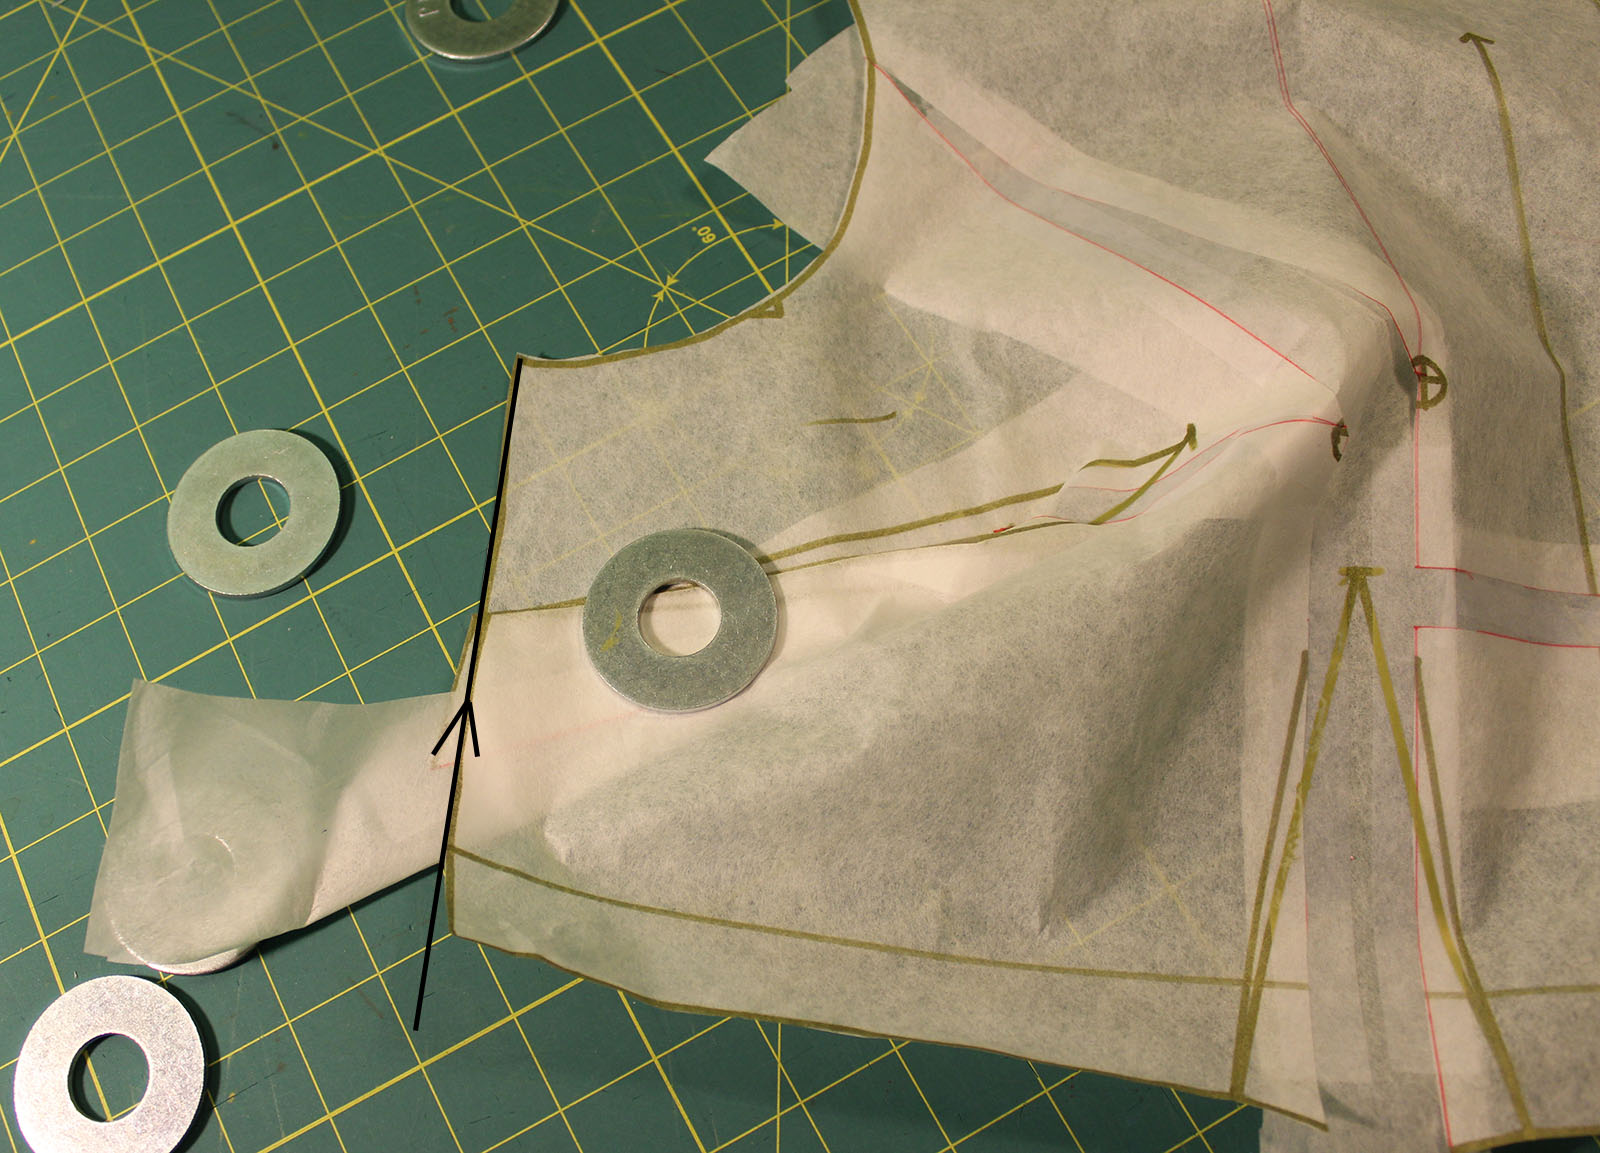
To do this, fold your new dart legs together, as I have done above on the side bust dart. Once you've folded them together, cut across the end of your pattern piece, noted in black in the above image. Voila! A complete dart is formed! Repeat this process for your second dart.
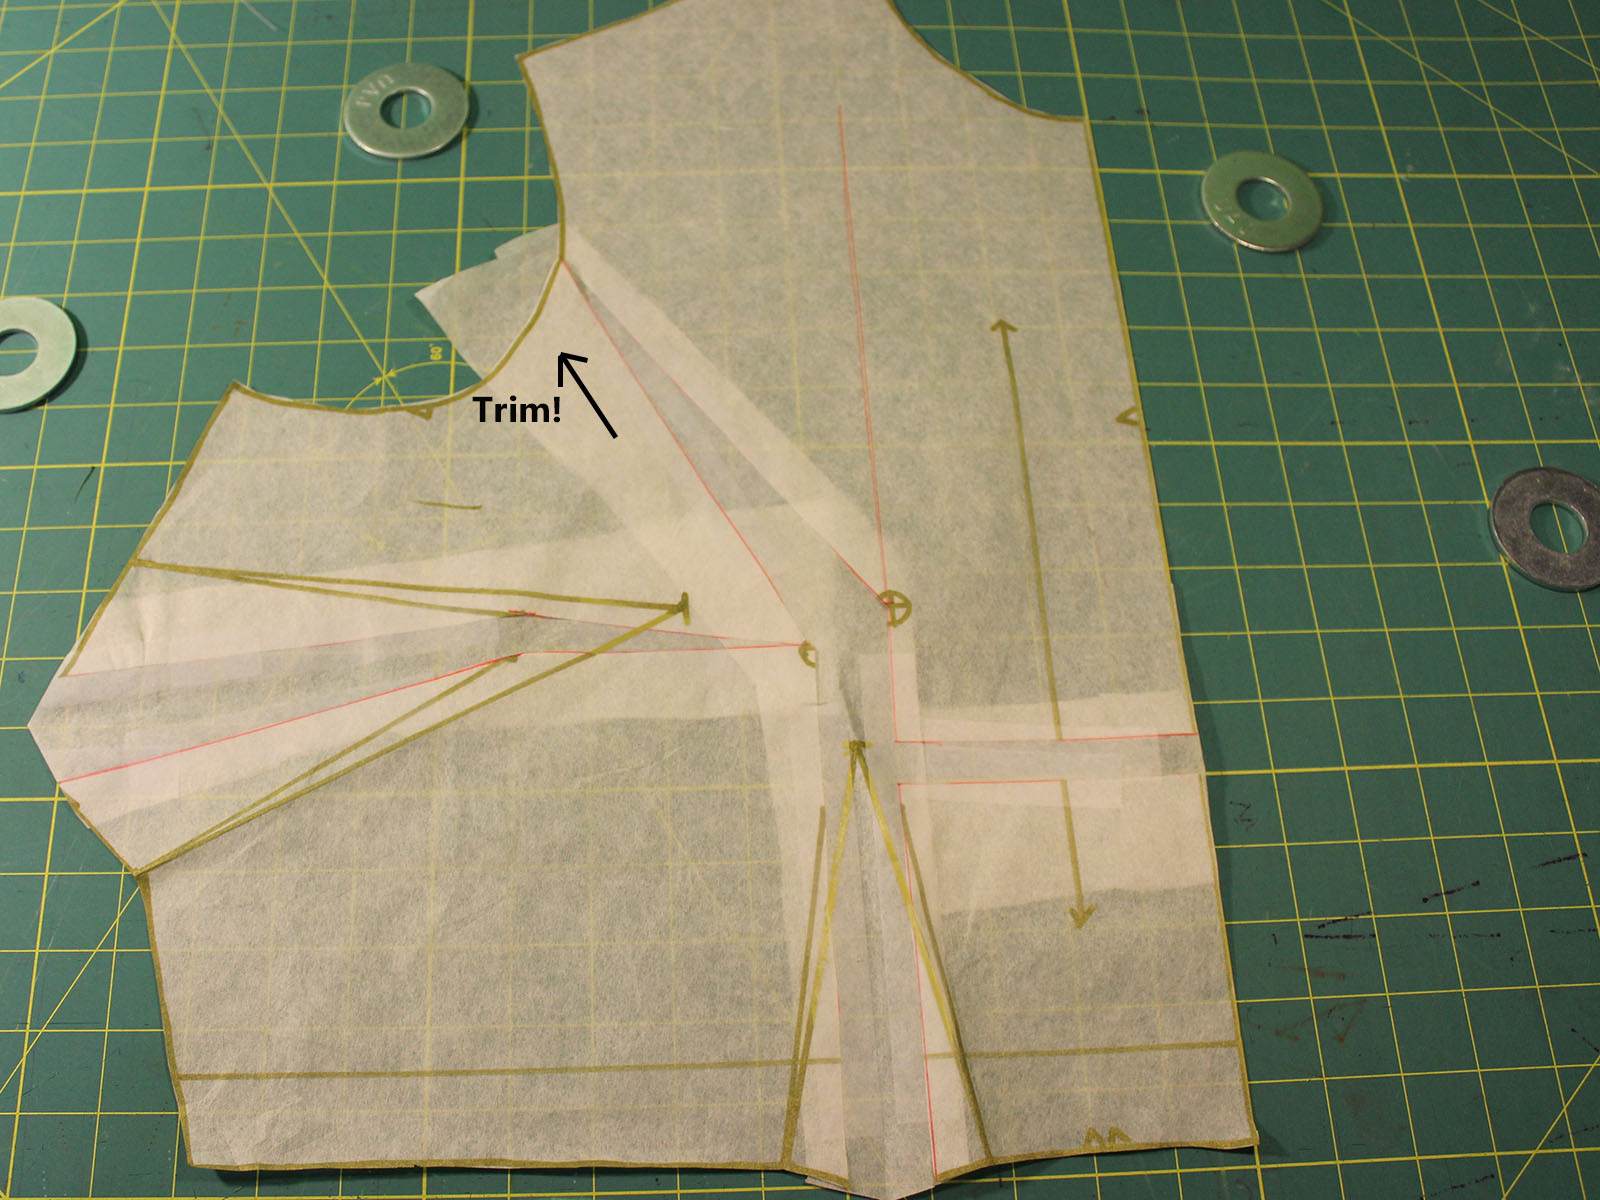
Step Fourteen:

Step Sixteen

Finally, trim that extra paper along your armscye!
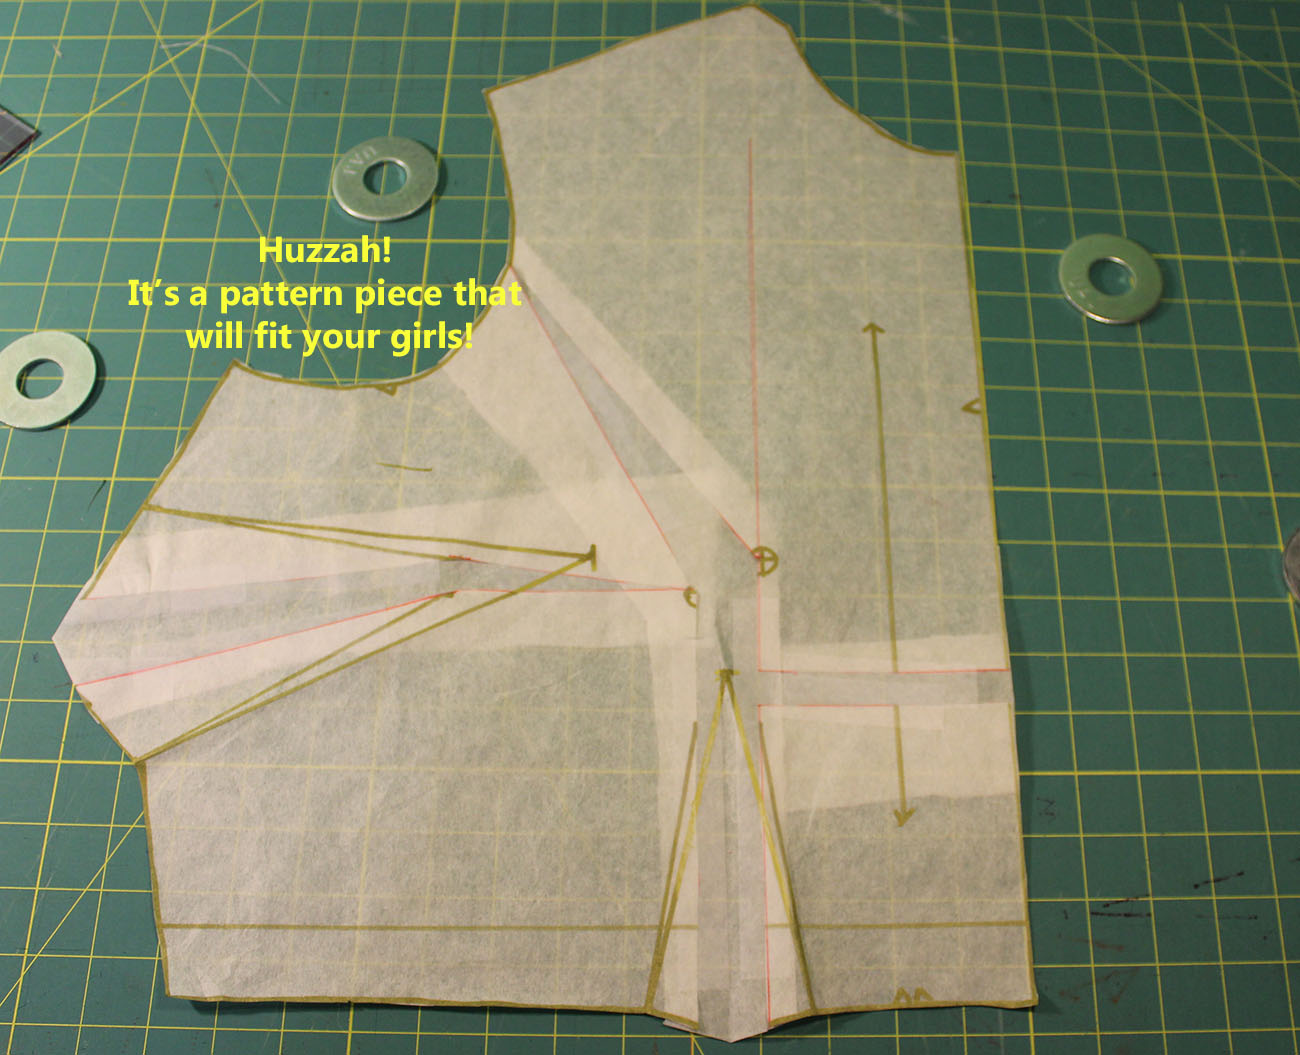
Step Fifteen:

You're done! Do a happy dance!
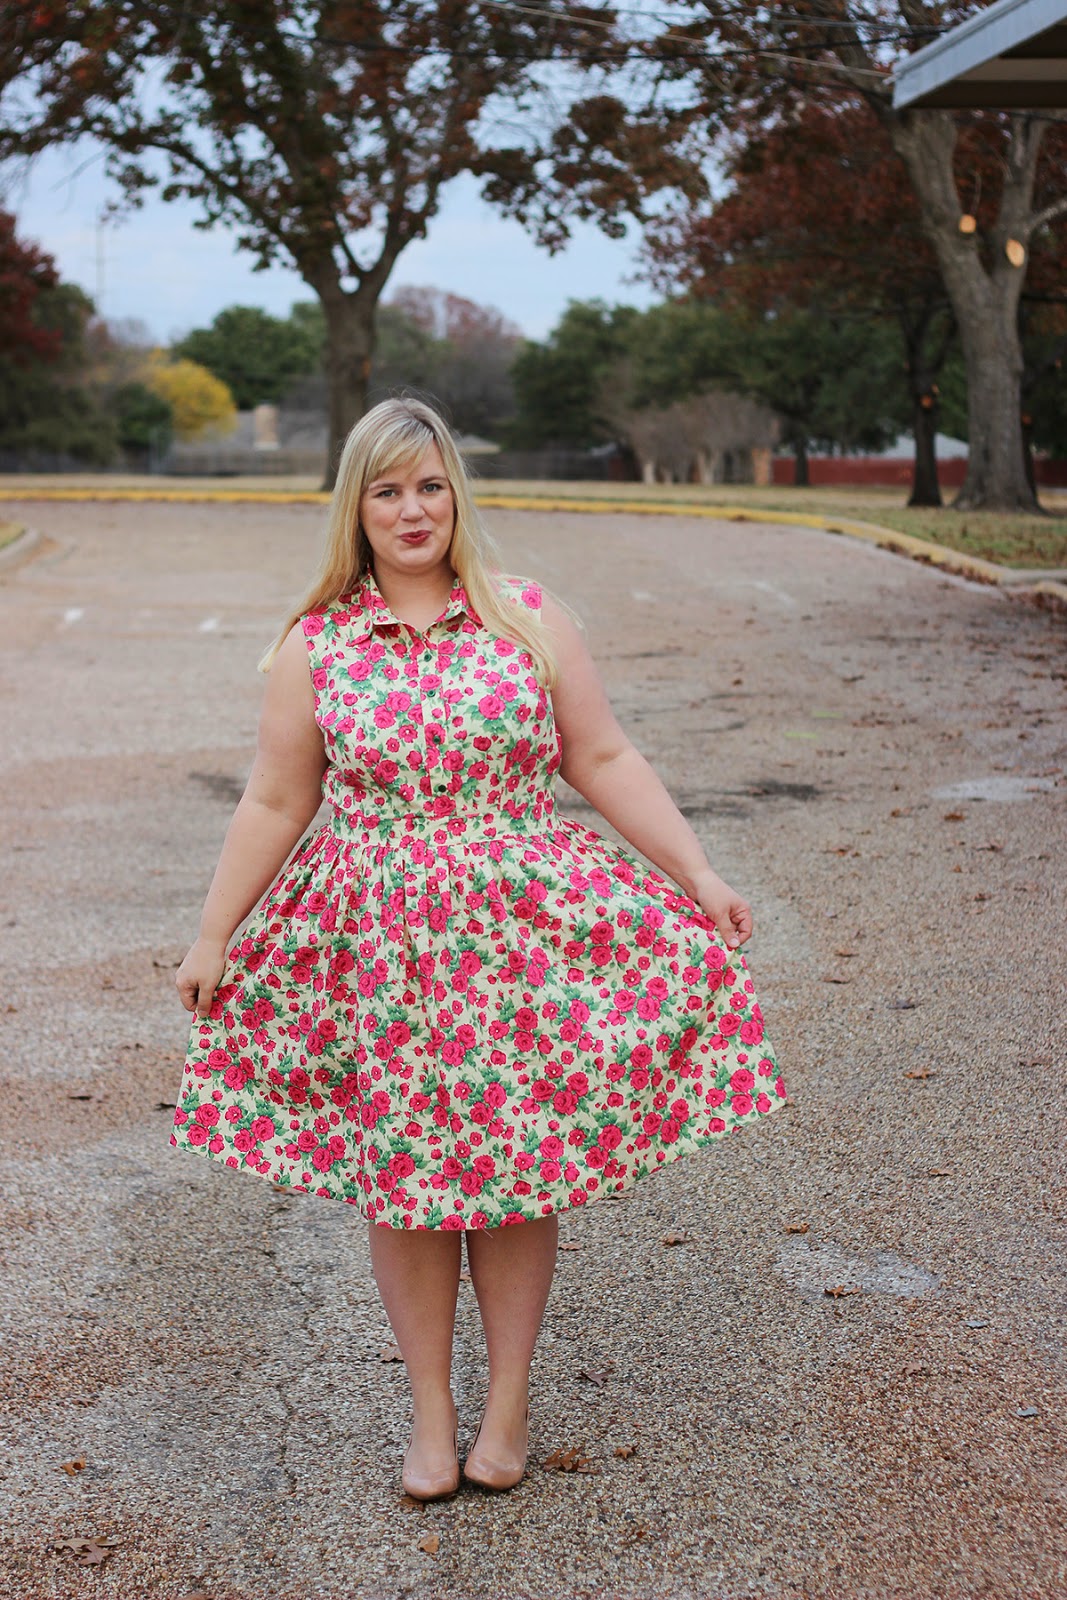
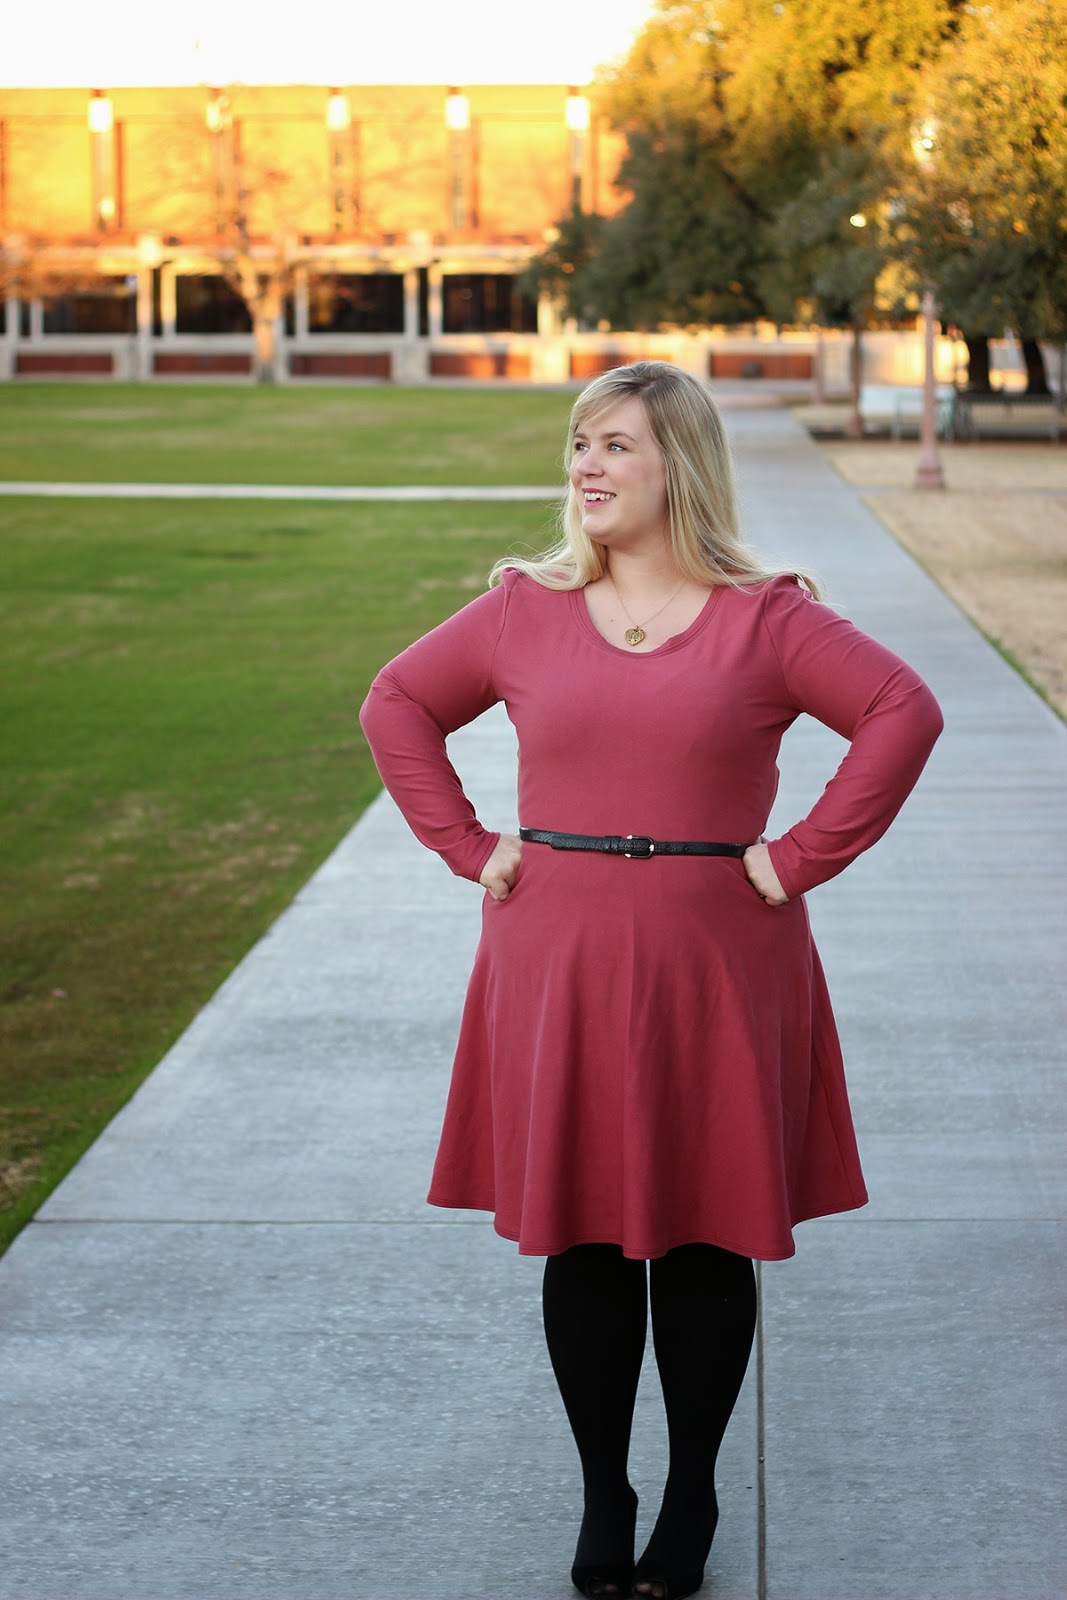
Then, make a muslin of your new bodice and see how you like the fit.

The End

McCalls 6696 - Idle Fancy -9232

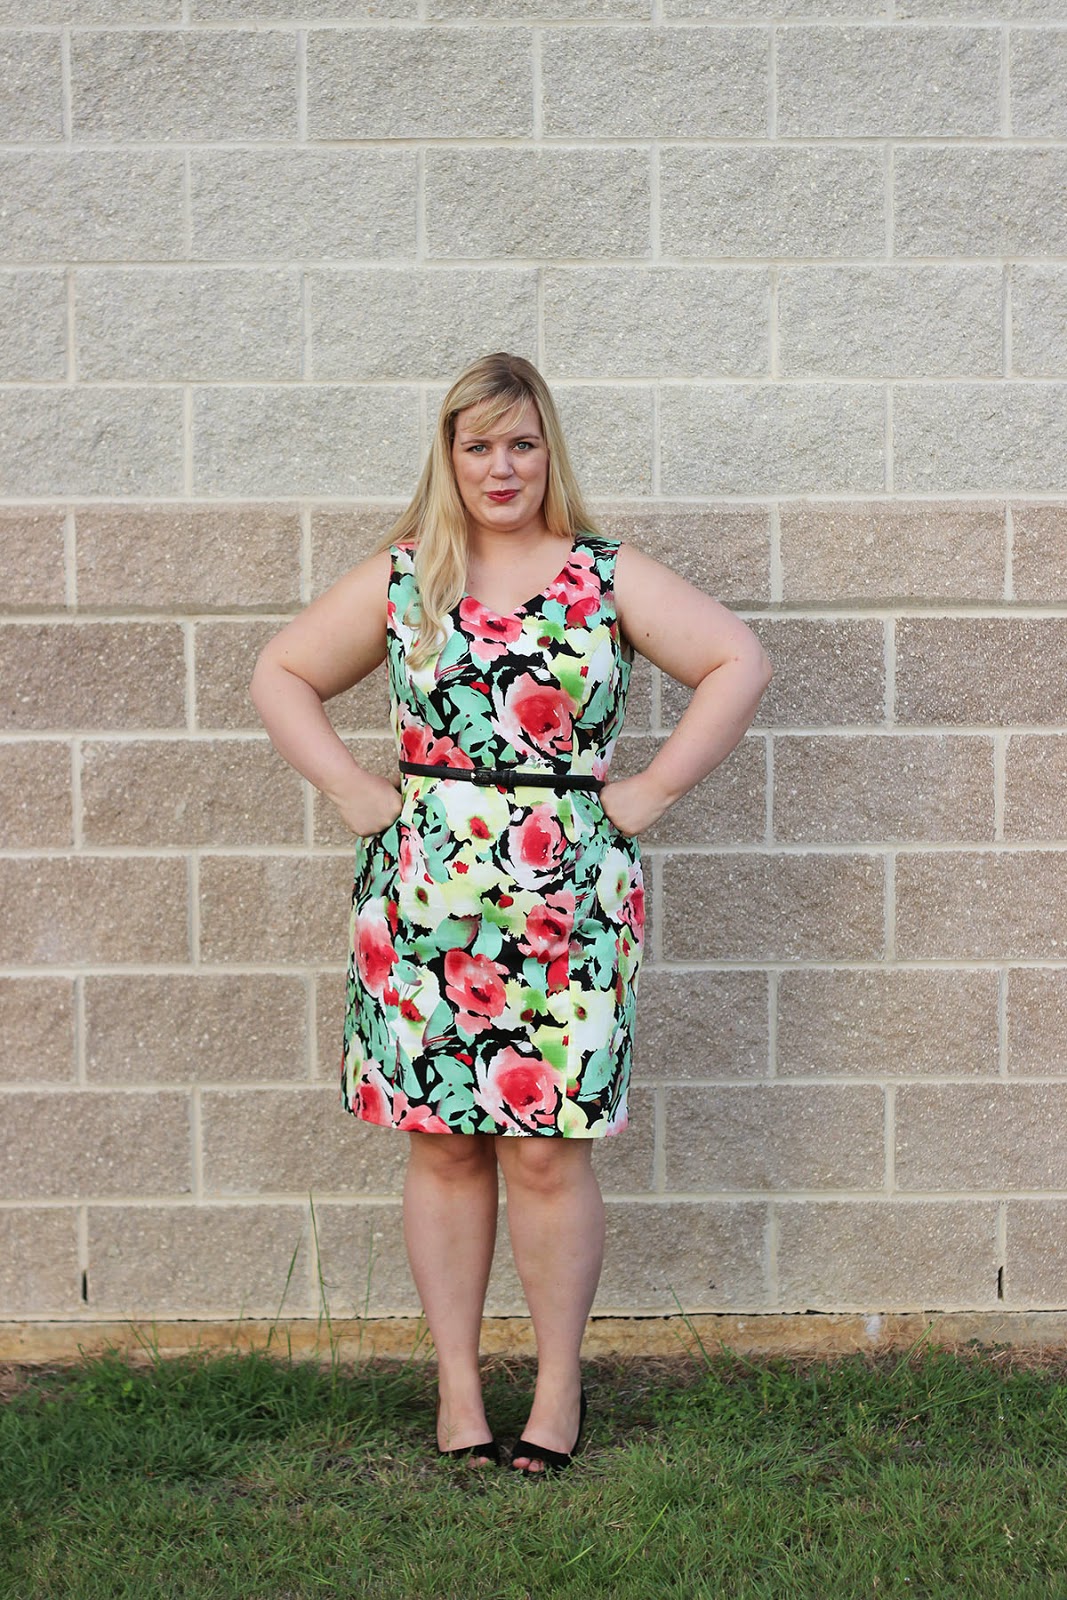
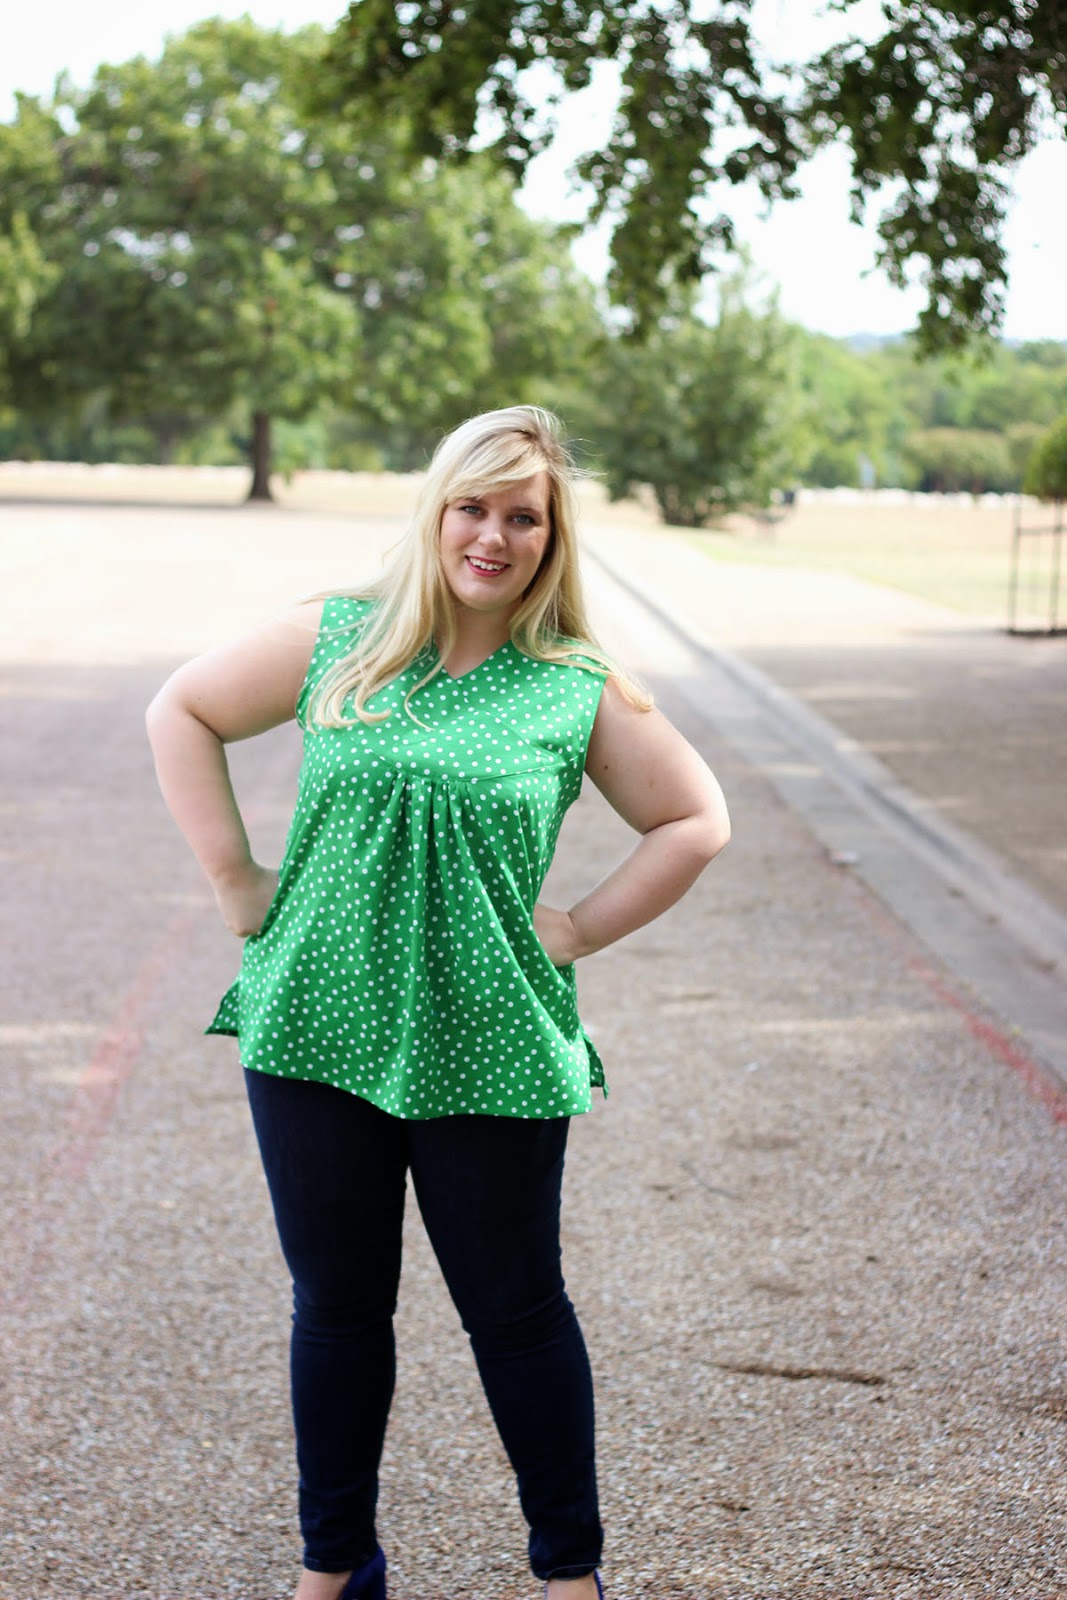
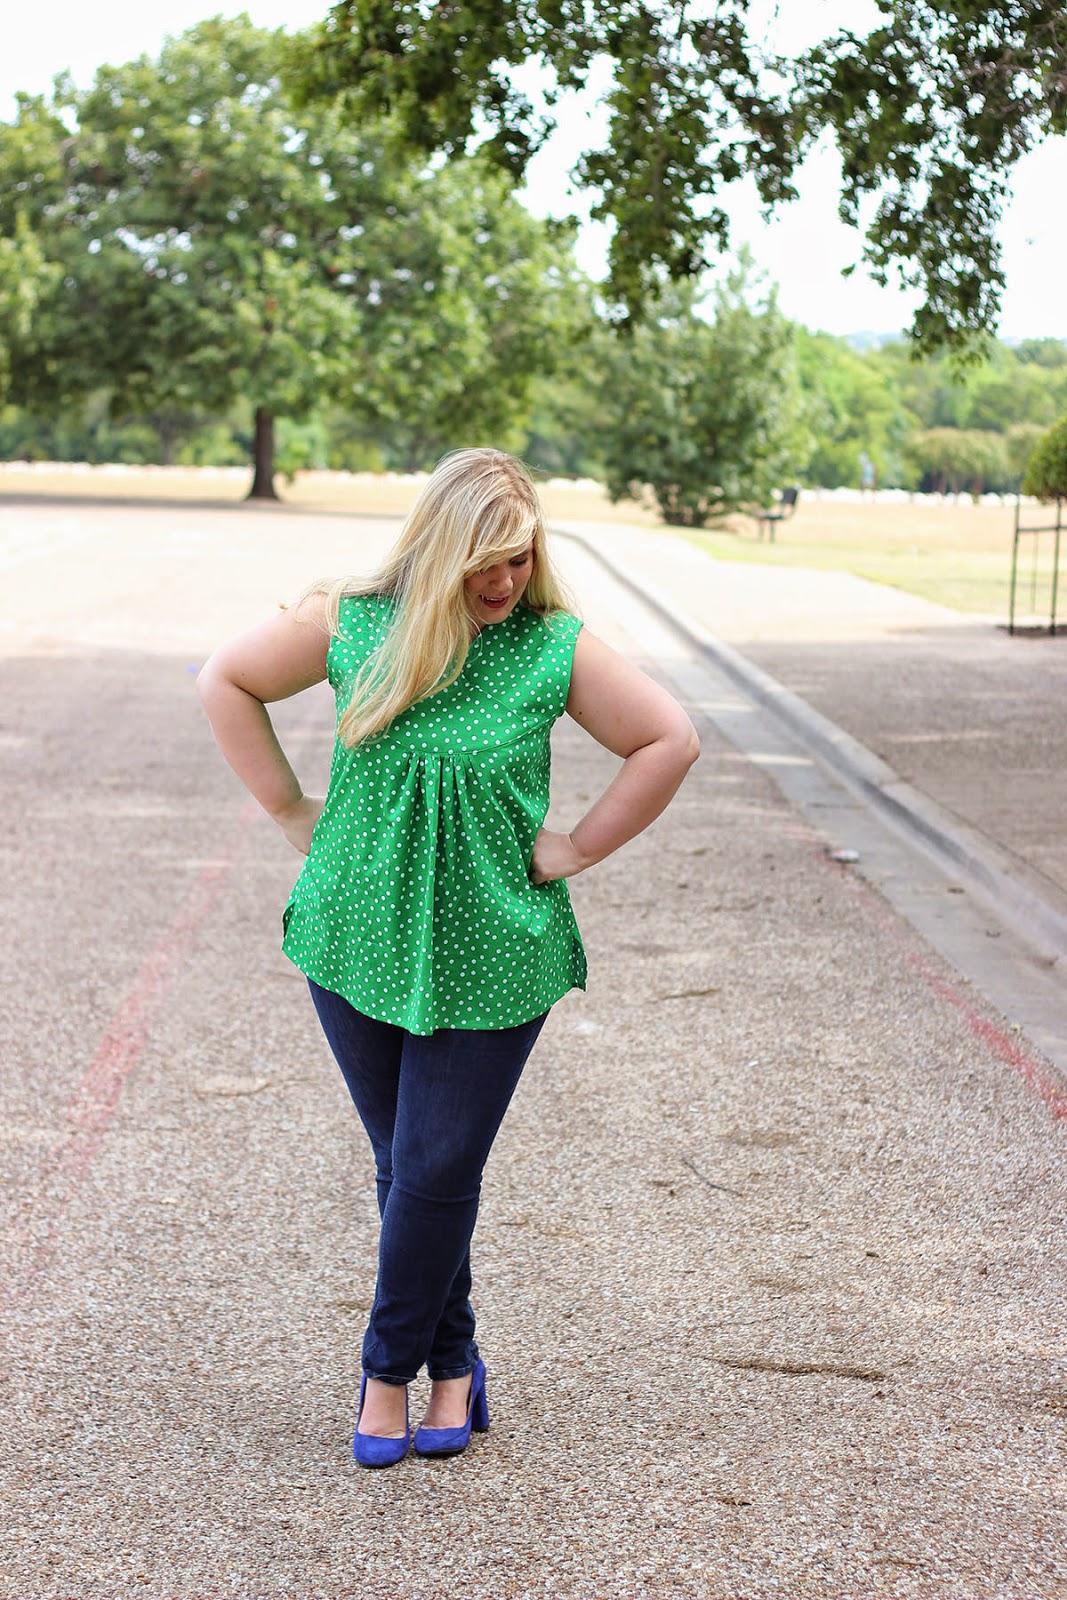
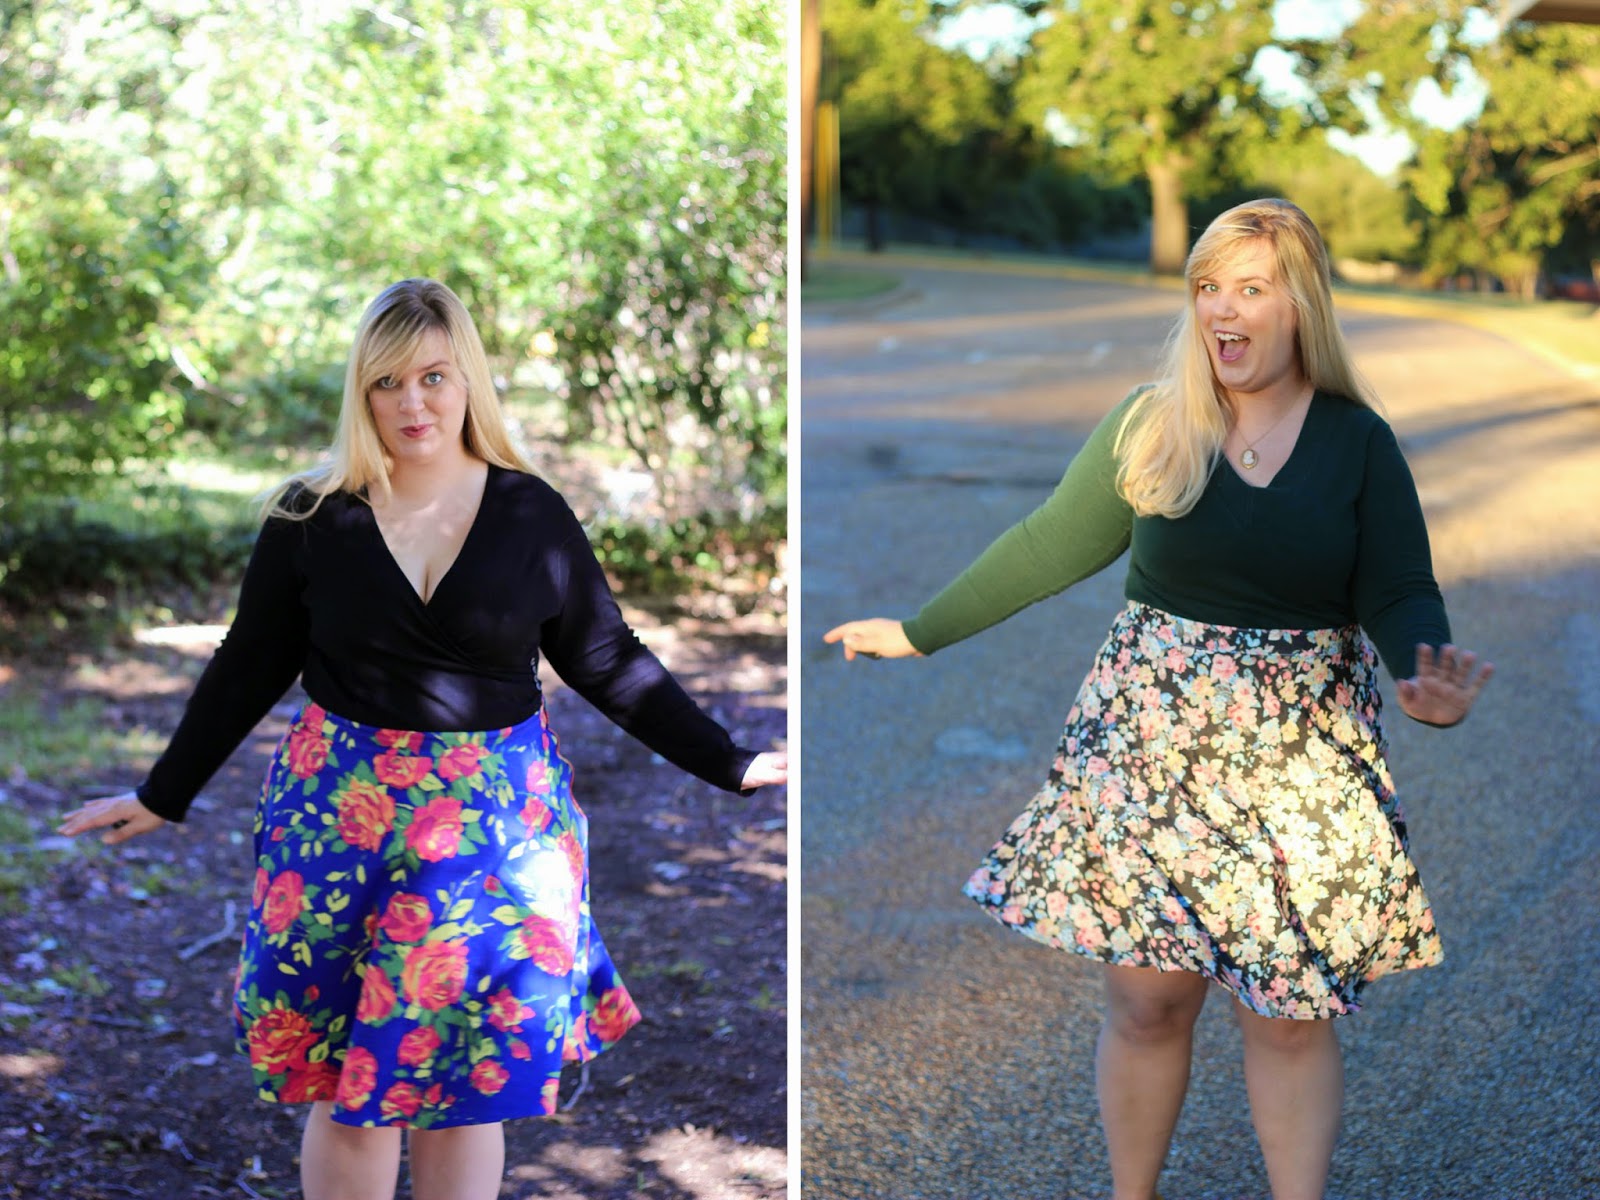
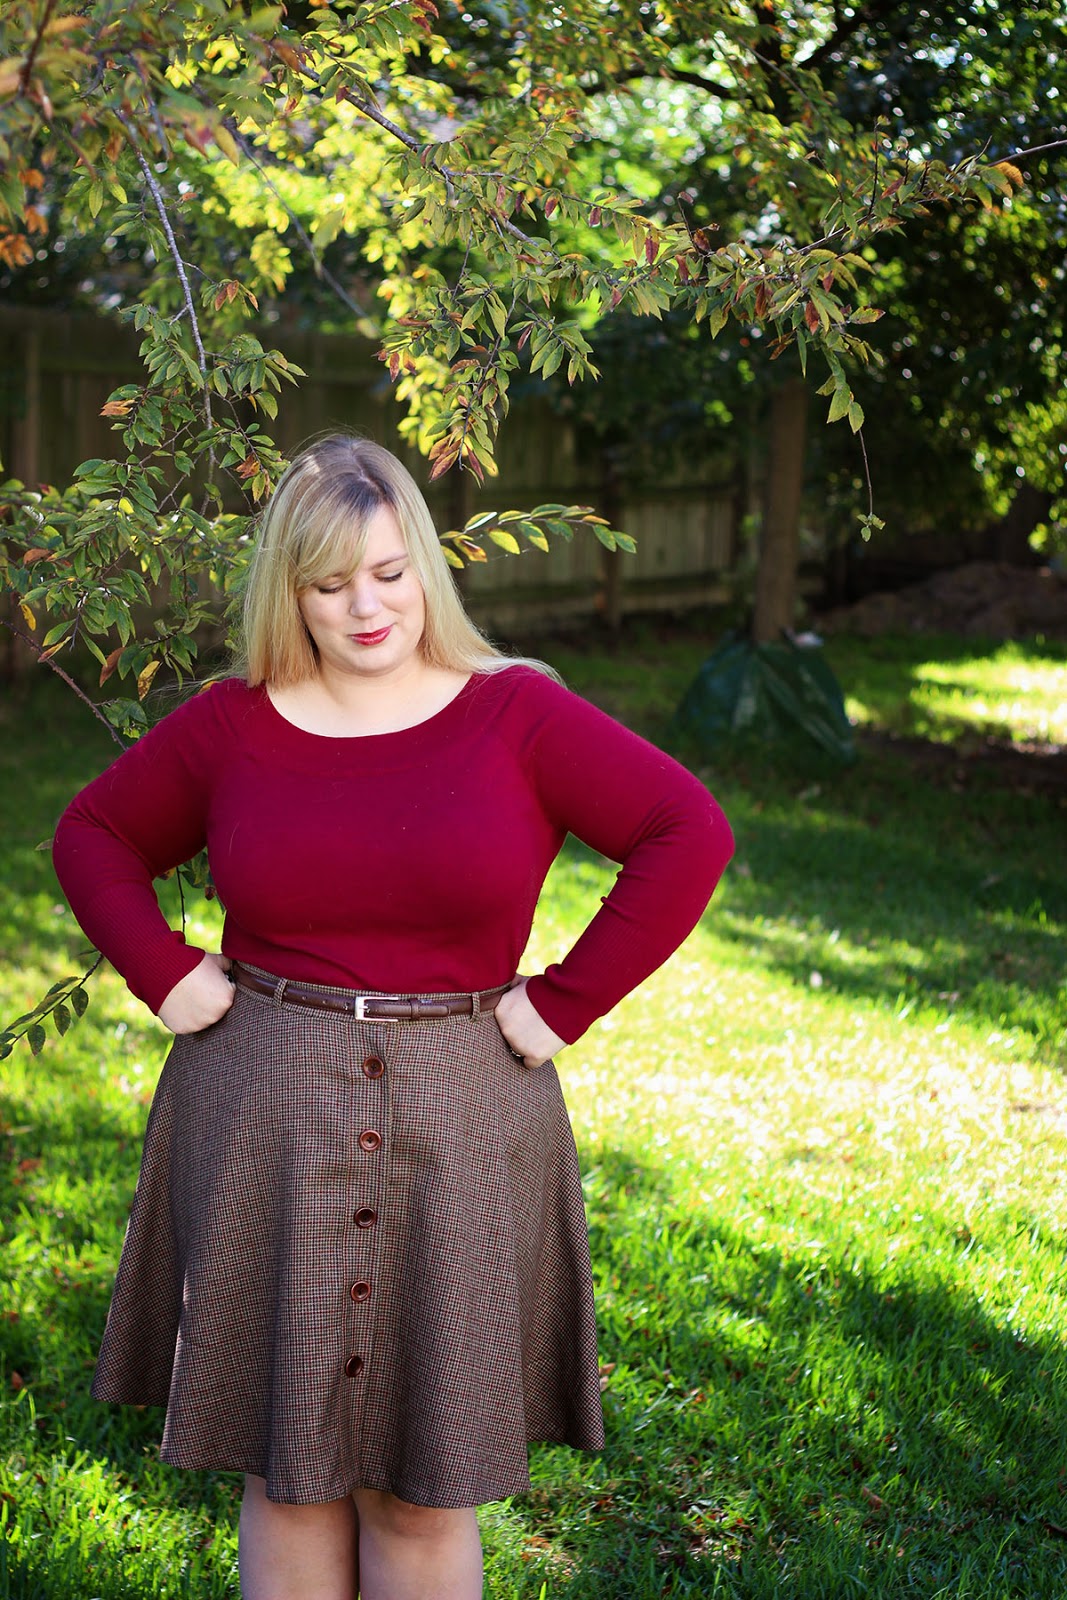
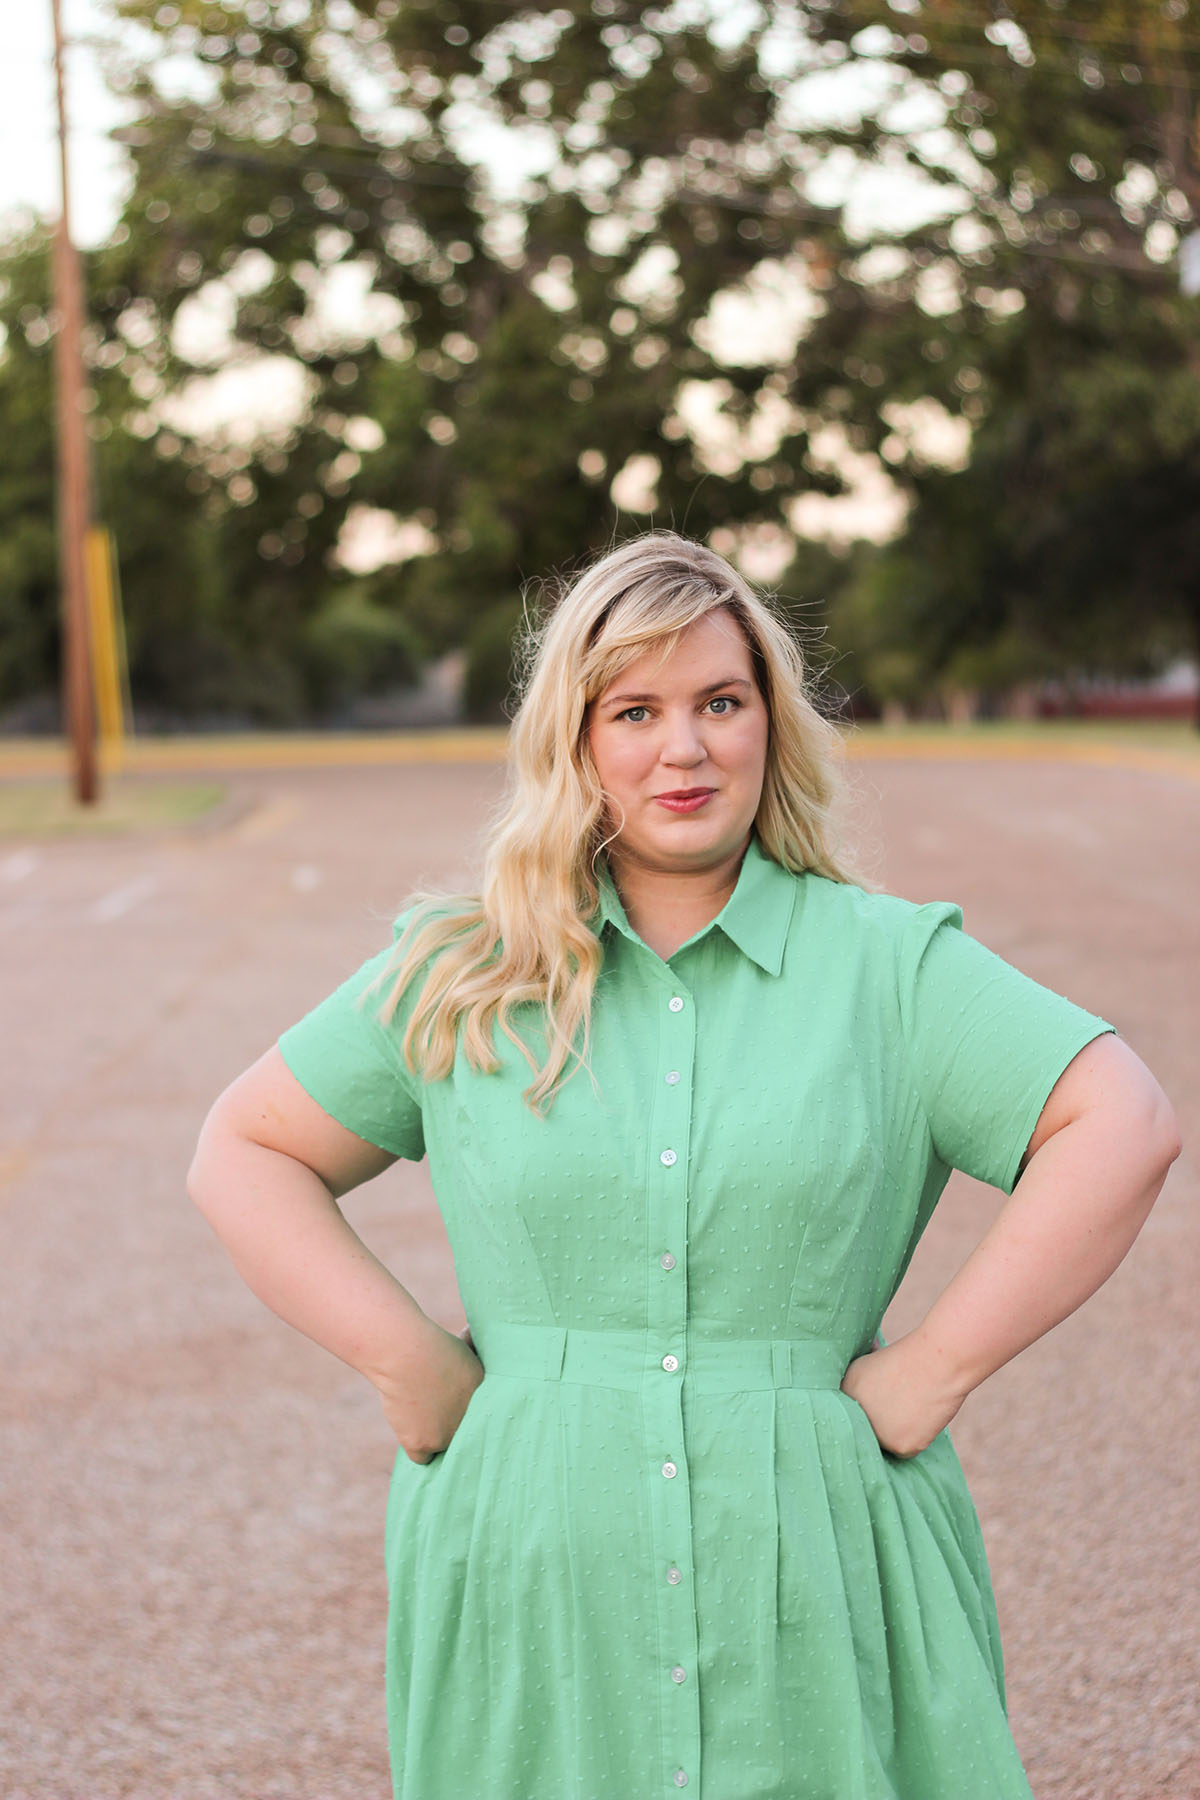
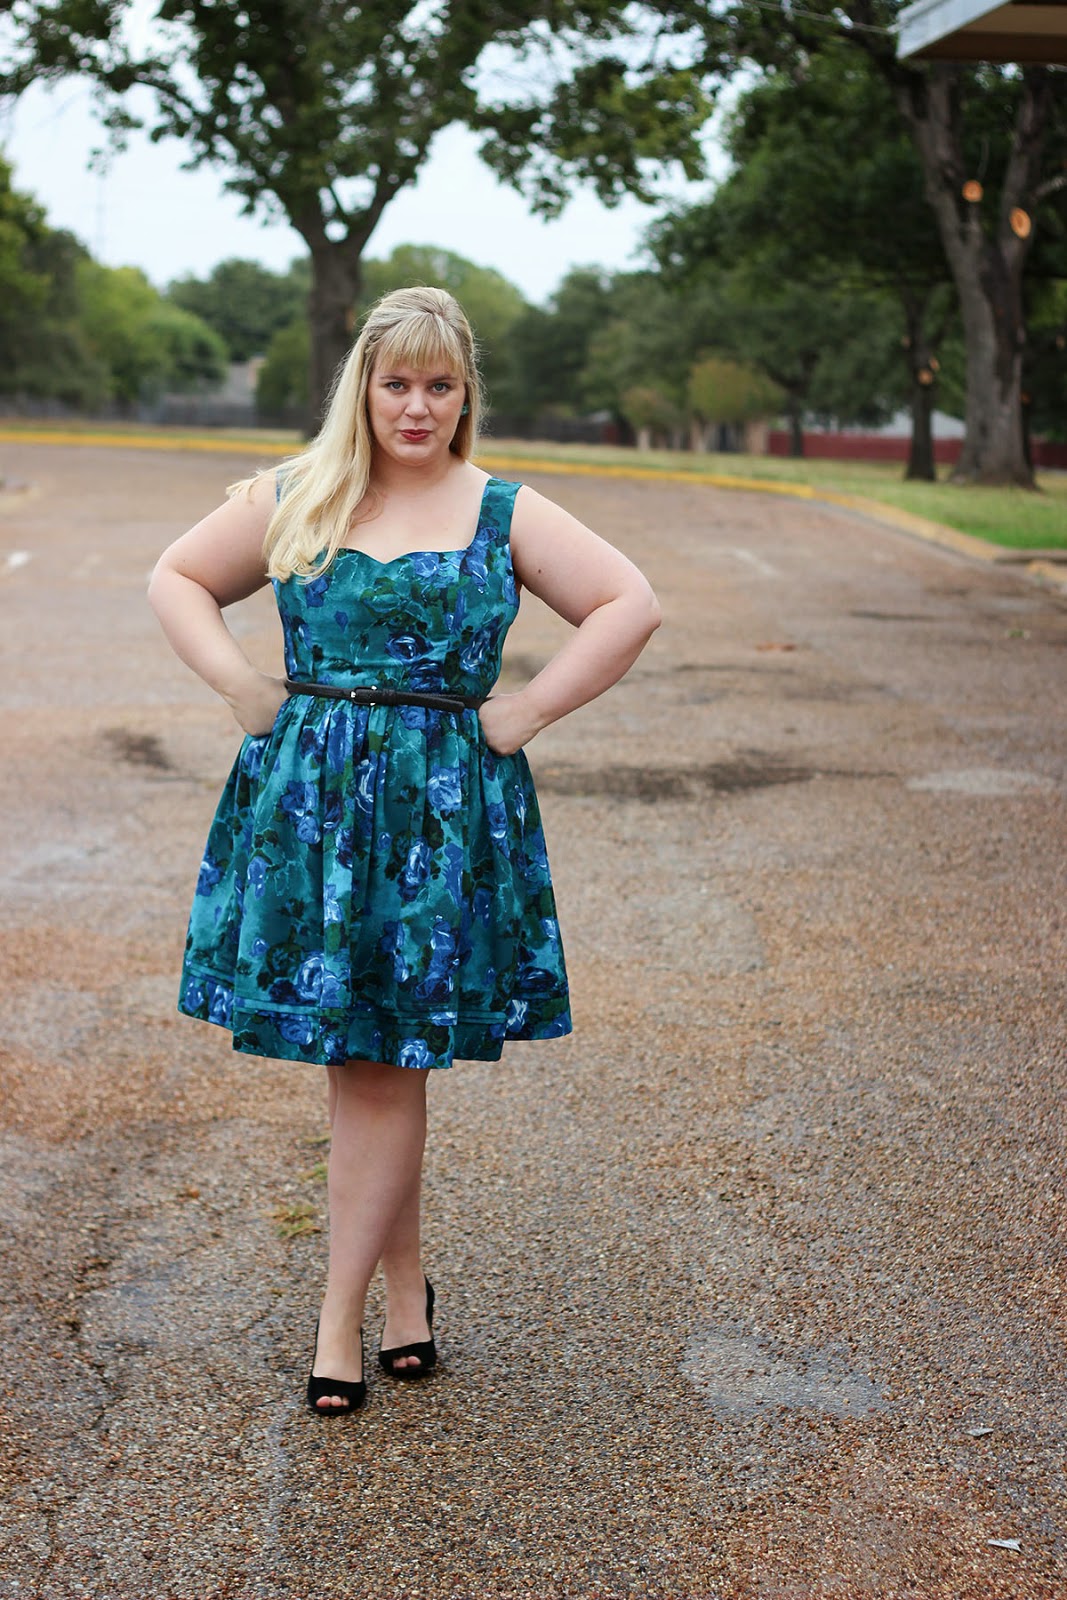
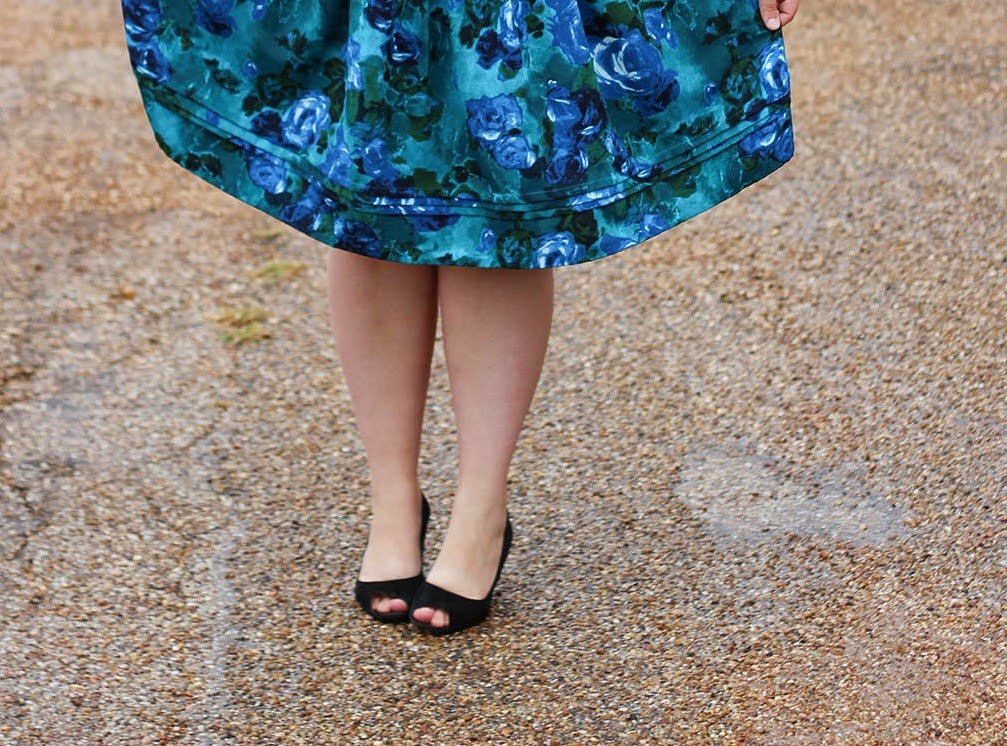
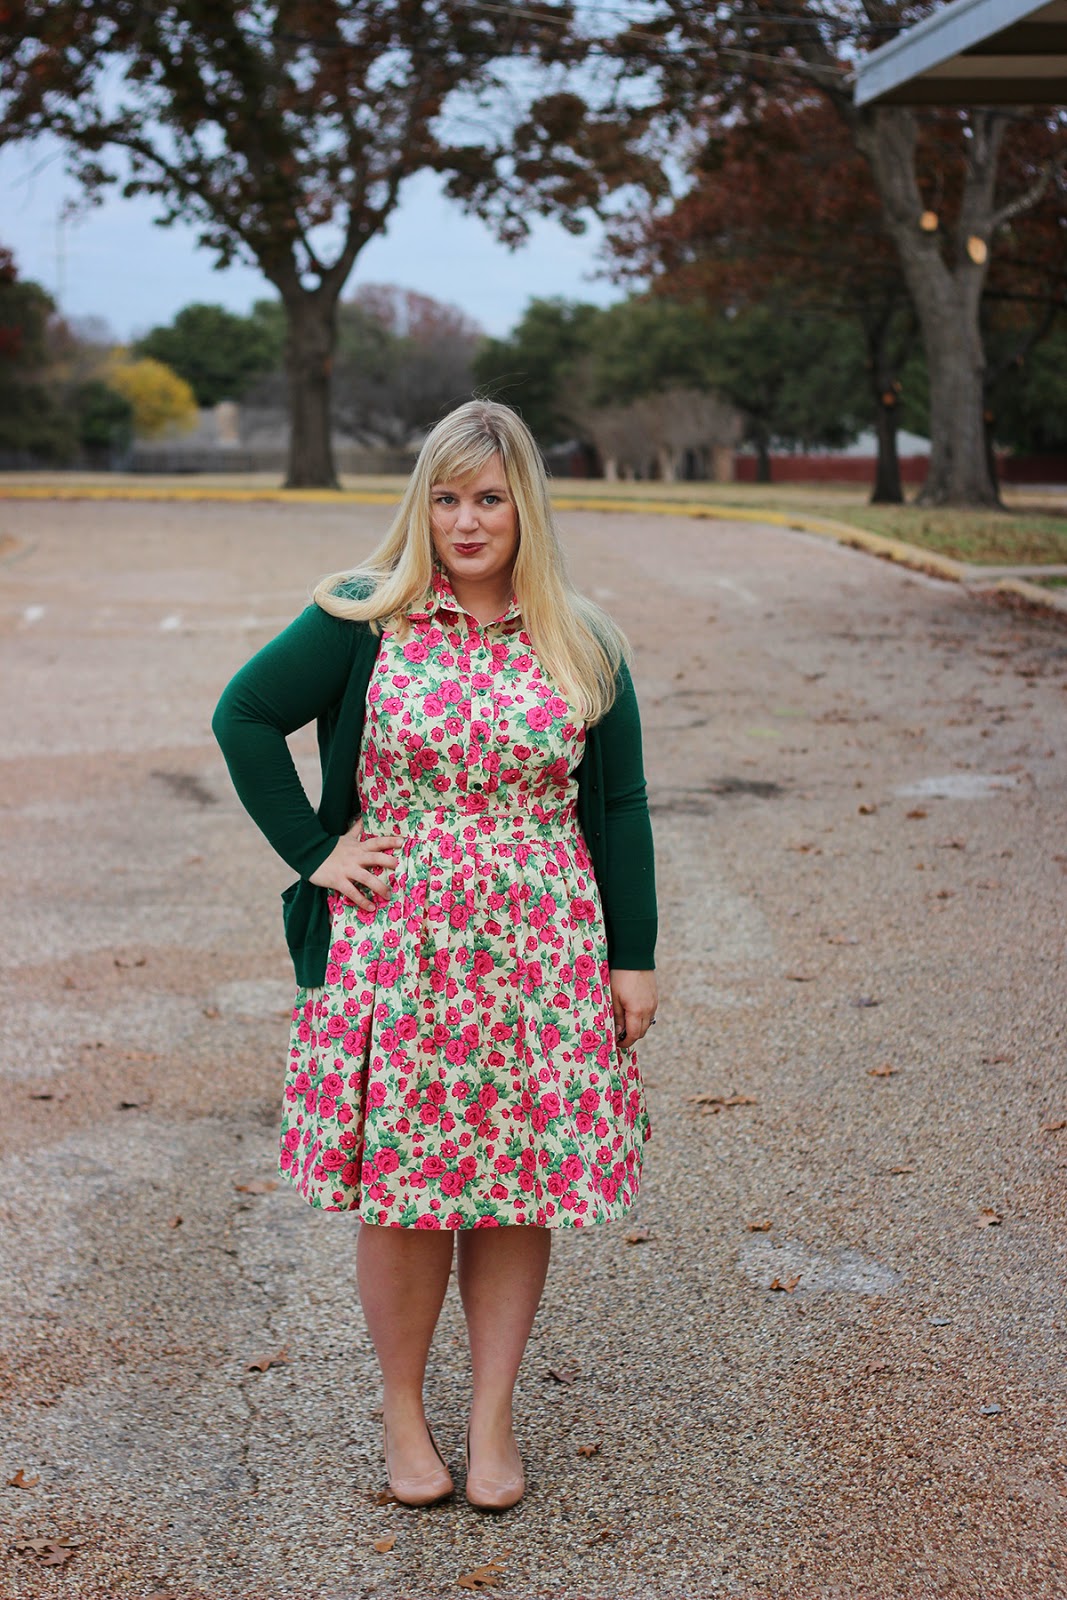
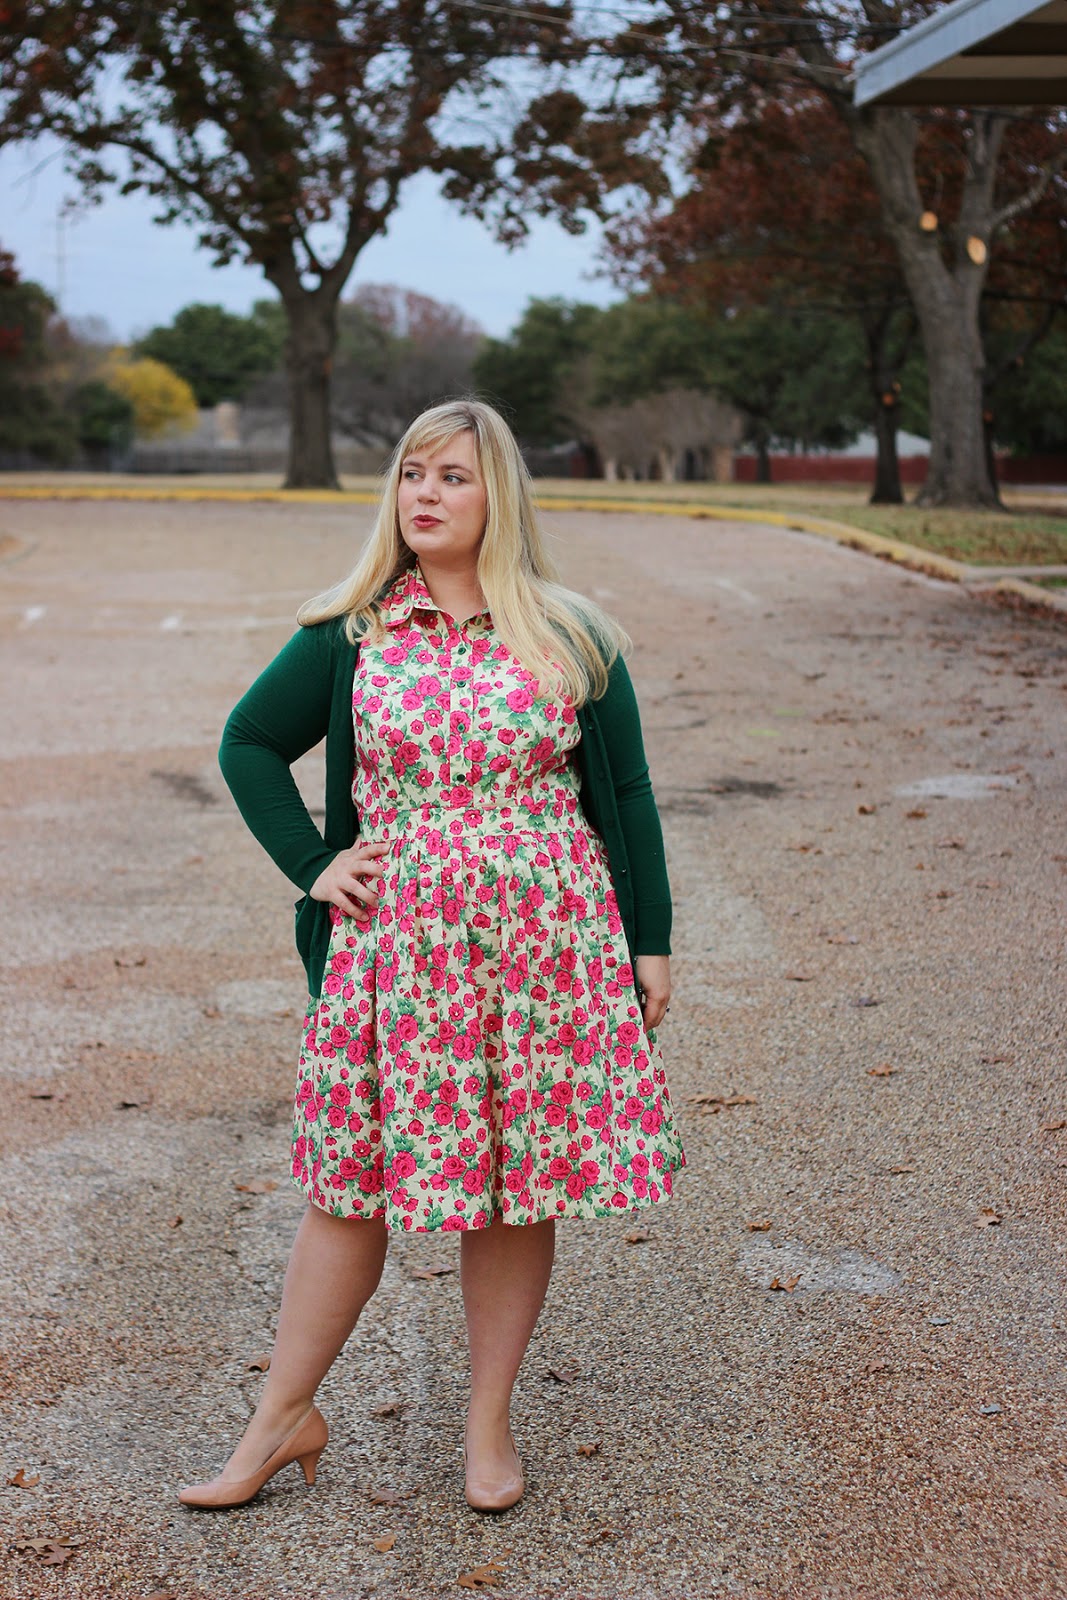
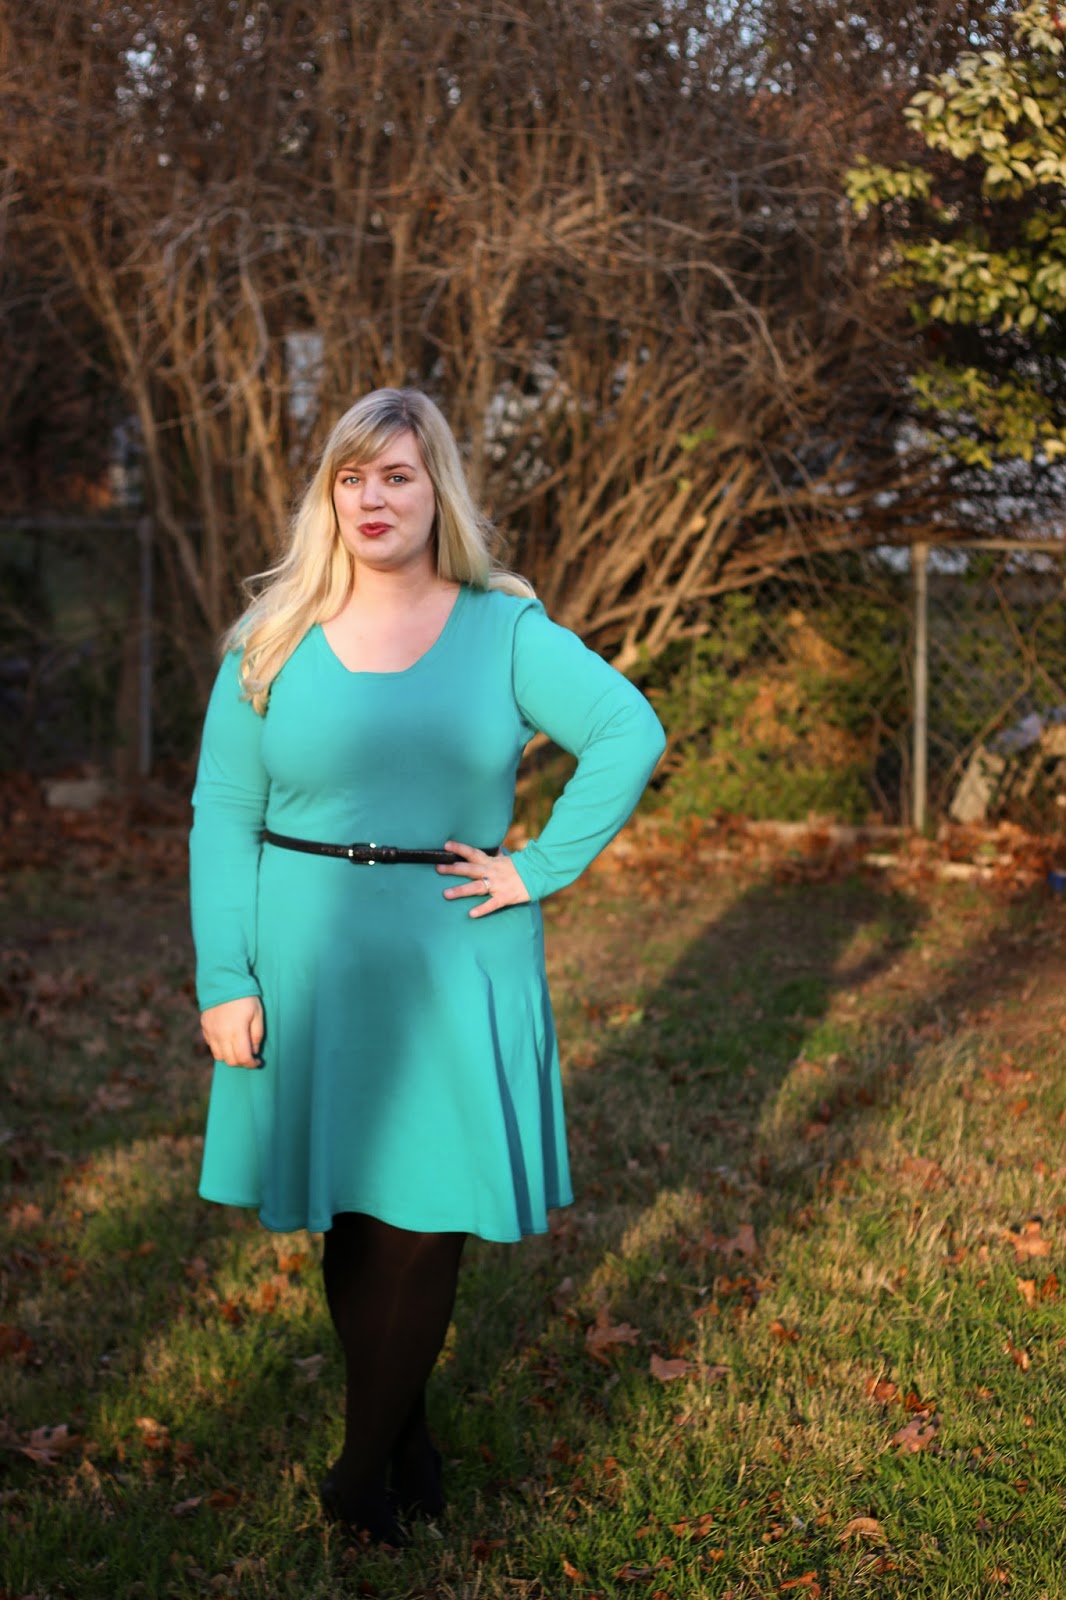
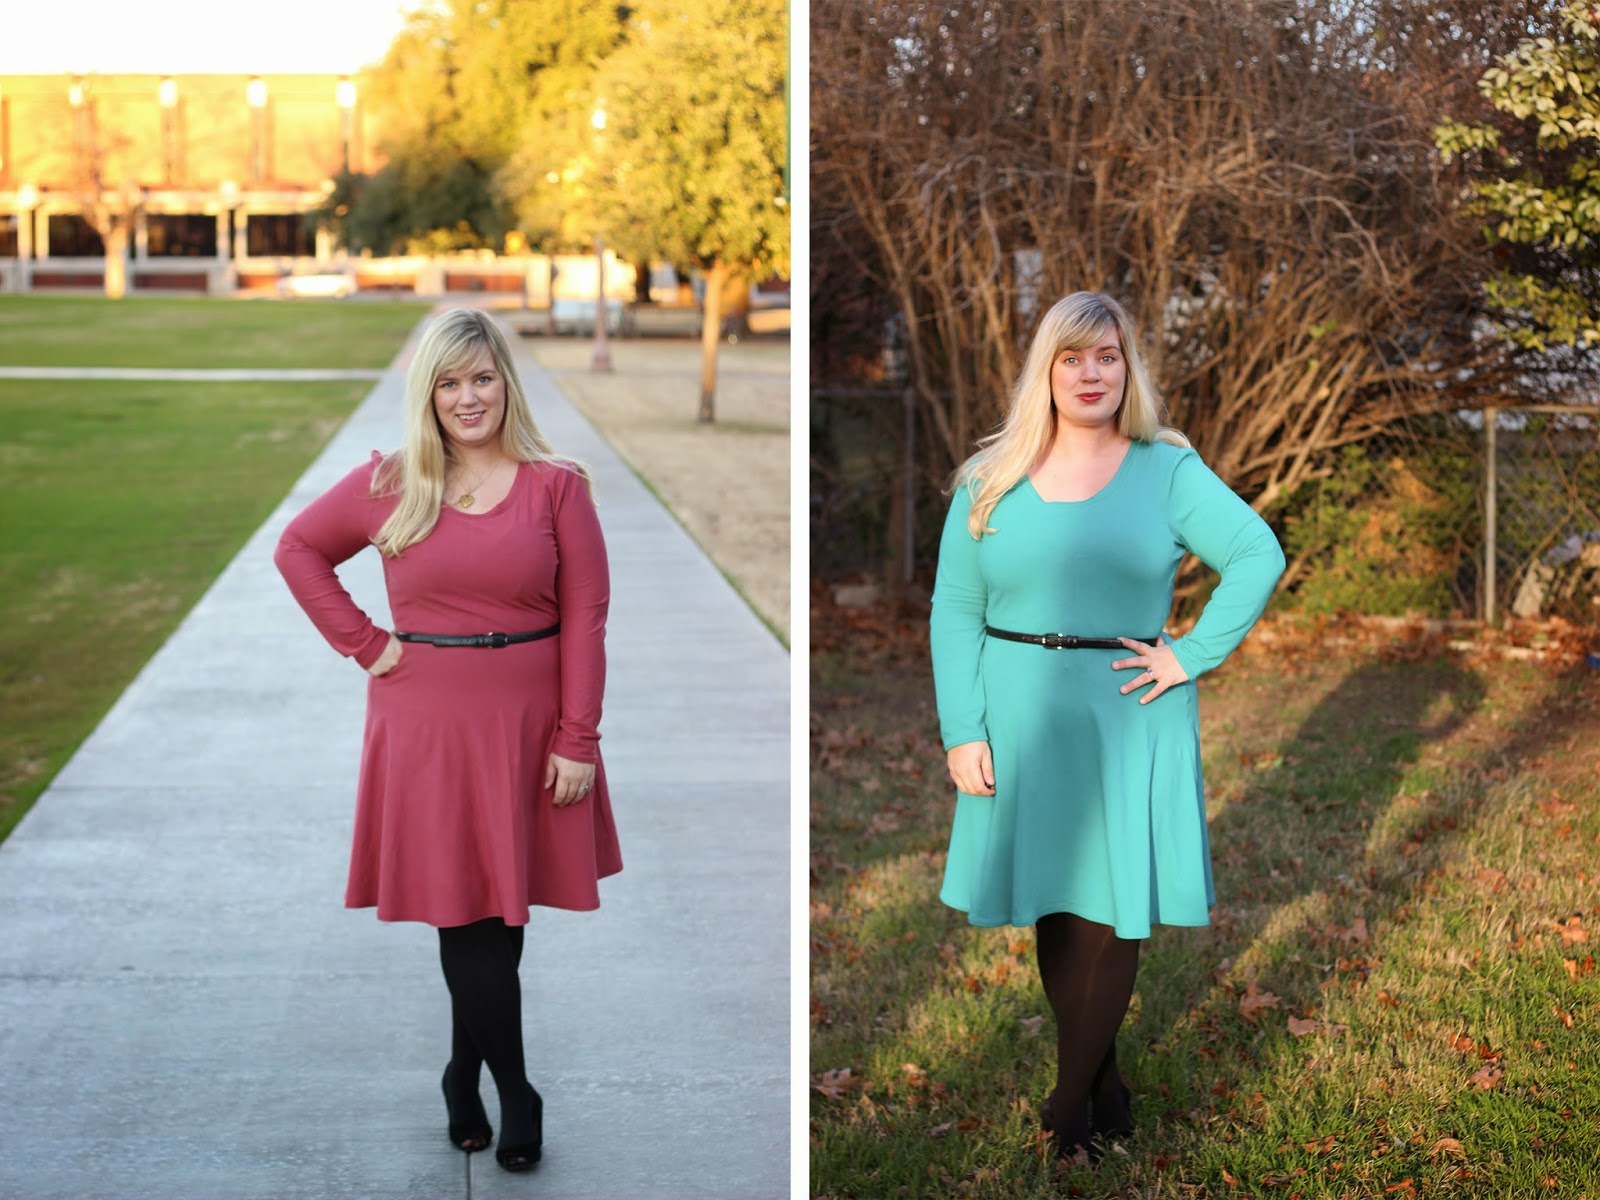
There are, of course, more advanced FBA techniques to cover, but this is a good basic process. You will be amazed by what a simple FBA can do to fix fitting woes! After completing this exact FBA, I ended up with the perfectly fitted bodice of my green shirtdress above. It's so worth the effort, don't you think?

Tomorrow, I'll round up a list of my favorite tutorials for other bust adjustments. This will include a small bust adjustment, dividing unwieldy darts, and moving bust points. There are, also, the aforementioned more complex versions of an FBA that I'll include, for those who are curious about other methods. 

The Bodice Adjustment Bonanza: Tutorial Round-Up

$
0
0
Good afternoon, dear ones! Today, we're going to discuss bodices. Or, rather, we're going to discuss a dizzying number of ways you can change a bodice to suit both your shape and your style.

As I said at the beginning of The Autumn of 1000 Shirtdresses, I am not going to throw a million of my own tutorials at you. There are few personal reasons for this, including time constraints, but mostly I decided to do it this way, because so much great information is already out there. While I have years of consistent sewing under my belt, I'm by no means an expert. However, I can Google with the best of them. This is how I learned to sew--reading good tutorials, hoarding books by actual experts, and not being afraid to screw things up. That's what muslin and tracing paper are made for!

To that end, I've rounded up some fantastic tutorials today for a myriad of bodice adjustments. While many of these tutorials were made in conjunction with specific patterns, most adjustment tutorials are applicable to a wide range of bodices. Find one that has similar qualities to your pattern (princess seams, two darts, one darts, etc.) and you're set! This list was not made from just blind Googling, but instead carefully curated by looking at forums on each of these topics and seeing which ones worked best for other seamstresses. I'm hoping these tutorial round-ups will help you cut time, when searching for adjustment advice.


Small Bust Adjustments


The Small Bust Adjustment (SBA) is essential for those who find that, while a pattern's shoulders and waist might fit, there's a bit too much room along the bustline. While McCall's 6696, which I'm using throughout this challenge, has separate pieces for A/B and C/D cups, it may still be necessary for you to tweak the pattern to your exact fit needs! These four SBA tutorials below will cover the vast majority of dresses, buttoned or otherwise.

Small Bust Adjustment by Haley for City Stitching -- As part of the Emery Dress sew-a-long, Haley posted this textbook tutorial for an SBA on a two-dart bodice. This tutorial is perfect for patterns like McCall's 6696 and has a ton of clear, helpful pictures.

How To Do a Small Bust Adjustment by Megan Nielsen -- This is a tutorial for dresses with only a bust dart, like the Darling Ranges dress. It's well-written, clear, and uses computerized lines for teaching purposes, which I find really helpful.

My Cup Does Not Runneth Over by Hungry Zombie Couture -- Another look at the small bust adjustment, this tutorial has been recommended all over the place as one that delves deeper into the hows & whys of the SBA. In it, you're shown not only how to make a dart smaller, but how to eliminate one altogether, should you wish.

Princess Seams and the Small Bust by Ann Steeves of Threads -- This is a really simple version of an SBA tutorial, but also gets great reviews in the sewing community. Unlike an FBA, SBAs are fairly straight-forward on a princess seamed bodice and just require a bit of pinching in the right places. How lovely is that?


Full Bust Adjustments: Y-Method

While I've always been a fan of the traditional FBA, as I showed in last week's tutorial, there are many who prefer this updated take on the technique. Pioneered by Palmer/Pletsch, in their Full Busted DVD, this method is best used for FBAs larger than one inch, when the resulting darts can be unwieldy. It's fairly difficult to find good demonstrations of this technique in the wild, but these two are ones I've referred to myself.

Colette Macaron FBAby Alana of Lazy Stitching -- In my opinion, Alana is the queen of demystifying Full Bust Adjustments. She always explains them with such enviable clarity and fearlessness, making the reader completely confident that everything is going to be alright in the end, once you tape those weird bits together. Her FBA for the Macaron is no exception and is, bar none, one of the most exhaustive Y-method tutorials out there. Though the bodice shape is quite different, it's easily translatable to a standard bodice.

Full Bust Adjustment Tips by Alison at Another Little Crafty Creation -- Alison shows a splendid example of a Y-dart method, on the Sewaholic Cambie, as well as tips for splitting up unwieldy darts. While this isn't quite as exhaustive a tutorial as the one above, the images are beautifully clear and helpful.


Moving A Bust Apex

As some of you may have noticed in my FBA tutorial, I treat the moving of an apex as a separate issue, to be dealt with after the completion of an FBA. Not only was this the way I was taught, but I find that many apex issues are mitigated in the process of spreading the bodice pieces, as my own apex is usually in the same horizontal plane as the pattern's. Having a muslin that can actually fit over my bubbies, post-FBA, also helps fine tune the dart locations in a way that flat pattern alterations just can't. To that end, tutorials about simply moving darts are so helpful to have on file!

How to Alter Bust Dart Height by Megan Nielsen -- A fantastic, concise tutorial on moving darts. This is such an easy skill anyway, but Megan's clear images and helpful hints can keep you on the right track.

Fitting Myself: Lowering a Bust Point by Andrea Schewe -- This tutorial is a bit more in depth look at the whys of lowering a bust point, complete with muslin pictures and all the red lines you could wish for. I especially like her tip on sitting, in a tight garment, so you get a real sense of fit.


Splitting Darts

With any Full Bust Adjustment, there is the chance for darts to become unwieldy. Common wisdom states that any dart more than 3 or 4 inches wide is too wide, which may result in puckering or warping. I tend to treat this rule on a pattern-by-pattern basis, but having the ability to split a dart into smaller, more manageable pieces is absolutely invaluable. There is no reason to fight with a 5 inch dart, when you can sew two, perfectly lovely 2.5 inch ones instead.

FBA Bonus: Splitting Dartsby Rachel for Coletterie -- This tutorial has gotten a bit of flack in some corners of the internet, but many people have found it extraordinarily helpful. In my opinion, your take on this tutorial is going to depend on whether you prefer multiple waist or bust darts. I don't mind either and find this to be a clear, helpful presentation of this skill, which works on either dart type.

Darling Ranges Dart Manipulationby Megan Nielsen -- I love this tutorial, y'all. LOVE it. In this, Megan quickly goes through almost every kind of thing you can do a dart, from splitting them to curving them. Even better, she does it all with her characteristic attention to detail and clear, helpful images.


Shoulder Adjustments

I am constantly needing to adjust the shoulders on my dress patterns, y'all. Especially as patterns go up in size, shoulders can skew to comical proportions. Reigning them back in is fairly straightforward, but essential. As part of the Emery Dress sewalong, Haley provided two fantastic, well-illustrated tutorials on both aspects of shoulder adjustments.

How to Do a Narrow Shoulder Adjustment by Haley for City Stitching

How to Do a Wide Shoulder Adjustment by Haley for City Stitching


Back Adjustments

Sometimes, the front of the bodice fits beautifully, while the bodice back is a pulling or gaping disaster. Like everything else, there are fixes for these problems, too! Don't you love the never-ending rabbit hole of fitting adjustments? 

Problem Areas: The Back by Sandra Betzina, excerpted from Fast Fit -- Like everything the great Sandra Betzina explains, these quick adjustments for both narrow and wide backs are a revelation in fitting. Thorough explanations and clear pictures will definitely help you with these common back bodice issues. 

How to Fit My Body by Sunni of A Fashionable Stitch -- I'm going to let you in on a secret, kittens. My number one sewing crush is Sunni, from A Fashionable Stitch, and this tutorial is an excellent example of why. In clear, helpful language, she walks us through her own problems fitting her shoulder blades and how she fixes it. Everything is beautifully explained, easy to replicate on one's own, and it works. I've used this exact method so many times, since first reading her post, and am constantly amazed by its success. I love esoteric fitting tips like this one and Sunni is a fount of them!


Updated Dates: The Autumn of 1000 Shirtdresses

$
0
0
Hello, lovelies! I hope you're staying warm wherever you are. We've gotten a blast of icy weather here in the States, making me long for tea and flannel. Good thing I've started a flannel shirtdress, eh? 

To that end, I have an update on The Autumn of One Thousand Shirtdresses. Quite a few people, myself included, were feeling pressured by the December deadline. With holidays coming up and sewing time becoming precious, it seems silly to add extra stress to anyone! Besides, it's my challenge. I can just change the blasted dates for us all. 

So, The Autumn of One Thousand Shirtdresses has been bumped an extra month and will now end on January 10th. I hope that gives you enough time, post-holidays, to enter the challenge! Next week, I'm going to cover plaid matching, for anyone else who's craving something seasonally festive and stripe-bedecked. 

Remember to add all of your creations to our Flickr board and tag them #1000Shirtdresses on Instagram and Twitter! That way, we can all properly applaud your sewing brilliance. 


Miss Melinda Needs Longer Arms: Grainline Archer

$
0
0

Good afternoon, my dear chickens! For those of you in the United States, I hope you had a lovely Thanksgiving holiday. My own was filled with perfectly made apple pie (a first!), tons of family, and a lower back injury. Apart from the oh-my-god-I-can't-move back spasms, it was an idyllic holiday. Sam and I really enjoy cooking for masses of people and it was a blast having both of our families at the same table. 

That being said, I have missed quiet weekends. Right before Thanksgiving, we were in Chicago for an academic conference, and the weekend before that was our (newly) annual trip to the Renaissance Fair with Sam's family. We counted it up and it has been overtwo monthssince we've had a weekend without travel plans, visitors, or familial obligations. The first two weeks of December, however, are blessedly open. I plan on using the next two weekends to conquer my backlog of sewing projects. Woohoo! 

As far as blogging, I have quite a few unposted pieces to share. It's rare that I photograph projects, without immediately posting them, but life has continually gotten in the way these past weeks. First up on that list is a mixed-bag project: my first long-sleeved Grainline Archer


Autumn in Texas is a funny thing. Our high temperatures can hit anywhere on a forty-degree spectrum, from the bitter chill of the thirties to the lovely, mild seventies. (0°C to 25°C) As such, layers are essential. I love a patterned button-down, because they work solo and layered under a cashmere sweater. Unfortunately, my wardrobe is a bit slim on buttoned shirts. I keep telling myself to make more of them, but if I'm going to spend time fiddling with collar stands and buttons, I'd rather make a shirtdress!

Shocking, right? However, as part of my quest for the perfect shirtdress, I realized my vision lacked something: sleeves. Though it is wonderful in every other way, there isn't a true long-sleeved option for McCall's 6696. To my mind, a perfect long sleeve on shirtdress has a placket, buttons, and cuffs. 
Enter the Archer.

Combining sleeve patterns is one of the easiest changes to make. Swap out the sleeve cap on your foundation pattern for the one on your desired sleeve and--voilà!--a perfect new sleeve. I had high hopes for the Archer sleeve, but didn't want to count on it with precious shirtdress fabric. I also have no time for unnecessary muslins in my life right now. I knew the Archer body worked on me, so I grabbed some polka-dot cotton from my stash and threw caution to the wind. I'd make up an Archer, see how I liked the sleeve once and for all, then decide whether it would work for my frankensleeve!


This did not go well. As it turns out, the larger sizes of the Archer have sleeves fit for Amazons.

On the statuesque side myself*, I've never particularly worried about sleeves being too big. If anything, I usually have the opposite problem. Not so with the Archer. The sleeves on this baby are a good three inches too long and four inches too big around the wrist. Instead of lightly hugging my wrist as a cuff should, these slide right on down my hand and land on my knuckles. It's like I've transplanted sleeves meant for Dwight Howard onto an otherwise reasonably sized shirt.

I'm going to fix this, of course. In fact, I considered doing so before posting this blog and glossing over the whole thing. However, if you were coming to Idle Fancy for perfectly muslined, aspirational garments, you would have stopped following long ago. You deserve to see these sleeves. Why, with my arms down, my hands are barely visible! It's a new trend sweeping (the floors of) the nation!

*5'8'' (172cm) and with what my mother calls "healthy Viking bones," my wrists are decidedly larger than the average woman's. Bangle bracelets are but an optimistic pipe dream and cuffs are rarely this big. 


Eventually, I'm going to pick the cuffs off, shorten and narrow the bottom sleeves, then try the whole shebang again. For my plaid shirtdress, I'm also going to add a tower placket on the sleeve, in lieu of the narrow, banded one of the Archer. 

If you ignore the sleeves, this shirt was an uneventful project. For the bodice, I used my original altered Archer, which added in a bust dart during the FBA. It's a base size 16, with four inches added to the bust line, and the shoulders narrowed by a 1/2 inch. The polka-dotted cotton was printed horribly off-grain, but it worked out. I cut out according to grainline, instead of vertical dot lines, and the scattered pattern hides the flaw well. For buttons, I used plain black ones from the stash and they're the perfect contrast. Once the sleeves are fixed, this will be a fantastic layering shirt! 

In the meantime, I'm trying to convince myself that my arms aren't abnormally short. This is the only problem with sewing, y'all. Adjusting patterns makes over-analyzing your proportions all too easy! Perhaps I have time for full muslins right now, after all...


Miss Kimberly Paints in Watercolors: BHL Kim Dress

$
0
0

Perhaps I've watched Indiana Jones too many times, but I'm a big believer in the quest. Whether it's hunting down just the right Christmas present for Great Aunt Myrtle, or searching for the perfect set of long-lasting, colorful pens (Ahem: Triplus Fineliners), I love a good mission! To that end, I'm often sewing with a quest in mind, trying pattern after pattern until discovering my platonic version of a garment. I've found the classic shirtdress, conquered the A-line skirt, and--most recently--sewn the perfect party dress.

That last one really shouldn't have been so difficult! Yet, as a plus size woman, party dresses have forever been the thorn in my sartorial side. Your ready-to-wear shopping experience may differ from mine, but buying basics isn't that much of a trial for me. It still sucks, admittedly, but I at least have success. If I'm going to buy RTW, I know that Loft carries my favorite jeans, Talbot's stocks the coziest sweaters, and Asos Curve produces my favorite coats. Fancy dresses, however? I have no go-to. Inevitably, dresses for plus size woman are boring shifts, overly embellished horrors for mothers-of-the-bride, or ill-fitting polyester disasters. It was shopping for a party dress that led me to sewing, in the end. I just couldn't take one more bout of shopping for something pretty and ending up with another black dress.

Nowadays, I sew a ton of dresses, as you know. After years of settling for mediocre RTW pieces, I can't get pretty fabrics and floofy silhouettes out of my head. Every time I put a handmade dress on, it's striking a personal victory against the body-shaming, unwelcoming fashion industry. Unfortunately, my number one battle remains the cocktail dress. Striking a balance of sexy and sophisticated proves a continuing challenge. Inevitably, I sew a silk wiggle dress, love it in photos, then never reach for it when an event comes up. If I analyze why, a simple answer emerges. I want to be sexy, sophisticated, and not horribly self conscious all night. I hate worrying about panty lines or squeezing myself into some stretchy torture device disguised as shapewear. Y'all, I would throw a bonfire just to burn my Spanx and roast marshmallows over their stretchy corpses. The easiest way out of this conundrum would be to use a luxe fabric, with my tried-and-true dress pattern, Simplicity 1873. Yet...I long for extra details and a bit of sass.

Enter By Hand London's newest pattern: the Kim dress.


When BHL reached out to their testing pool with this pattern, I squealed out loud in delight. There are two Kim variations: a square-necked princess seamed bodice with a tulip skirt, and a sweetheart princess seamed bodice with a gathered, pin-tucked skirt. Jenny actually sent me a message not long after, making sure I'd gotten this e-mail, because the gathered view just screamed "Mary." She was right. So, so right.

Y'all, this is the party dress of my dreams. Not only does it mix sex appeal with sweet design details, but it has a fairly expansive size range. The Kim dress goes up to a UK 20, which translates to measurements of 45-38-48 inches and 114.5-96.5-122 centimeters. That puts me (46-35-46) at a base size 18, so I jumped at the chance to test this baby.

Today, I'm sharing with you that first version of this pattern. Usually, I keep my tested versions of a garment on the down low, because I prefer to blog about finalized patterns. However, since most of the testing pool loved Kim's fit, there aren't substantial changes between this version and one that comes in BHL's envelope. Ergo, I can review it like a real dress. Huzzah! Of course, because this is a quest, my Kim isn't perfect quite yet.  For testing purposes, I sewed as close to the original pattern as possible, which meant choosing a size 18 and performing an FBA, but nothing further. Thus, there are some changes I plan on making the next time around, but we'll get to those.


First, let's talk design, shall we? As you can see, I chose my initial love: the poofy-skirts, divinely feminine View A, sweetheart neckline and all. The bodice is lined in jade cotton batiste and there is a 22'' invisible zipper at the center back seam. Honestly, I was trepidatious about the princess seams of the bodice. Though I'm now to the point where they turn out well, I still find the fitting and sewing of princess seams to be in an utter pain. All that clipping and pressing and smoothing! Egads! Scarier yet, Kim's princess seams didn't come in from the armscye, as is most common, but from the sweetheart neckline itself. This, it turns out, was actually a plus. Since the curve of vertical princess seams is less drastic, the FBA was infinitely easier. After moving the bust point down just a hair, the whole process was a breeze and my pattern pieces didn't distort whatsoever. Considering the end results I'm used to, that was a miracle!

Fabric wise, I chose this beautiful watercolor floral from Hancock Fabrics. It was lovely, had a nice weight, but fluid drape, and was 100% polyester. I usually sew with natural or semi-natural fibers, but couldn't get this gorgeous print out of my head. Each time I visited the store, I would pet it a little, wishing it were silk. So, I bit the bullet and bought it anyhow. It proved really easy to sew up, except for one step: those pintucks. That's the only area of Kim that really gave me fits. I spent hours marking and sewing those pleats, friends. Part of it was the fault of the fabric, which wouldn't hold a crease at all, but the other was the sheer expanse of the gathered skirt. It goes on for eons.  The directions suggested marking certain points, then eyeballing it and using the grainlines to make sure each pleat was even. Call me a perfectionist, but I couldn't handle the unknown. Instead, I marked straight lines in chalk across the entirety of the skirt, and used them as exact guidelines. It worked, but I needed a few glasses of wine at the end of the night.

The rest of Kim was a total cake walk, thank heavens! All the pieces joined beautifully and came together with zero fuss.


Fit wise, the Kim is pretty great for practically out-of-the-pattern. It hits my waist at the right point, hugs my bust in that lovely princess-seamed manner, and is a great hem length for a fancy dress. Next time around, I do plan on making a few changes, though. The neckline is just a hair wide on me, showing a bit too much bustline for comfort, if you catch it at the wrong angle. I'm all for sex appeal, but would like to not worry about scaring children, you know? The shoulders also have a tendency to slip, which is partly a fabric issue, but something to be addressed. So, my game plan: move the straps in by a half-inch and raise the entire neckline by another half-inch, then shrink the armholes a hair. That will keep the sexy silhouette, but make wardrobe malfunctions much less likely.

On the whole, I'm inordinately pleased with the Kim dress. All those little design details really elevate it from the usual fit-and-flare dress. It's the ideal mix of sexy and sophisticated--just the dress pattern I've been looking for! The best thing of all, however? No Spanx required. That requires a happy dance, y'all. So, tell me, what is your go-to party dress pattern? Will you be making one for the holiday season, this year? I just ordered some of this damask velvet from Mood, for a wintry Kim, because I couldn't resist another fancy dress.


Note: This pattern was given to me free of charge, in exchange for testing it and providing accurate feedback. In addition, this post originally appeared on the Curvy Sewing Collective, but I like a record of my projects on Idle Fancy.


Miss Clara and the Seasonally Inappropriate Christmas Dress: McCall's 6696

$
0
0

When planning a dress for the holidays, a certain aesthetic comes to mind. This is the season for plaid taffetta and long-sleeved wool sheaths. This is, most assuredly, not the season for lightweight poplin printed with hot pink roses. No Northern Hemisphere woman in her right mind would sew such a thing right now. 

Except, apparently, me.

I couldn't help myself. While musing on Christmas dresses, this Liberty cotton lodged itself in my mind and wouldn't budge. I've hoarded four yards of this poplin, in the pink Carline print, for years. Not only is this my favorite Liberty print, but it's also maddeningly discontinued. I have another two yards in blue, awaiting the perfect blouse pattern, and an Ebay alert set up for the red colorway. Carline is my fabric white whale. 

This particular length was bought with a shirtdress in mind. Of course. Since then, McCall's 6696 has come into my life and my collar-making skills have improved tenfold. Not only would this be an ideal Christmas shirtdress, I decided, but I probably wouldn't ruin it in the process. Score! It was time for Carline to have her day. 


True to form, I couldn't leave well enough alone. Heaven forbid, I take the easy way and make an unaltered, perfect-as-she-is 6696. That would be too easy, too stress-free! Instead, I decided to turn my beloved shirtdress pattern into a half-shirtdress pattern. I would use the bodice of 6696, paired with a straight waistband, full, gathered skirt, and side zip closure. 

Despite my dramatics, this is actually a straight-forward pattern change. There was some basting involved, to get the waistband just right, but otherwise, it's a simple matter of planning. Let's walk through it, shall we? Note: I didn't set out to make this a tutorial, but rather a guideline of my process, so this isn't a fully photographed explanation. Writing it out, the instructions ballooned in size. I explain everything thoroughly, however, and photographed the two weird parts. If you have any questions, leave them in the comment section!


1. Cut both skirt pieces on the fold. I decided to use the original skirt pieces from 6696, but gather them like a traditional dirndl skirt. You could, similarly, cut two rectangles for a real dirndl skirt, as in Gertie's tutorial. Either way, since we're moving from a front button closure to a side zip, you're going to cut those skirt pieces on the fold, so that you don't have a seam running down the front.

2. Trace a new button band. For a half-shirtdress, you only want a button band the length of your bodice pieces. So, measure the length of your bodice center fronts, then mark that length on your button band piece. Trace that portion of your band and--voila!--new bands.

3. Measure your waistband. Your impulse for this project will be to add the length of your button band to your original waistband, to create a slightly longer one. This is actually not the way to go. Full shirtdresses have more ease around the waist than a half-shirtdress, to prevent button gaping. How much ease you want at the waist will be up to you (standard is 1'', but I prefer 1/2''), but it's likely that 6696's waistband will work as-is, without lengthening. Put the pattern piece around your natural waist and try it out! Does it feel comfortable, when you sit? Is it secure enough to add definition? Add or subtract length, based on this decision, and remember to factor in a 5/8'' seam allowance on each end.

4. Mark side seams and centers of waistband. Because we're gathering our skirts in, you'll need to mark your center front, center back, and side seams, so that your skirt is even all around. Begin by adding your seam lines to each end at 5/8'', then measure in from one end at 1/4th the length (Center Front), 1/2 the length (Side), and 3/4th the length (Center Back) between those lines.

5. (Optional) Reduce gathers on back bodice. While the blousing in the back of this dress doesn't bother me, you may want to streamline the back in this version. To do so, simply trace the back bodice piece, then remove your desired amount from between the center gathering marks, in a vertical strip from top-to-bottom. I recommend leaving some gathers in, for ease of wearing, but removing one or two inches from the pattern piece will lessen that blousing quite a bit.

6. Leave the left side bodice open, 3.5 inches from top. We're going to insert an invisible zipper on the left side, so construct your bodice normally, but only sew down part of that side seam. There's no exact science to this, but it should be enough that you'll be able to get into your dress comfortably! Remember to back-stitch, at each end. Construct and finish the rest of your bodice, as usual. 

The left side of my bodice, after leaving it open. 

7. Add button bands, then overlap the right bodice onto the left bodice. After sewing your bodice as you would normally, attach your button bands! Once you have them on and top-stitched, put the right bodice over the left bodice, lining up the bands, then baste them into place. Finish both the collar and the sleeves now. Leave the buttons and buttonholes until the end of dress construction, so you can accurately mark placement, with the skirt attached.

8. Sew the waistband to the bodice. Begin pinning with the left side, still leaving that open, and pin your waistband to the bodice. Align the centers of your front and back bodice, with the marks on your waistband, then baste them together. If you're happy after a fit-check, then sew everything in permanently! Note: you may find that you want to take the waistband in further at this step, or even raise it a little. The proportions of a half-shirtdress are just a bit different from a full, so these changes are natural. 

Overlapped bodice bands attached to the waistband. 

9. Sew the right skirt seam. We're still leaving that left side open, so sew and finish the right skirt seam only.

10. Gather and attach the skirt. Sew two rows of gathering stitches, at 1/4 inch and 1/2 inch, around the entirety of the skirt waistline. Once you've sewn, push along these lines and create your gathers. Match the skirt center front, center back, and side seams to those of your waistband, and even out the gathers across the skirt. Stitch into place. 

11. Insert an invisible zipper. Finish the entire left side of your dress, from bodice to skirt, using your preferred finishing method. (I serged everything, for simplicity's sake.) Then, insert the invisible zipper into the left side, with the top zipper stop aligning with your fabric opening. It's just like sewing an invisible zipper in a skirt or a dress, but the top zipper tape is going into an existing seam. Conversely, you can choose to leave the top left side entirely open beforehand, closing it only after your zipper installation. Either way, make sure your waistbands line up, and have at it!

Resulting invisible side zipper and a peek at my light pink bias tape armscye finish!


12. Sew the left skirt seam. Once your invisible zipper is in place, sew the remaining skirt side seam, below the zipper. Secure the bottom zipper tape into this seam, with a few hand stitches.

13. Buttons and hem. Add your buttonholes, buttons, and hem, as usual!

14. Dance a jig, in your new half-shirtdress. 


Of course, you could also just use an existing half-shirtdress pattern. There's the new wrapped half-shirtdress from McCall's, M7081, and the Lisette Traveler Dress from Simplicity. I didn't use either of these, because the McCall's was just published last week and the Traveler doesn't have a traditional collar construction, which drives me crazy. I figured, the 6696 already fits in the bodice, so why not go with the one I already love? A good design alteration is creatively exhilarating, anyhow!

It's okay to just nod at me, as if I've gone mad. You should use an existing pattern, if you've got one stashed away. 

Apart from the construction techniques above, there are a few little extras in this dress. As is my wont, everything is top-stitched, including the button bands, collar, collar stand, and the waistband. Not only does it cut down on the hand-stitching, but it adds a bit of definition to the busy floral pattern. The armscyes are finished with light pink single-fold bias tape, which goes with the palette nicely. I was going to make self-fabric tape, but couldn't bring myself to waste the Carline. I actually have just enough of this fabric leftover to make a sleeveless blouse. Joy!

The buttons on this lovely are jade green plastic, from Hancock's, and match the green of the rose leaves exactly. Honestly, y'all, as much as I love Carline, those buttons might be my favorite part of this dress. They glow like little emeralds against the rose pattern, don't they?

Of course, I'm wearing this dress with my favorite emerald cardigan right now. It's been pretty mild lately, but things are going to turn chillier this week! We're actually headed to New Orleans next weekend, to spend the holiday week (and our first anniversary!) there with my family. It's not a Danielson Family Christmas, unless we're in some far flung location, eating Chinese food and using a coat stand as a tree. What can I say? We're heathens, the lot of us. 


Miss Bonnie Goes Rogue: BlueGingerDoll Bonnie Sweater (Dresses)

$
0
0

Happy New Year, friends! This past week, I've experienced a fit of obsessive sewing. Upon returning from New Orleans, I made a knit sweater dress for my Mood Sewing Network project. Then, I made another one. And another one. 

Y'all, I've gone through ten yards of clear elastic in less than seven days. All I want to sew right now are warm, stretchy dresses. This makes a certain amount of sense, since they're also all I want to wear right now. Our weather forecast in Waco is grim. There's nothing but cold, drippy weather for the foreseeable future. It makes a girl want to curl up in comfortable clothes, drink piping hot cups of tea, and never leave the house again. 

As a newly stay-at-home writer, that's an option I actually have. If it weren't for sweater dresses, I'd probably wear yoga pants and sweatshirts clear through February. The only thing as cozy as pajamas are deceptively elegant dresses that feel like pajamas. Taking the lovely Naomi's cue, I've decided a closet full of warm, knit dresses is my wardrobe's winter salvation. 


This obsessive bit of sewing was helped along by the arrival of my perfect knit pattern. Or, rather, Frankenpattern. Of course, there are a ton of knit dress patterns on the market. It seems every other independent designer is releasing their take on the simple, stretchy dress. None, however, are quite perfect on me.

Though I initially liked the Lady Skater, neither iteration gets worn very often. They're too clingy for comfort, obviously designed for a woman less extravagantly (ridiculously) curvy than I. The base Moneta bodice really is fantastic, but the wide, gathered skirt is not my favorite look for a sweater dress. I like a little swirl, but minimal bulk. Plus, the Moneta's turned under neckline makes me doubt the longevity of its bodice. 

I could have drafted a neckline band and circle skirt for the Moneta, but such labors were unnecessary. Instead, BlueGingerDoll Patterns saved the day. This past fall, Abby released two knit patterns of her own, Bonnie and Violet. Bonnie is a retro sweater, with neckline variations, puffed sleeves, and two length options, while Violet is a pieced bodice, v-neck dress with sleeve and skirt options. Both are patterns I tested and swooned over. Not only do they each fit my curves well, but they're a cut above the standard, simple knit pattern. Here, there be design details!


While I initially planned on making a Violet for my MSN dress, the fabric didn't cooperate. Though absolutely gorgeous, this charcoal wool and silver lurex sweater knit, was just too chunky for Violet's pieced bodice. All those lovely details would be lost to the knit's fuzzy abandon! Instead, I pulled a Frankenpattern. Could Bonnie's elegant, retro bodice and Violet's circle skirt be my perfect sweater knit dress?

Yes. Yes, actually, it could. This pattern mash-up is my knit dream come true. The FrankenBonnie, or Bonnielet, has all the small things those other patterns were missing:
  • Extra bodice details - Puffed sleeves! Banded neckline! 
  • Bosom-friendly fit - Abby drafts on a D-cup. Hallelujah! 
  • Swishy skirt - Violet's half-circle is the ideal knit skirt shape. It's neither clingy nor bulky, but skims everything beautifully and retains good movement. 


The actual patterns for knit garments are so simple, lacking any pesky bodice darts, so this combination was a breeze to pull off. I narrowed the Bonnie bodice pattern (size 18) by 1.5 inches at the waist, then tapered up along the rib cage to my bust line, to better match Violet's original bodice proportions. Dresses, after all, fit much closer the body than sweaters. Then, I used Bonnie's original sleeves and neckband, and attached the unchanged (size 18) Violet skirt. 

Voila! A perfect knit dress. The sleeves lightly puff, the skirt swirls in a most becoming manner. Nothing, not anything, hugs my lumpier bits. It is ridiculous, I admit, that I took two detailed patterns and combined them into one, much simpler dress. What can I say? Rogue sewing is my jam. 


Insides! Wahbam!
It's always a good sign, when not two minutes after finishing a first dress, you're already cutting out another iteration. After the gray FrankenBonnie turned out so well, I wondered how it would turn out in a traditional wool jersey. Unsurprisingly, it looks even better! The claret colored wool jersey (also from Mood) has greater stretch recovery and is lighter weight, so the bodice fits snugger, hugging my bust admirably. 

Both dresses were sewn almost completely on my serger, save for the gathered sleeve puff and finishing techniques. They're stabilized with clear elastic at the shoulders and waistline, while the neckline is stabilized and finished with that lovely thin band. I used Dritz Stitch Witchery on the hem, then finished it and the sleeves with a twin-needle. So, so easy!


Apart from how freaking cute they are one, my favorite things about these dresses are their construction times. The gray sweater knit took a little over three hours, while the maroon wool jersey took just two. While wovens will always have my loyalty, there's something really fun about finishing a dress, in less time than it takes to watch Lord of the Rings. 

So, there you have it. Two cozy, stretchy dresses of wonder. Throw on tights, a knit slip, and they're like wearing secret pajamas. Don't you love a good Frankenpattern? I have a few more of these babies on my docket, as well as finishing up two more shirtdresses before my January 10th deadline. I'm going to ride this sewing frenzy as far as I can! 2015 has started off with an awfully productive little bang. 


Note: Both fabrics were bought with my monthly allowance from Mood Fabrics, as part of the Mood Sewing Network


1000 Shirtdresses: Update!

$
0
0
Good afternoon, y'all!

I'll probably be back tonight or tomorrow morning, with an outfit post (more Frankenbonnies!), but I wanted to let y'all know as soon as possible about a change with our shirtdress challenge. After talking to quite a few people who were under crunch time with their first (or second or third!) shirtdresses, I've decided to bump the end date back just a bit. Instead of ending on January 10th, the challenge will now end two weeks from today, on January 22nd.

Hopefully, this gives anyone who wants to jump in on the challenge a bit of extra time to fit, sew, and perfect those buttonholes!

Honestly, it also gives me more time to photograph my last two shirtdresses. A plaid and a floral, they're both on the springier side. Unfortunately, winter is hitting us hard in the States right now, and I'd turn blue trying to accessorize and photograph them appropriately for the blog. We're supposed to be up in the fifties again next week, which sounds much more humane!

So: January 22nd. All the Shirtdresses.

Happy sewing!

Miss Bonnie and the Tale of Two Cotton Jerseys

$
0
0


Good evening, dear ones! Tonight, Sam is making his world-famous spaghetti and has decreed that I must sit on the couch, drink wine, and do something fun. I'm supposed to complete a book proposal by Monday and the first chapter of this particular one is trying, very slowly, to murder me. I've rewritten it four different ways and it just won't gel. So, I'm taking the night off. While I do have a new Tessa Dare book to read and Project Runway: All Stars to watch, I thought I'd prattle about my latest dresses instead. So, sparkling shiraz in hand, let's do this!

Surprise! I'm still sewing knits. The combination of a looming deadline and chilly weather has really kicked this stretch-obsession into overdrive. When writing a page feels like cutting open a vein, a quick, cute sewing project can be the difference between singing Enya and boiling bunnies. Both of these dresses were gloriously quick: 2.5 hours each, from cutting to hem. Our neighborhood rabbits are breathing tiny, adorable sighs of relief. 

Note: The pictures of this dress were taken, when it was 27 degrees outside. They aren't great, admittedly, but they were taken quickly to avoid frostbite. High five for still having all my digits to high five with!

Beyond the fact that these are my most recent projects, there's another reason I paired these dresses together. They're cotton jerseys, from two different suppliers. I thought it might be interesting to compare and contrast the two fabrics, as knits can be more difficult to buy online than wovens. Cotton jerseys really run the gamut, when it comes to stretch, recovery, and weight. As such, these are two very different dresses, even using the same fabric type and pattern.

The rose dress was made with organic stretch jersey, in dusty rose, sent to me from Organic Cotton Plus. (Color out of stock, but they have this gorgeous plum!) Fairly heavy, this jersey is 13.25 oz and has 10% spandex content. The blue dress, meanwhile, is made from Girl Charlee's in-house jersey. It's billed as medium weight, at 10 oz and 5% spandex, and was sold as "Paris Green." That color is also sold out (Another lovely plum in this fabric!), which is good because it prevents me from sending a rant-filled, unbearably pretentious e-mail about how Paris Green and turquoise are two completely different colors. Paris Green was the violently poisonous, completely gorgeous deep yellow-green of the Impressionists, while this... this is just perfectly fine turquoise.

Witness: 

Manet does Paris Green!

Mary does turquoise!


Ahem. Sorry, y'all. I just got really, really excited about finding supposedly Paris Green fabric, ordered it, and opened a box of blue jersey. Maybe it's that I was raised by an artist, but that somewhat sickly, deep green has always been one of my favorite hues. We're only now able to recreate it properly with synthetic dyes and my sewing room is painted with one such modern iteration! I'd kill for some fabric in the same color.

Why, yes, that is the nerdiest rant I've indulged in on this blog. Never underestimate my ability to get all riled up over silly things!

Both of these fabrics have sat in my stash for a few months. While I adore wool jerseys, I have mixed emotions about their cotton cousins. They are so, so comfortable, but they can also cling to every lump and bump. I love all my various lumps, but I don't necessarily want them zeroed in on either. However, after my success with sweater knits, I itched to try some more Frankenbonnies! I ordered two more wool jerseys from Mood, but while trying not to badger the postman, these jerseys caught my eye again. How would cotton look in my new favorite pattern? 


Turns out, I like the results quite a bit!  Like my sweater dresses, these are both made with a combination of Blue Ginger Doll patterns. It's the Violet skirt (size 18) paired with Bonnie's bodice (18), which I narrowed at the waist to match Violet's original proportions. Are they clingier pieces? Unquestionably. However, they're sublimely comfortable. The rose dress, specifically, feels like the world's softest pajamas. They also turned out to be two fairly different dresses.

Despite cutting the same size, the rose dress is slightly tighter. The jersey from Organic Cotton Plus has phenomenal recovery, thanks to that high spandex content. It's the springiest jersey I've ever felt, which bodes well for its longevity, but also makes it mold to my body. The bodice that worked so well with sweater knits ended up rippling around the bust. On one hand, it's a knit dress and this happens with knits, on the other hand...curse those wrinkles! Everything else about this dress is beautiful. The weight of the jersey gives the skirt a lovely, swishy drape, and the color is just divine. Dusty rose is one of those colors that I'm ambivalent about on the rack, but love to wear. It makes everything so, well, rosy!


Meanwhile, the turquoise dress fits well, but probably won't retain its shape over time. The knit has a good deal of stretch, but doesn't recover easily. After a day of wearing this, the collar band flops and the elbows bag. Even in these pictures, you can see how any bit of movement makes the band do weird things. That being said, I prefer the bodice fit here. The looser knit means everything skims, rather than clings. Unlike with the rose dress, the lines of my slip are completely invisible and the bodice doesn't pull. Woohoo! I also prefer the slightly lighter weight of this jersey, since it doesn't bunch quite as easily. 

Both dresses were sewn mostly on my serger, with hems sewn and sleeves gathered at my traditional machine. The hems were turned up with Stitch Witchery, then twin-needled in place, to prevent warping. I also added in clear elastic at the waistbands and shoulders, to stave off loosening there. The rose jersey was much easier to construct, because it didn't curl up as drastically as the turquoise. When pinned together it stayed in place, whereas the turquoise required extra vigilance, to make sure all the bits where aligned and not curled under. The seam allowances on BGD's knit patterns are 1/4'', which is super small, so this was more of an issue. 

Neither one of these will replace the sweater dresses in my heart, but they are already getting worn a lot. It's hard to say no to secret pajamas, even if they cling a little bit to the lumps! So, which jersey wins the competition here? I'm honestly not sure. Despite its cling issues, I keep coming back to the rose Organic Cotton Plus fabric. Knowing how it clings now, I would size up the next time around, but it feels so dishy on and was easy to sew. I have my eye on some that plum for myself, for a short sleeved version of the Frankenbonnie. While I really like Girl Charlee's fabric options, despite color confusion, we'll have to see how this dress wears over time. If it exceeds my expectations, I may order from them again, because some of those prints are too cute to resist! 

Either way, my box of Mood sweater knits arrived last night. Bring on the wooly knits! 


Note: The OCP jersey was given to me, in exchange for an honest review, while the Girl Charlee was bought out-of-pocket. I couldn't resist that "Paris Green!"

Reminder: 1000 Shirtdresses Deadline!

$
0
0

Hello, friends! I'm sitting here in my office, recovering from a stomach virus and trying to narrow down the prize package for the Autumn of 1000 Shirtdresses winner. Which reminded me to remind you...

If you want to enter a shirtdress, any shirtdress, into the challenge, you still have time! The deadline is tomorrow night, January 22nd, at Midnight (PST). Simply add your photos to the Flickr group and you're entered. There's no need to have a blog post or even a blog. If you've made a shirtdress in the past few months, you're good to go! Our winner will be randomly drawn and announced this weekend. 

Woohoo! 


1000 Shirtdresses: Round-up + Winner

$
0
0
Good afternoon, friends! I hope you're having a lovely weekend. My own has been spent perusing the gorgeous entries into the Autumn of 1000 Shirtdresses! Y'all, we ended up having forty-seven shirtdressess made over the last few months. That's a whole lot of buttons! I've gathered up the official entries below, so that we can all properly gawk at these beautiful garments. Shall we?

 POLKA DOTS

Sophie-Lee looks ethereal in her light blue polka dot chambray dress, Lauren drafted (!) her own classic, navy blue dotty shirtdress, and Nicole opted for a chic collarless shirtdress, in this super fun polka dotted rayon. 

Andie is a woman after my own heart in this seasonally-inappropriate nautical shirtdress, with white bands and striped shoulder button tabs, while Beat Girl not only made a shirtdress, but her first ever dress! Even cooler, those dots are actually tiny daisies, when up close.

BOTANICAL
Marije was our very first entrant, with this gorgeous black-and-white version of McCall's 6696, Caroline is a vision in this vintage-inspired red floral, with a beautifully piped collar, and Chrystal has me swooning over her floral striped shirtdress, with a coordinated yellow collar.

 Sophie-Lee went with vintage re-issue Simplicity 1459 for her second fabulous shirtdress, made up in a largescale floral cotton sateen, Bianca is right at home in a garden, wearing her lovely raspberry ditsy floral, Rhiannon's dramatic red botanical print has me on the look out for copycat fabric, and Alicia is so on-trend for 2015 in this glorious wax print floral Hawthorn.

Bec is channeling the divine wardrobe of Betty Draper in her sweet floral lawn 6696, Emily put a twist on the Colette Pastille dress to create her lovely orange half-shirtdress, Rowena made a beautiful Hawthorn, using bamboo-and-bird print cotton and coordinated cream collar/cuffs, and if Izzy didn't live in Saudi Arabia, she'd be in danger of me stealing this shades-of-pink floral shirtdress from her closet!

PLAIDS

 Ruth made a perfectly matched version of the Cami dress, complete with bias-cut sleeve cuffs for a fun bit of visual interest, Marije returned with a beautifully autumnal plaid for her second version of 6696, and Fiona made a cozy, layering version of the Alder dress in blue-and-black buffalo plaid flannel.
Cheryl is super cool in her plaid, sleeveless Alder and fabulous brown boots, Qui made the epitome of a classic shirtdress, in a sweet peach and turquoise plaid, while Debbie made her first ever shirtdress, a fantastic neutral plaid version of McCall's 6600.

STRIPES 

Gina is tailored and chic in her gorgeous candy-striped version of M6696, which I'm already plotting to knock off, Tanya was inspired by the period costumes of Call the Midwife, when she made her lovely navy-and-white striped vintage Simplcity, and Nancy is sweetly classic in her blue-and-white striped M6696, proof that the simplest fabrics can also be the prettiest.

PRINTS

 Honey looks so modern and lovely in her bold, graphically printed shirtdress , Melizza's silk ribbon version of the Alder dress is the perfect winter layering piece, CFA13 is absolutely gorgeous in her retro print shirtdress with coordinated buttons, while Amanda is a picture of summery cuteness in a rayon version of much-loved M6696.

Angelica used a textured cotton floral, gifted from her grandmother, to make a light and beautiful Hawthorn dress, Marilla paired a southwestern print Kaufman chambray with her own Maya dress pattern, for the ultimate day dress, and Bianca is a work of art herself in a blue-and-white printed version of M6696.
 Chrystal captured that casual end-of-summer vibe in her gorgeous nautical print shirtdress , Andie stole all of our hearts with her color-blocked, cat-themed newspaper dress, while Linda put a bird on it, with this modern maroon shirtdress in the cutest flock-print fabric.

Lyric is absolutely stunning in her cream-and-khaki botanical print half-shirtdress and chic belt, Kirsten used a Japanese cotton lawn to create a fresh and summery version of Grainline's Alder dress, and Trisha use French seams and heaps of hand-sewing on her elegant and bold crepe de chine shirtdress.

SOLIDS

 Becky started off a parade of gorgeous blue shirtdresses, with her classic denim fit-and-flare and super cute gold toe shoes, Jo is as pretty as a picture in her dark indigo Frankenpattern shirtdress, and Cheryl altered the Alder pattern, to make this casually cute chambray popover dress.
 Ida Aida turned her soft denim M6696 into a stand-out dress, with an embroidered collar and waistband, Sylvie is timelessly elegant in her royal blue version of Simplicity 1459, in a tone-on-tone print cotton sateen, CFA13 makes the ideal summer dress, in blue linen with variegated cream buttons.
Caroline reminds us that corduroy can be elegant, in a burgundy M6696, with pops of polka dot contrast fabric, Marianne's beautiful black brocade shirtdress is perfect for a night on the town and sipping festive drinks, and Tanya is all summer elegance in her classic blue shirtdress, with white buttons and top-stitiching. 

Holy smokes, ladies! I'm blown away by these dresses. Thanks so much for joining me in this sewing challenge and braving all those buttonholes. Your dresses are, to a one, beautifully made and absolutely lovely. I know I'll be perusing that Flickr group for more inspiration, in the future! Thank you, again, for sharing your creative talents with me and the other participants.

Now, onto the last question of The Autumn of 1000 Shirtdresses.
Who won the prize package? Well, I assigned numbers chronologically, plugged them into a random number generator and...


Our winner is also our very first entrant, Marije of  Make Think Go! Congratulations, Marije! Send me an e-mail with your mailing address to anidlefancy (at) gmail.com and I'll send out your goodies! 

Miss Mavis Goes to the Opera: Vintage Simplicity 5238

$
0
0

Good evening, friends! Tonight, we're going to talk about three things: vintage patterns, sewing with velveteen, and loving the monsters. Let's deal with the monsters first, shall we? You know the ones I'm talking about--those flawed garments that we love anyway. The dresses with wonky darts or holes from seam ripper "incidents" that see heavy rotation in our closet, nonetheless 

This dress is one such monster, I'm afraid. I love it, but it's definitely not perfect. You've been warned.


It all started with a pattern. I'm not one for New Year's resolutions, but I would like to use more vintage patterns this year. I've collected them for eons, but was excessively lazy about sewing them up, during grad school. Tracing, grading, and making multiple muslins wasn't my idea of blissful sewing. Imagine that! Now that I have more free time, however, the prospect of a long process isn't nearly so grim. 

First out of my stash: Simplicity 5238. This cocktail dress from 1963, a favorite of Erin's, seemed like a painless way to reenter the world of vintage. It's a one dart bodice, with a box-pleated skirt and two sleeve options, long or short kimono sleeves. Even better, my copy was a size 40, which aligned pretty well with my high bust (40 inches) and waist (35 inches). One FBA and I should've been good to go!

So, I was. Three bodice muslins later. Oh, vintage ladies, your undergarments provided such amusingly improbable dart locations! During the course of my alterations, I:
  • Added a side bust dart, through a two-inch full bust adjustment (Muslin 1)
  • Moved the front waist dart one inch toward the center seam, lowered the side dart (Muslin 2)
  • Curved both darts, to make up for some underbust pooling (Muslin 3)
  • Adjusted for a sway back (Muslin 3)
  • Changed the shoulder slope angle (Muslin 3)
I also decided to eliminate the skirt's center seam, since it's just a pleated dirndl. With this particular dress, I actually changed the pleat orientation entirely, to better preserve the fabric's pattern. 


Then, we come to the velveteen. That's right, the velveteen. Heaven forbid a fabric this pretty be reserved for rabbits contaminated with scarlet fever. When I saw this black cotton velveteen, with its swirling copper floral pattern, I snatched it up for a Mood Sewing Network project. It was originally going to be a blazer, then a Kim dress, then a coat. When I looked at the suggested fabrics for Simplicity 5238, however, velveteen was first on the list. Sartorial kismet!

Of course, this pattern does have a center front bodice seam and a bias-cut back bodice. I cut the pattern out in one layer, to match those seams in an appropriate manner. Unfortunately, the skirt pieces were really wide, when compared with the 46'' fabric, so I had to center the skirt on a different line of the floral. It doesn't bother my eyes, looking instead as if the pattern builds, as we go toward the hem. That's pure, dumb luck, y'all. 

Center front pattern matching, like a boss!
Center back seam!
The back bodice matching isn't quite as on point, because trying to find a visually
agreeable bias origin point is a pain in the ass. 

When it comes to construction, velveteen is finicky. Pressing it incorrectly can cause the pile to crush and seams can't be unpicked, then altered, because sewing will make permanent lines on the fabric. To make everything easier, I used a towel draped across my ironing board, to prevent a crushed pile. Similarly, I used a very light hand with the iron itself, paired with heavy steam. (More tips on sewing velvet and velveteen can be found in Elisalex's recent blog post.) 

My other major velveteen tip? Don't wear nice things, while sewing it up. Velveteen frays like the devil, while you're sewing, and the pile turns into fluffy balls of doom. Fluff gets on everything. I serged those seams, as soon as they were sewn, and faced the hem, sleeves, and neckline with silk organza, to combat it. I was still covered in the stuff. 

Silk organza not only lends more structure to those areas, but prevents fabric deterioration. Woohoo! I sewed the velvet and organza right sides together, flipped the facings to the inside, then catch-stitched them down. Similarly, the zipper is a traditional zip, hand-picked in place. This particular piece involved quite a few hours of watching Phryne Fisher solve murders, while hand stitching all those bits in place.


Silk organza hem facing! I like visible catch-stitching, instead of blind stitches. Don't tell my grandmother.

Everything seems alright up to now, doesn't it? I didn't crush the pile or accidentally misalign my center seams. How does this dress deserve monster status? Well, check that bodice fit, kittens. The weight of the velvet, paired with a little bit of stretch, means that my perfectly fitted muslin didn't translate over. The whole thing is a touch big and those darts refuse to lie flat. With any other fabric, I could probably steam them into submission, but that's not an option here. There is some bubbling on the front, which definitely wasn't there in my final muslin. Alas, I've discovered the problem with sewing a velvet garment toile out of easy-to-please cotton...

Here's the thing, though. I really love this dress.

Rationally, I know that the bodice is imperfect and that the whole thing looks like an ill-fated attempt to upholster a blonde, but whatever. It's soft and warm and the fabric is gorgeous. There's something so delicious about wearing yards of lush, dramatically printed velveteen. My judgment may be twisted from reading about that rabbit as a child, but I adore this fabric and this dress. Perhaps I'm not completely batty, however, because Sam agrees with me. He's plotting to buy tickets to some fancy theater event soon, so that he "can dress up in a three-piece suit and take me out to show off that dress." You've got to love a man who loves your monsters, don't you?


Note: Fabric for this dress was provided by Mood Fabrics, as part of my participation in the Mood Sewing Network.
Viewing all 143 articles
Browse latest View live